12 Hidden Mac Features You Must Try [Tips & Tricks]
Before we dive in
Before we dive in, let's make sure you stay safe online. We created SpyHunter because your security matters to us.
Protect your computer today — download SpyHunter right here! Check out our top tips below to keep your computer safe and secure.
Are you getting the most out of your Mac? Many users barely scratch the surface of what their devices can offer.
From customizing your menu bar to using your iPhone as a webcam, uncovering these secret Mac features can significantly upgrade your productivity and workflow.
In this article, we’ll explore a variety of tricks that go beyond the basics—streamlining how you interact with your Mac and making everyday tasks quicker and easier.
Why these hidden Mac features matter
Exploring hidden features in your Mac not only enhances your interaction with the device but also significantly boosts your productivity.
These features are designed to simplify your workflow, allowing you to perform tasks faster and more efficiently.
Understanding and utilizing these lesser-known tools means you’re leveraging the full capability of macOS to fit your personal or professional workflow, thereby saving time and increasing output.
12 top hidden features of your Mac to boost your productivity
Many Mac users only scratch the surface of what their device can do. Beyond the basic features, macOS offers a plethora of hidden and underutilized tools that can significantly enhance your productivity and user experience.
From automating mundane tasks to quickly managing your active applications, learning to utilize these features can transform your interactions with your Mac.
Let’s delve into some of these functionalities to help you unleash the full potential of your Mac.
1. Customize your menu bar
The ability to customize the toolbar on a Mac is a significant productivity booster.
By tailoring the menu bar, you position the most used settings and features right at the top of your screen, accessible with just a click.
For example, having easy access to Wi-Fi, Bluetooth, or screen mirroring settings can streamline your interaction with different devices and displays during your workday. This customization eliminates the need to dig through multiple menus to find the settings you need, thus speeding up your tasks.
The steps for adding items to the toolbar are simple:
- Open
System SettingsorSystem Preferenceson older versions of macOS. - Navigate to the
Control Center. - Select or deselect features to keep them permanently visible or only when they are active.

2. Make use of hot corners
Hot corners are a stellar feature for anyone looking to streamline their workflow and reduce repetitive manual tasks.
By simply moving your mouse to any of the four corners of the Mac screen, you can trigger specific actions like locking your screen, opening the notification center, or accessing a quick note.
This is especially beneficial for users who work with multiple apps and need to switch quickly.
To set up hot corners:
- Go to
System Settings. - Select
Desktop & Dock. - Click on
Mission Control. - Click
Hot Cornersat the bottom right. - Choose the desired action for each corner of your screen using the dropdown menus.

By reducing the need for keyboard shortcuts or navigation through menus, hot corners help you maintain your focus and transition smoothly between tasks, enhancing overall productivity and user experience.
3. Using your iPhone as a webcam for Mac
The increasing trend of remote work and online meetings has emphasized the need for reliable webcams. The ecosystem of Apple devices allows you to use your iPhone for this as well.
If you find yourself in need of a better quality webcam, your iPhone can easily be set up to serve this purpose for your Mac.
You can either use your iPhone wirelessly as a Continuity Camera or connect it to your mac via USB cable.
To use the Continuity Camera feature, navigate to Settings > General > AirPlay & Handoff and turn on Contunuity Camera.
Once you have done this or connected to your Mac via cable, simply use the settings window of the webcam-enabled application you are using and make sure you select your iPhone as the web camera in the app’s settings.
4. Emoji and special character shortcuts
Emojis and special characters can add an element of fun or precision to digital communication.
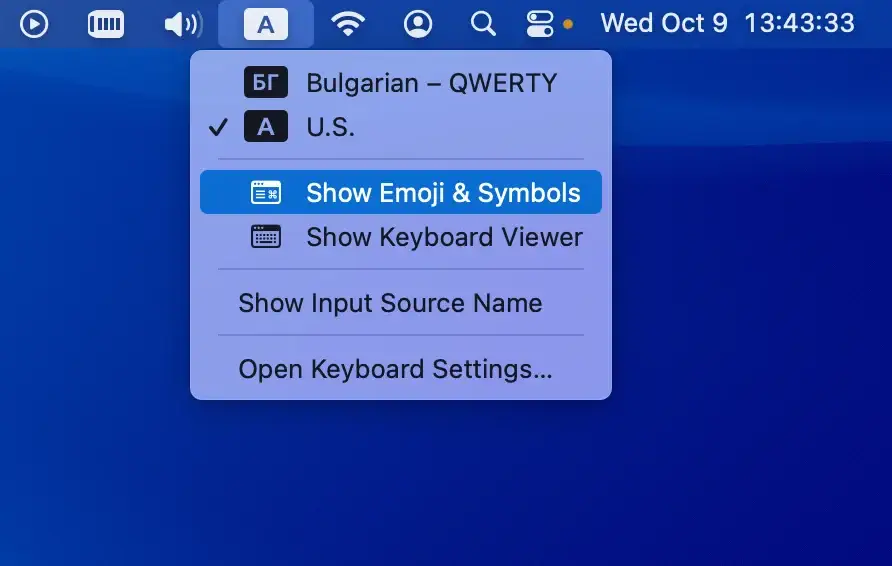
Accessing them swiftly on your Mac can be done using a simple keyboard shortcut that brings up the emoji picker interface or emoji keyboard.
While working on any text box or text field, press Control + Command + Space. This action will display the emoji picker, making it easy to find and select from various emojis and special symbols.
You can scroll through the available emojis or use the search bar to find a specific one quickly. This tool is especially useful when you want to express something visually without switching out of your workflow.
To make this feature permanently accessible, you can add the Emoji & Symbols viewer to your toolbar.
Navigate through System Settings > Keyboard, check the Show input menu in menu bar box in the Input Sources section.
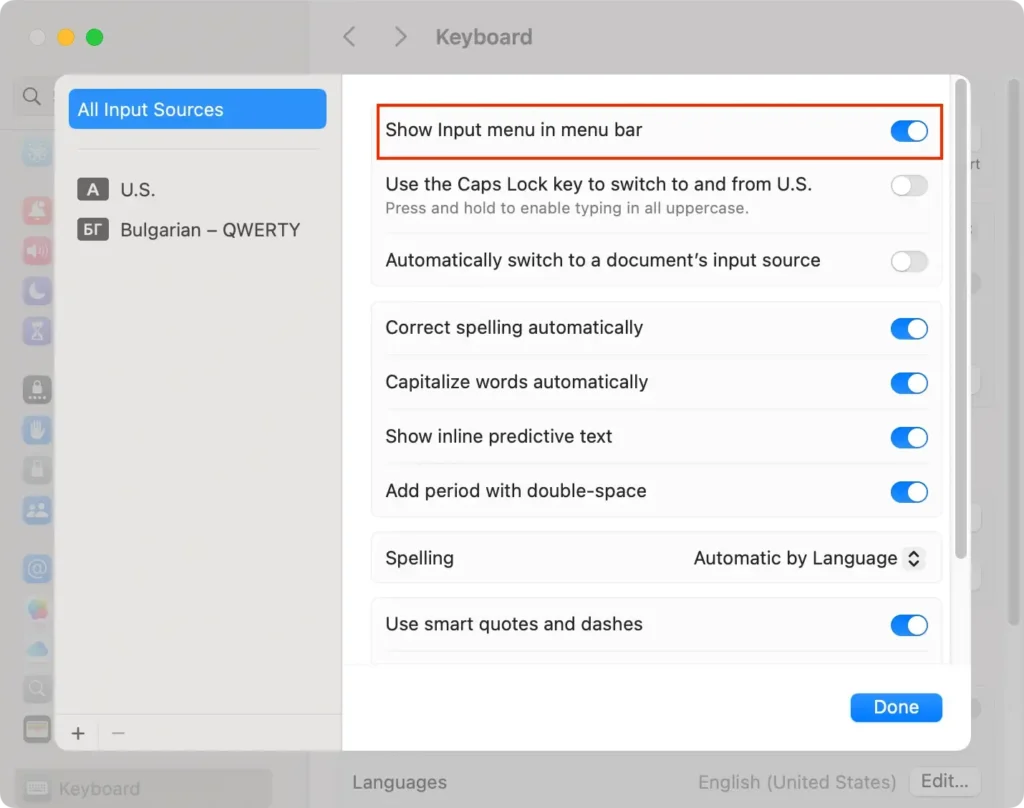
This allows for even quicker access to emojis whenever you need them.
5. Change your folder icons with ease
If you’re tired of the default blue folder icons on your Mac or want to have folders that are easily recognizable at a glance, you can personalize them with images that suit your needs.
Here’s a quick guide on how to change the icons of a directory:
- Find an image you want to use for your directory icon. This image can either be a .JPG or a .PNG file.
- Right-click (or control-click) on the image and select
Copy Image. - Next, select the directory whose alias you want to change, and click
File > Get Infoin the top menu bar. - In the upper left corner of the info window, you’ll see the current folder icon. Click on it to highlight it.
- Click
Editin the top menu, thenPasteyour copied image.
Your selected image will now replace the default icon, making your folders easier to recognize and adding a personal touch to your desktop.
If you want to revert to the default image, simply open the Get Info menu again and select Edit > Cut from the top menu.
6. Master the art of quick file previews
Quick Look in macOS allows you to quickly preview files without opening them fully, which is perfect when you need to browse through multiple files quickly.
Here’s how to use Quick Look:
- Select a file in
Finderthat you want to preview. - Press the
Space bar. A preview window will open, showing you the contents of the file. - If you want to interact with the file, such as zooming in on an image or scrolling through a document, use the tools provided at the top of the Quick Look window.
- If you decide to open the file in its native application for more detailed work, simply click the
Open with [Application]button at the top right of the preview window.
This tool is especially useful for quickly glancing at images, PDFs, documents, and even video files without the need to launch different applications for each file type.
7. Automate tasks with custom text shortcuts
One often overlooked feature of macOS is the ability to create custom text shortcuts.
These can save you a lot of time, especially if you find yourself repeatedly typing the same phrases or addresses. By setting up these shortcuts, a few simple keystrokes can expand into full sentences or links.
To set up custom text shortcuts on your Mac, navigate to System Settings > Keyboard > Text Replacements.
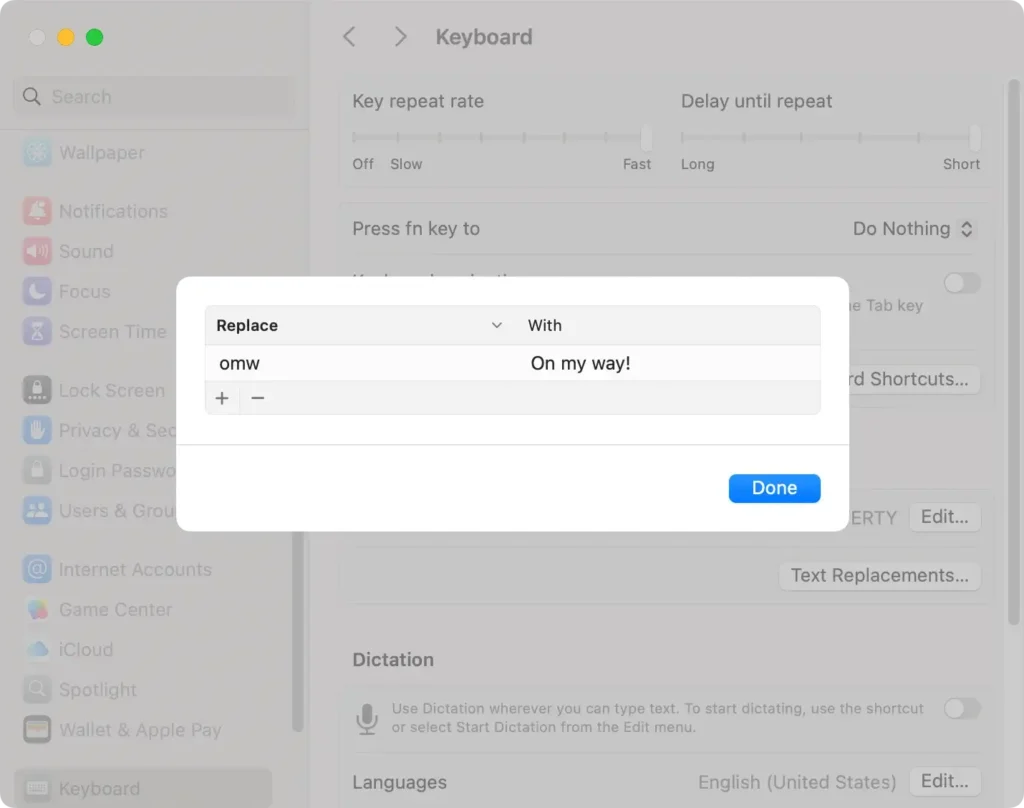
Here, you can add your shortcuts by clicking the (+) button, entering a phrase, and assigning it a shortcut. For instance, typing 'addr' could automatically expand to your complete address.
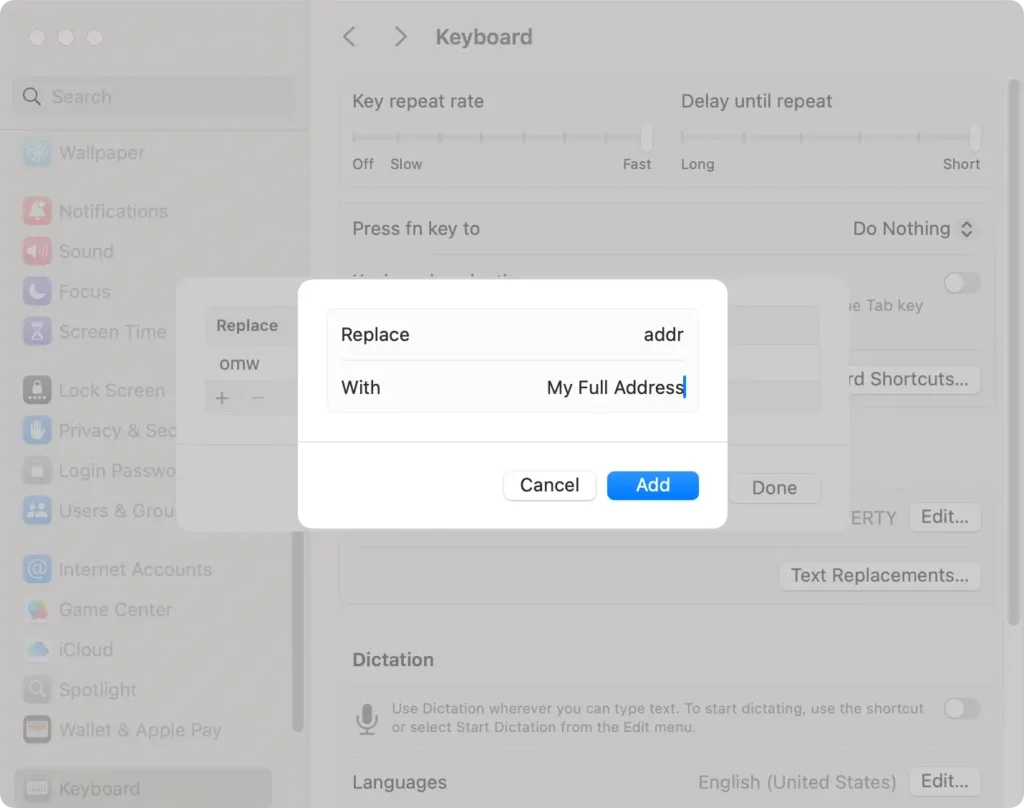
It’s a simple setup that can streamline your work or personal communication.
8. How to quickly hide current active apps
Managing screen space and maintaining focus can be tricky with multiple apps open.
Thankfully, the operating system allows you to quickly hide your currently active app without closing it, helping you maintain a clean workspace.
The keyboard shortcut for hiding the active application is Command + H. When you press these keys, the active app will disappear from view, leaving your screen clutter-free.
To restore the app, just click on its icon in the Dock, or use Command + Tab to switch back to it. This quick-action shortcut can significantly enhance your workflow by reducing distractions and maximizing productivity.
9. Drag and drop files into Finder favorites
One practical way to organize important documents and folders on a Mac is by using Finder’s favorites feature.
This allows you to keep essential files at your fingertips, making them readily accessible without the need to dig through numerous directories.
To add a directory to Finder favorites, simply:
- Open
Finderand navigate to the folder you wish to favorite. - Simply drag the directory into the
Favoritessection on the sidebar.
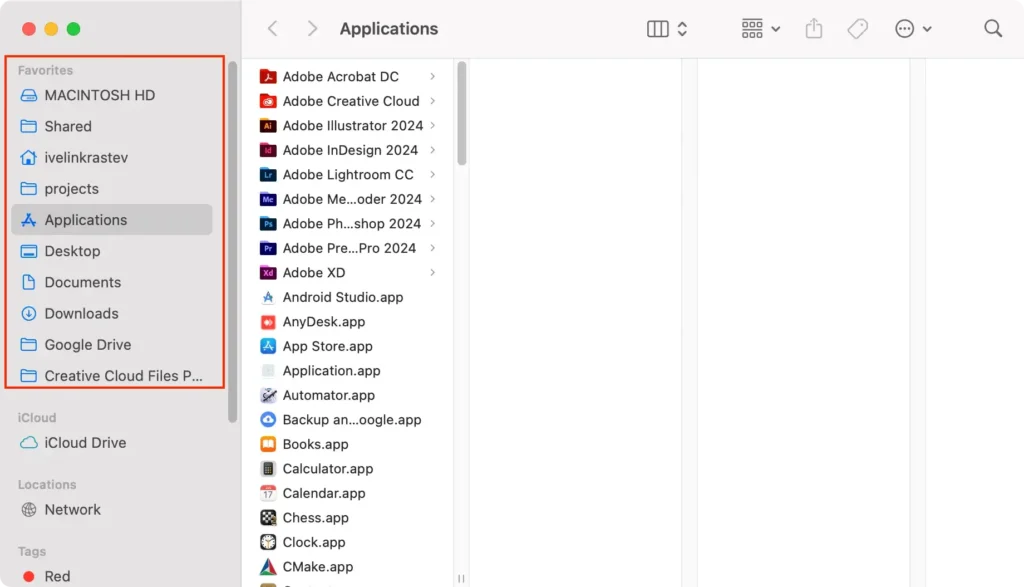
This simple action can save you time and enhance your workflow by placing your most used folders in an easily accessible area.
10. Protect your eyes with Night Shift
Long hours in front of your Mac can strain your eyes, particularly under less-than-ideal lighting conditions.
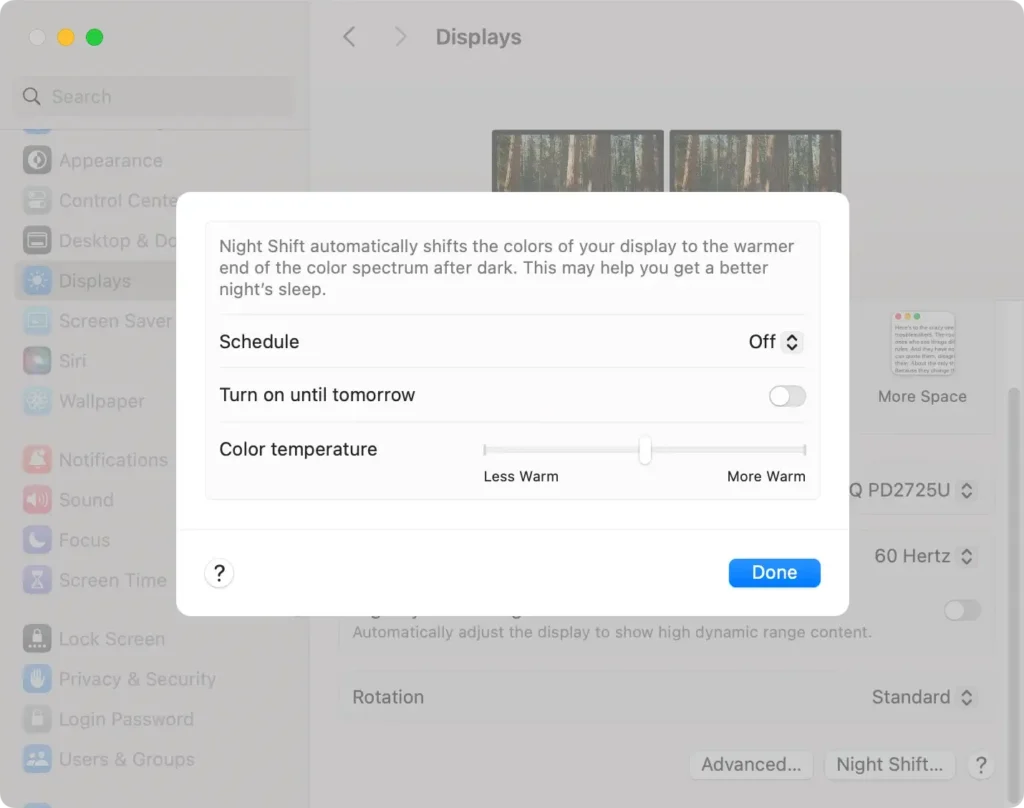
Night Shift is a beneficial feature designed to reduce blue light exposure as the day progresses. By adjusting the display’s colors to warmer tones, Night Shift helps minimize eye strain and improve sleep patterns if you need to work late.
Activating Night Shift is simple:
- Go to
System Settingson your Mac. - Select
Displays. - Click on the
Night Shifttab. - Configure your settings according to your preferences, setting a schedule or enabling it until the next day.
This small adjustment can make a significant difference in protecting your eyes and ensuring the comfortable use of your Mac during evening hours.
11. Use Spotlight to search just about anything
The Mac Spotlight search, accessible through clicking the magnifying glass icon in the toolbar in the upper right corner of your screen, is a very versatile tool.
You can use it to search not only for files and folders on your system, but also for pretty much anything you want. If you type any question in the Spotlight search box, it will usually bring a brief answer and offer automatic Internet searches for the same query.
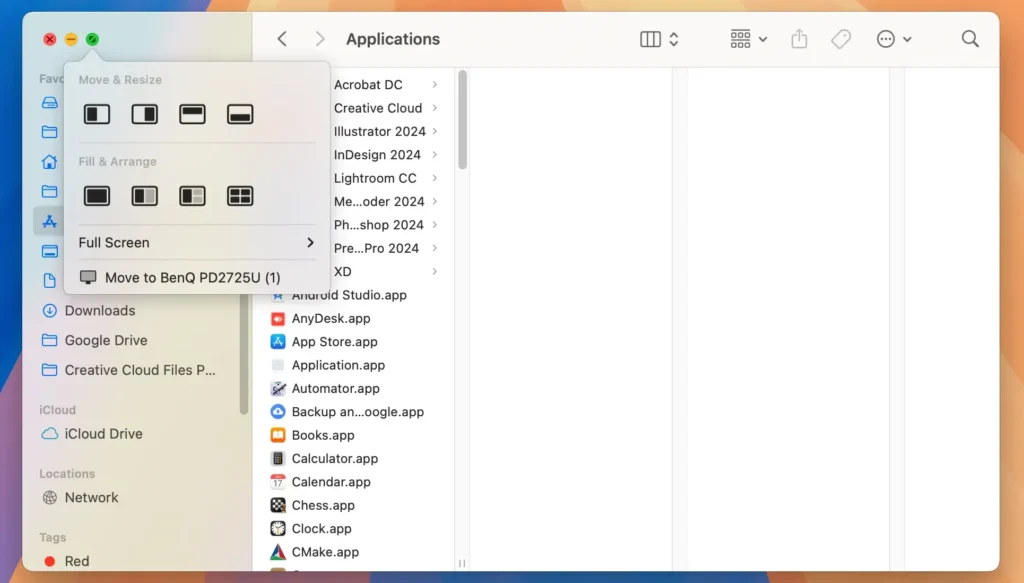
12. Hidden features of the full-screen green button
If you hover your mouse cursor over the green button that expands the current window to a full-screen view, you will access another somewhat hidden feature.
Hovering over the green button offers multiple options for automatically arranging the currently open windows. This allows for very quick and efficient workspace management and is a great productivity booster.