How To Delete Files On Mac (Every Method Explained)
Before we dive in
Before we dive in, let's make sure you stay safe online. We created SpyHunter because your security matters to us.
Protect your computer today — download SpyHunter right here! Check out our top tips below to keep your computer safe and secure.
Managing and removing files on a Mac can sometimes be a challenge, but it doesn’t have to be.
Imagine freeing up gigabytes of space by removing large files you no longer need or swiftly deleting multiple files at once with simple keyboard shortcuts.
Whether you’re a Mac veteran or new to the Apple world, knowing how to delete files will save you time and keep your Mac happy.
Here, we’ll cover all the ways to delete files on a Mac, from old-school drag-and-drop to the Trash to using Terminal commands for stubborn files that just won’t budge.
Get ready to declutter your Mac!
Delete a file on Mac using keyboard shortcuts
This is the easiest method to delete a file from your Mac. Mac OS offers two quick key combinations to delete files:
- Press
Command + Deleteto send the selected file to the Trash. - Press
Option + Command + Deleteto delete the selected file permanently. Use this combination when you want to immediately delete a file without sending it to the Trash. Be cautious, as this action cannot be undone.
Delete files on Mac using the Trash Bin
One of the most common and straightforward methods for deleting files on a Mac is by using Trash.
This method is familiar to most Mac users and serves as a safety net by allowing you to recover files if needed before they are permanently deleted.
To delete a file using the Trash, you can:
- Click and drag the file/folder you want to delete to the Trash icon located in the Dock.
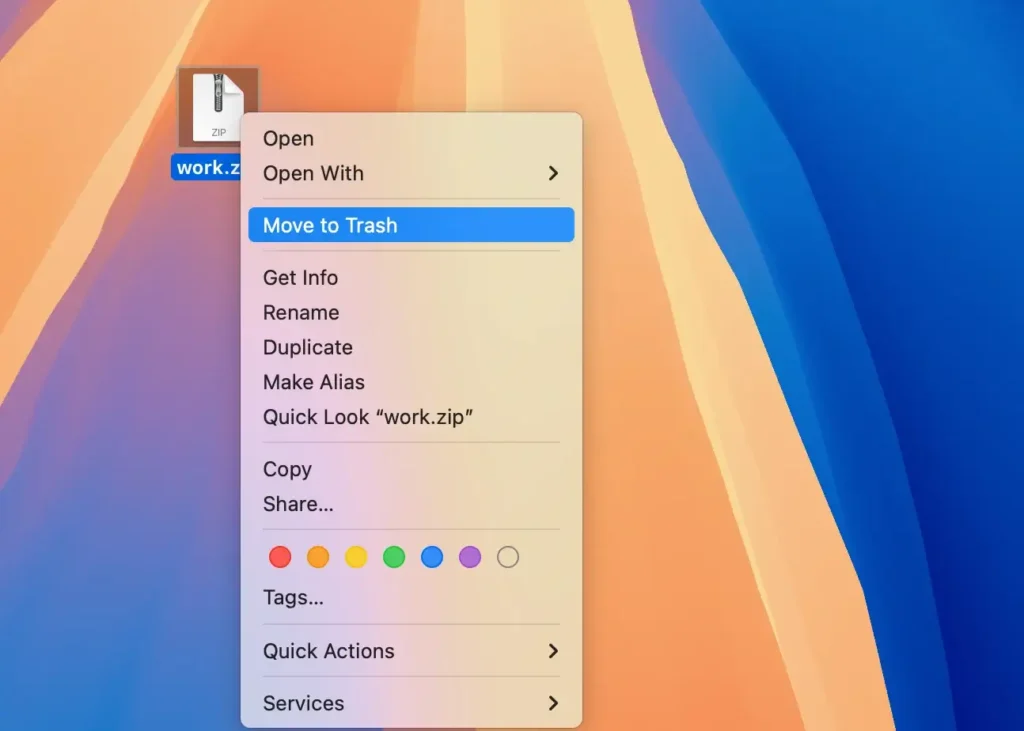
- Right-click (or Control-click) on the file and select
Move to Trashfrom the context menu.
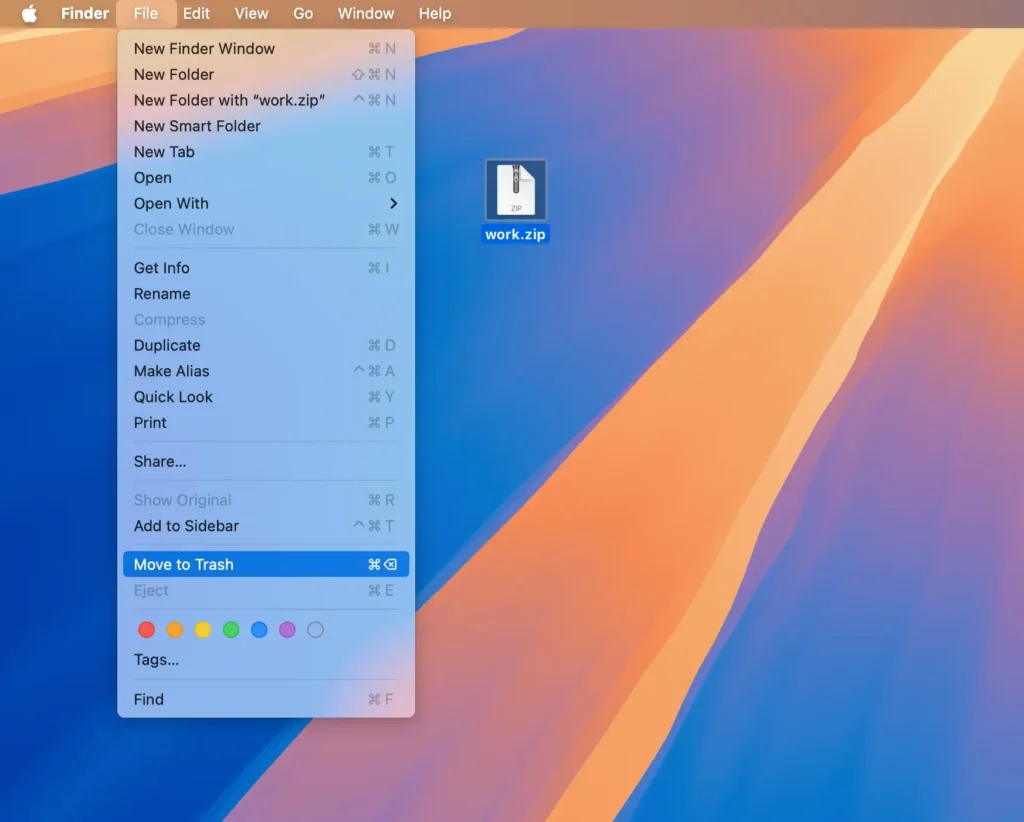
- Select a file, click on the
Filemenu in the menu bar, and clickMove to Trash.
Moving files to the Trash doesn’t permanently delete them from your Mac; they still occupy disk space until the Trash is emptied.
To free up space and delete these files permanently, you need to empty the Trash:
- Right-click on the Trash icon and select
Empty Trash.
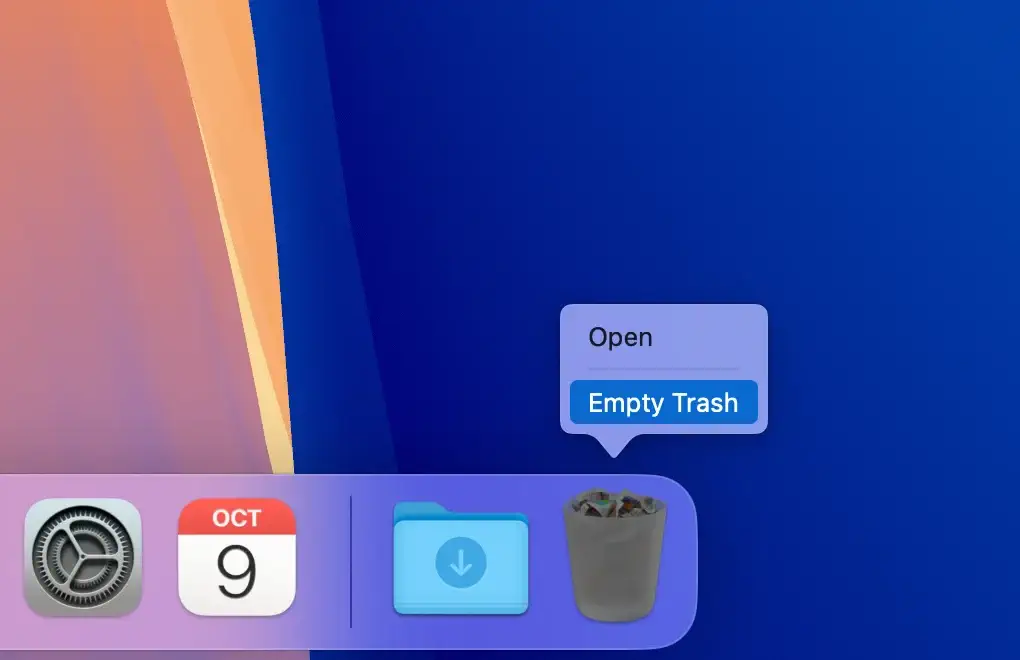
- A prompt will appear asking if really want to permanently delete the items. Click
Empty Trashto confirm.

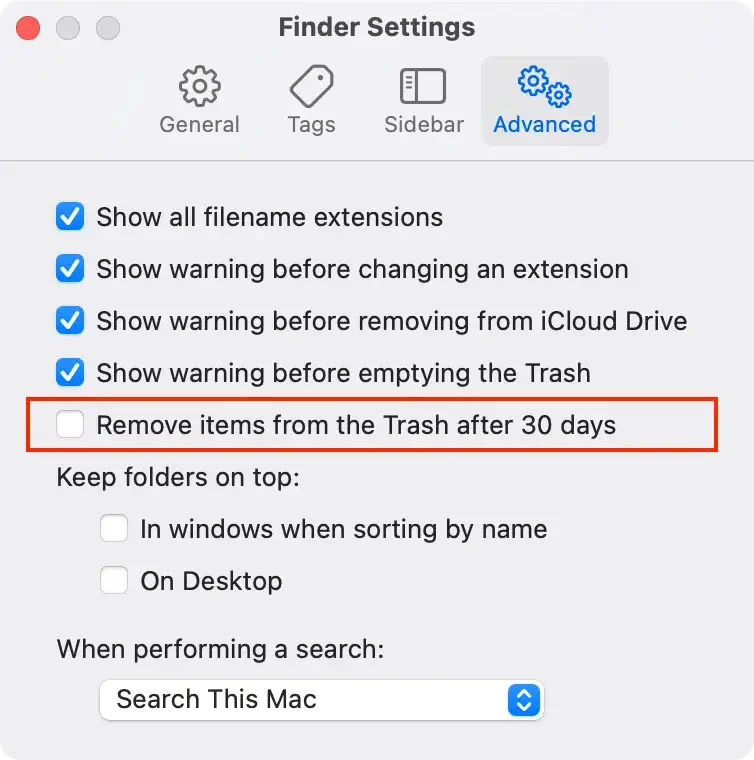
Note: If you want your Mac to empty the Trash automatically, you can enable this feature. Go to Finder > Settings and turn on the Remove items from the Trash after 30 days option. This will permanently delete files that have been in the Trash for more than 30 days.
Regularly emptying the Trash helps free up disk space and keeps your Mac running efficiently.
Use the Optimize Storage tool to delete Mac files
Managing your Mac’s storage space can be effortless with the built-in Optimize Storage tool.
Many Mac users overlook this handy feature, but it’s a powerful way to identify and delete files, including large and unwanted files.
Here’s how to use the Optimize Storage tool to delete files on Mac:
- Navigate to
System Settings > General > Storage. - Under the
Recommendationssection, you’ll see suggestions for optimizing your storage. These recommendations help you quickly identify files that can be deleted or moved to iCloud.
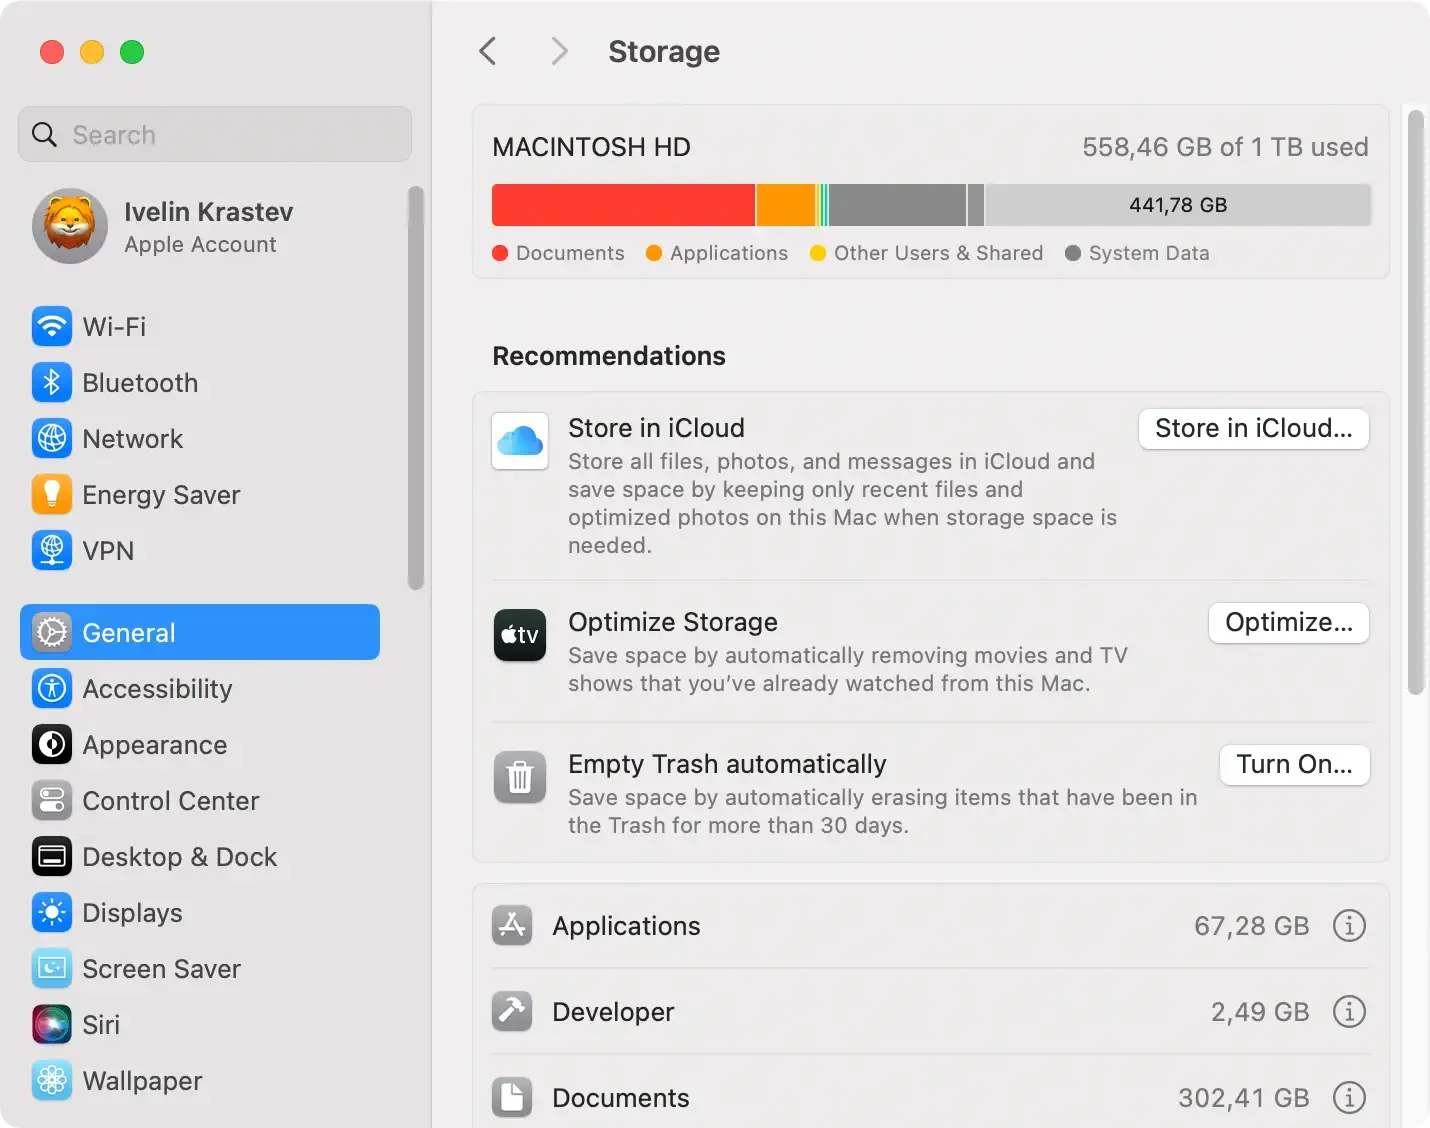
- Further down, you can view your files broken down into different categories. Select a category to see the files within it.
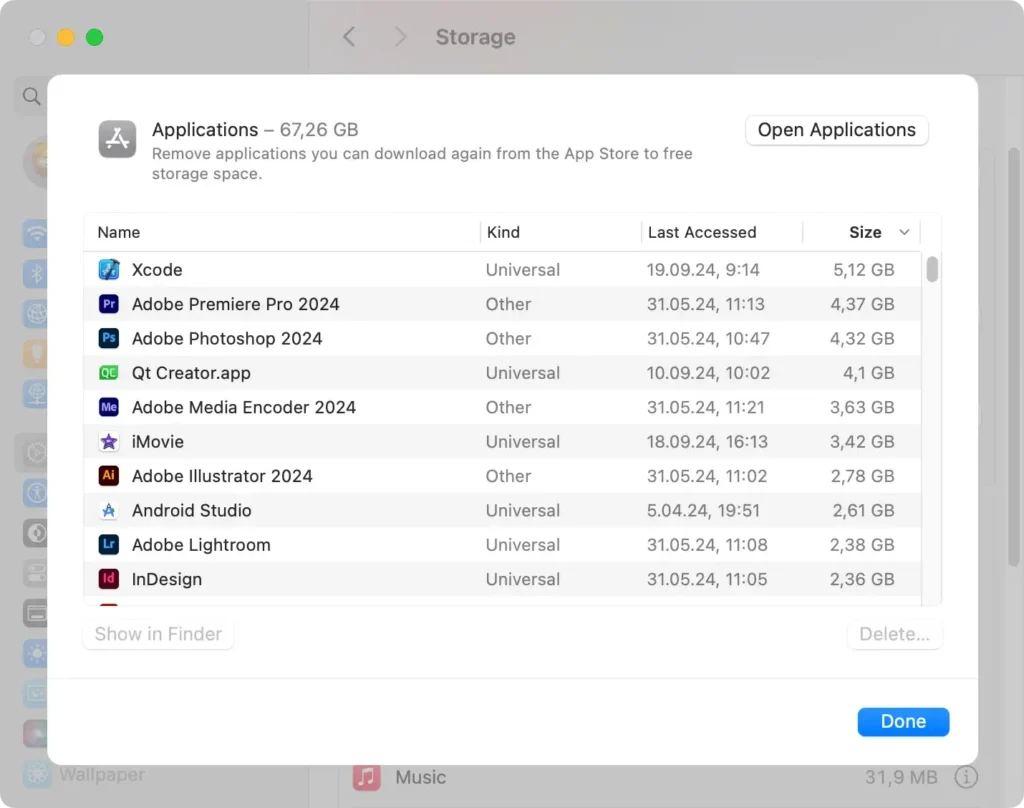
- Click on a file, then press the
Deletebutton to remove it. You can sort files by size, kind, or date to easily find large files or those you no longer need.
Tip: Focusing on large and old files that you no longer access regularly is an effective way to reclaim disk space. Consider archiving essential files to an external drive or cloud storage before deleting them from your Mac.
Remove even more files with SpyHunter for Mac
While the Optimize Storage tool is helpful, it might not catch every file that’s clogging up your system.
SpyHunter for Mac offers a faster and more comprehensive solution to clean up your Mac by targeting system junk, duplicate files, and other unnecessary data that consume your storage.
SpyHunter can solve a lot of Mac issues for you:
- Junk Scanning: SpyHunter thoroughly scans your Mac to identify hidden junk files, caches, and logs that the standard tools might miss.
- Duplicate File Finder: SpyHunter locates duplicate files scattered across your system, allowing you to delete them and free up significant disk space.

To find and remove large, junk, or duplicate files with SpyHunter for Mac:
- Download SpyHunter for free here and install it.
- Open the application and initiate a system scan.
- Once the scan is complete, you’ll see a list of files that can be deleted.
- Choose the files you want to delete. You can select all or pick specific files based on your needs.
- Follow the prompts to delete the selected files.
By using SpyHunter for Mac, you can effortlessly manage and delete files that are often overlooked, ensuring your Mac remains efficient and clutter-free.
How to delete multiple files at once
Deleting multiple files at once on your Mac can save a lot of time. Here’s how to select and delete multiple files simultaneously:
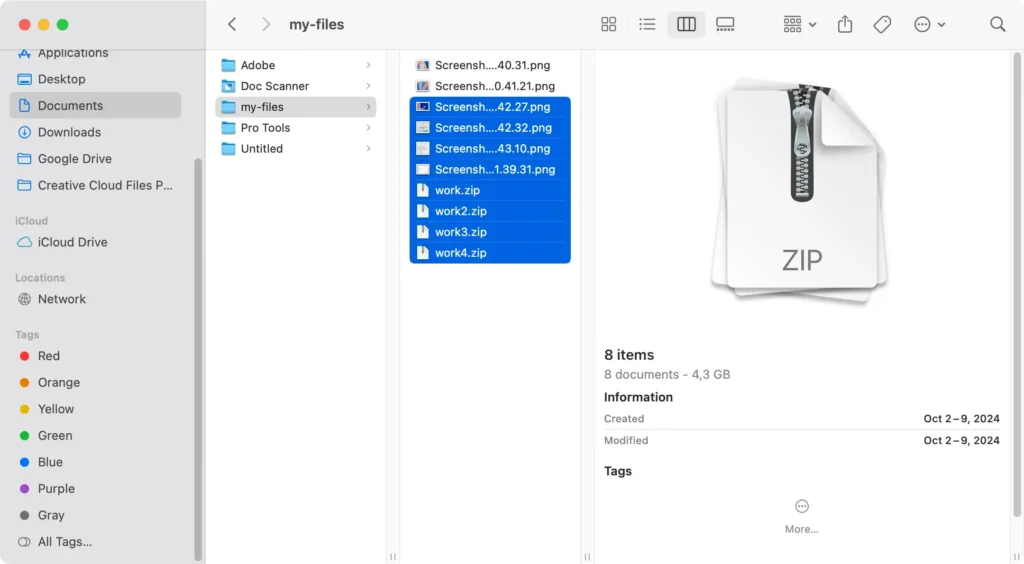
- For Adjacent Files: Click on the first file you want to delete. Hold down the
Shiftkey. Click on the last file in the range. This action will select all files between the first and last one clicked.
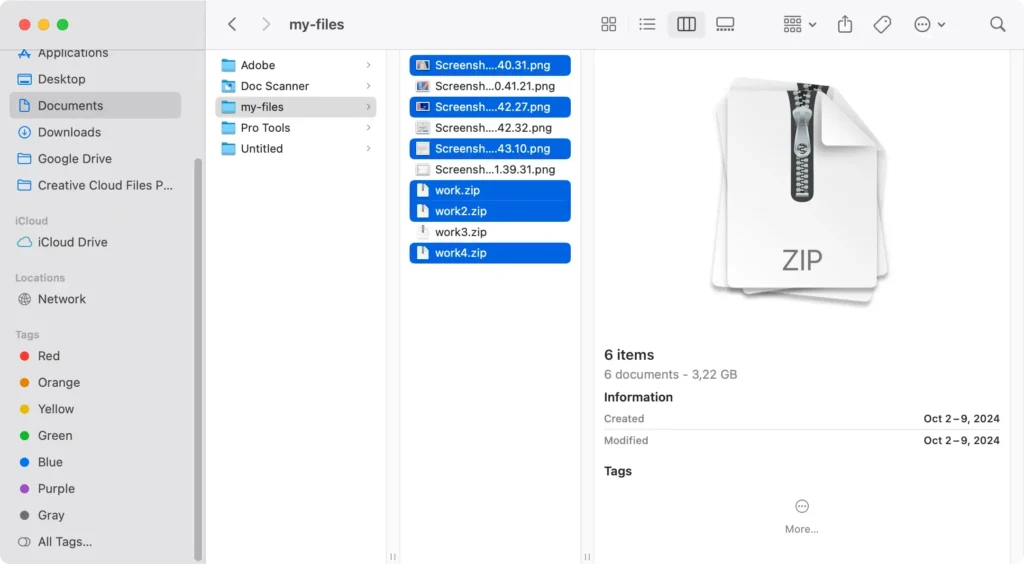
- For Non-Adjacent Files: Hold down the
Command (⌘)key. Click on each file you wish to delete. This allows you to select multiple files that are not next to each other.
Once the files are selected, delete them using your preferred method.
Deleting multiple files at once can significantly improve file management efficiency.
Delete files using Terminal commands
For advanced users, the Terminal provides a powerful way to delete files and folders directly using command-line instructions.
This method bypasses the Trash and deletes files immediately, so it’s important to be cautious to avoid accidentally deleting important data.
To delete files using the Terminal app:
- Open
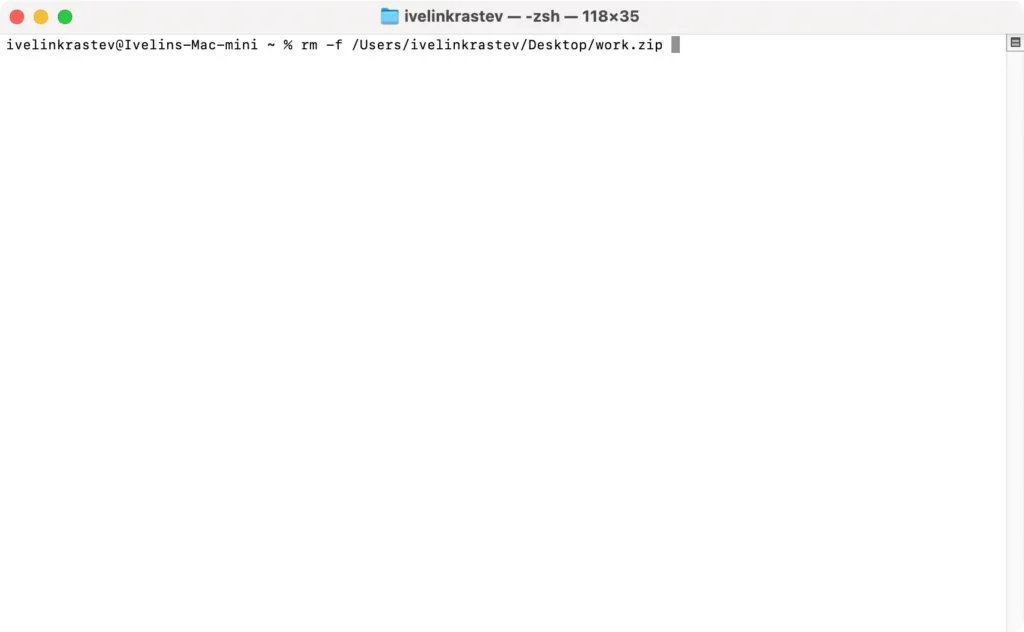
Terminallocated inApplications > Utilities. - In the
Terminalwindow, type in one of the following commands:rm -fwhen you want to force delete filesrm -rfwhen you want to force delete folders
- Press space and then drag and drop the file/folder you wish to delete.
- Press
Return. - In case the file is protected, use
sudo rm -fand enter your administrator password when prompted. This will force delete a file that is protected.
Be extremely careful when using the rm command, especially with the -f (force delete) and -r (recursive delete) options, as these actions lead to permanent deletion and cannot be undone.
Delete hidden files on Mac
Hidden files are often system files that are not visible by default to prevent accidental modification or deletion.
However, there may be times when you need to delete such files to free up space or remove unwanted files.
To reveal hidden files, open a Finder window, press Command (⌘) + Shift (⇧) + Period (.)

This keyboard shortcut toggles the visibility of these invisible files, making them appear as semi-transparent icons.
If you wanna learn all the ways to show hidden folders and files, check out our detailed guide on how to view hidden files on Mac.
Once these files are visible, you can select and delete them just like any other file.
How to delete locked files on Mac
Sometimes, when attempting to delete a specific file on your Mac, you may encounter an error message telling you that the file is locked or in use, preventing its deletion.
To remove a locked file, follow these steps:
- Find the locked file in
Finder. - Click on the file to select it, then press
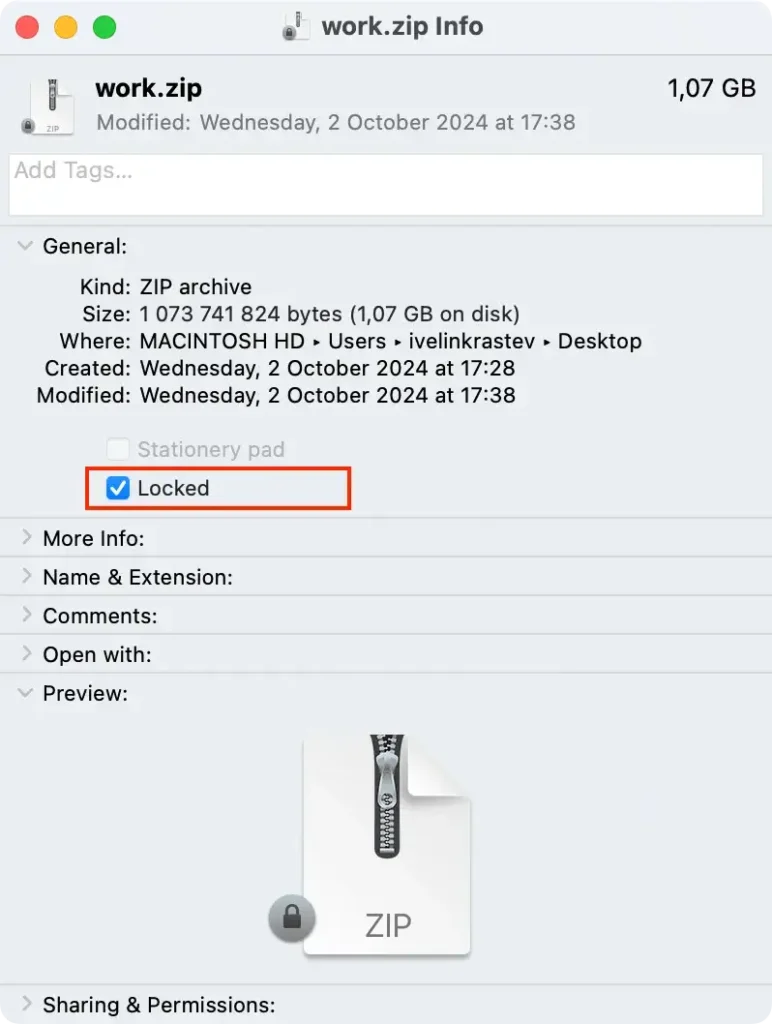
Command (⌘) + Ito open theGet Infowindow. - In the Info window, uncheck the
Lockedcheckbox to unlock the file.
You can now drag the file to the Trash. You can also hold down the Option key, click File in the menu bar and select Delete Immediately.

If you continue to face issues, restarting your Mac can help clear any temporary locks that applications might have on certain files.
How to recover deleted files on Mac
Removing important files accidentally can be stressful, but there are several ways to restore removed files on your Mac:
- If you haven’t emptied the Trash, you can quickly recover your files. Open the Trash, locate the deleted file, right-click it, and select
Put Backto restore it to its original location. - If you have Time Machine set up, you can restore files from a backup. Connect your Time Machine drive, go to the folder where the file was located, click the Time Machine icon, and select
Enter Time Machine. Find the file and clickRestore. - If the file isn’t in the Trash and you don’t have a backup, data recovery software can help. Install and run the software, select the drive to scan, and let the program search for deleted files.
- If you use cloud services like iCloud Drive, Dropbox, or Google Drive, your deleted files might be recoverable from there.
- If none of the above methods work, consider contacting a professional data recovery service. They have specialized tools for recovering lost data from your Mac’s hard drive.
Note: To increase the chances of successful data recovery, avoid creating new files or downloading data after you’ve deleted important files, as this can overwrite the deleted files making them unrecoverable.
Conclusion
Managing and deleting files on Mac effectively is essential for maintaining your computer’s health and ensuring you have sufficient storage space.
Whether you’re removing a single unwanted file or clearing out multiple files, various methods are available at your disposal.
By incorporating these methods into your routine, you can maintain optimal performance and keep your Mac files organized. Effective file management is crucial in maintaining your Mac’s performance.