How To Zoom In And Out On Mac (All The Ways Explained)
Before we dive in
Before we dive in, let's make sure you stay safe online. We created SpyHunter because your security matters to us.
Protect your computer today — download SpyHunter right here! Check out our top tips below to keep your computer safe and secure.
Have you ever had trouble seeing the fine print on your Mac screen or want to get a closer look at a digital design?
You’re not alone.
Mac’s zoom features are here to help you see better, so your screen time is more comfortable and productive.
Whether you have visual impairments or not, knowing how to zoom in and out on a Mac can change your user experience.
This guide will walk you through all the zoom options your Mac has, from keyboard shortcuts and trackpad gestures to Accessibility settings.
Get ready to master your Mac’s zoom capabilities, ensuring everything on your Mac screen is just the right size. But first:
What does zoom in and out mean?
On a Mac, zooming in and out means making things bigger or smaller on your screen. It’s great for readability, looking at details, or for those with visual impairments.
When you zoom in, text, icons, and images get bigger and easier to see. Zooming out gives you a broader view of the content, which is helpful for big documents or spreadsheets.
You can use this feature on your Mac for:
- Improving readability: Enlarge text and images to reduce eye strain.
- Detail work: Zoom in on intricate designs or photos for precision editing.
- Accessibility: Assist users with visual impairments by adjusting content size.
Your Mac offers multiple ways to adjust zoom levels, catering to different preferences and needs. By understanding these options, you’ll be able to fully customize your viewing experience.
How to zoom in and out on Mac
Zooming on a Mac is super flexible and has many built-in options. Below, we’ll go through each one step by step.
How to zoom in and out on Mac using keyboard shortcuts
Keyboard shortcuts are a quick way to zoom in and out on a Mac. It is ideal for users who prefer not to shift their hands from the keyboard.
To activate these shortcuts:
- Open
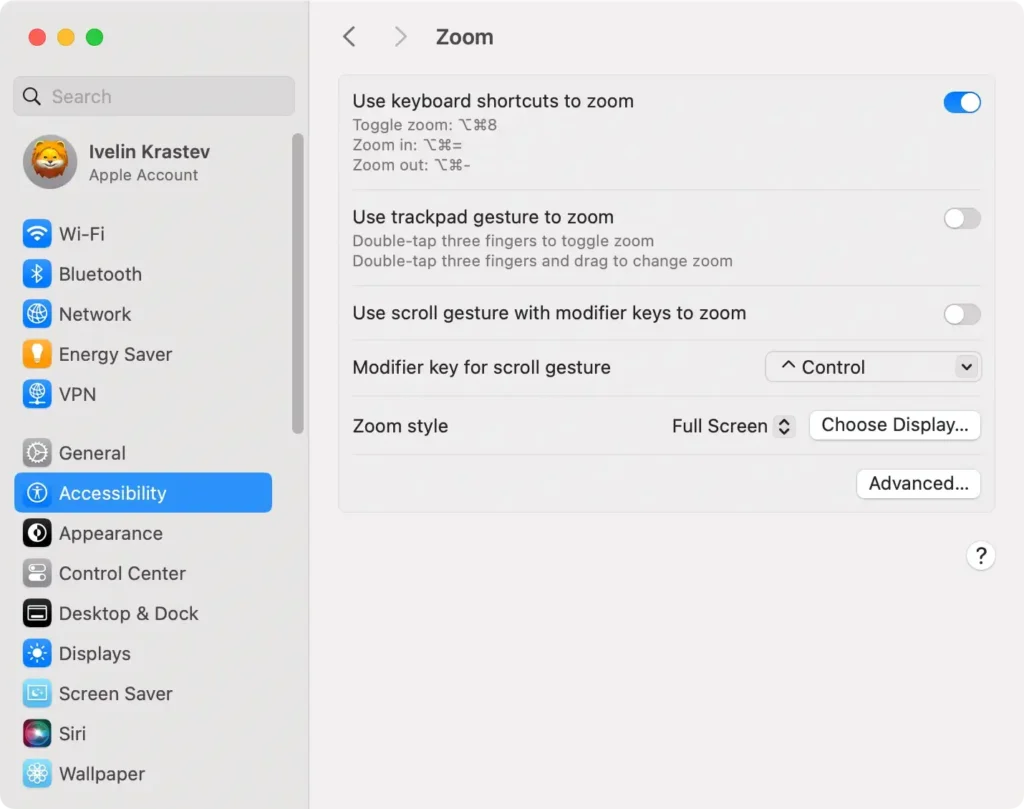
System Settingsfrom the Apple icon. - Go to the
Accessibilitysection, then click onZoomin the sidebar. - Enable the option labeled
Use keyboard shortcuts to zoom.
Once the keyboard shortcuts are enabled, you can:
- Press
Option (⌥) + Command (⌘) + Equals (=)on your keyboard to zoom in. - Press
Option (⌥) + Command (⌘) + Minus (-)on your keyboard to zoom out. - Press
Option (⌥) + Command (⌘) + 8to quickly toggle zoom.
Using keyboard shortcuts is handy for quickly adjusting zoom levels, especially during tasks that require frequent changes in magnification.
How to zoom in and out on Mac using trackpad
For those who navigate primarily through their trackpad, MacBooks offer a convenient gesture-based zooming feature:
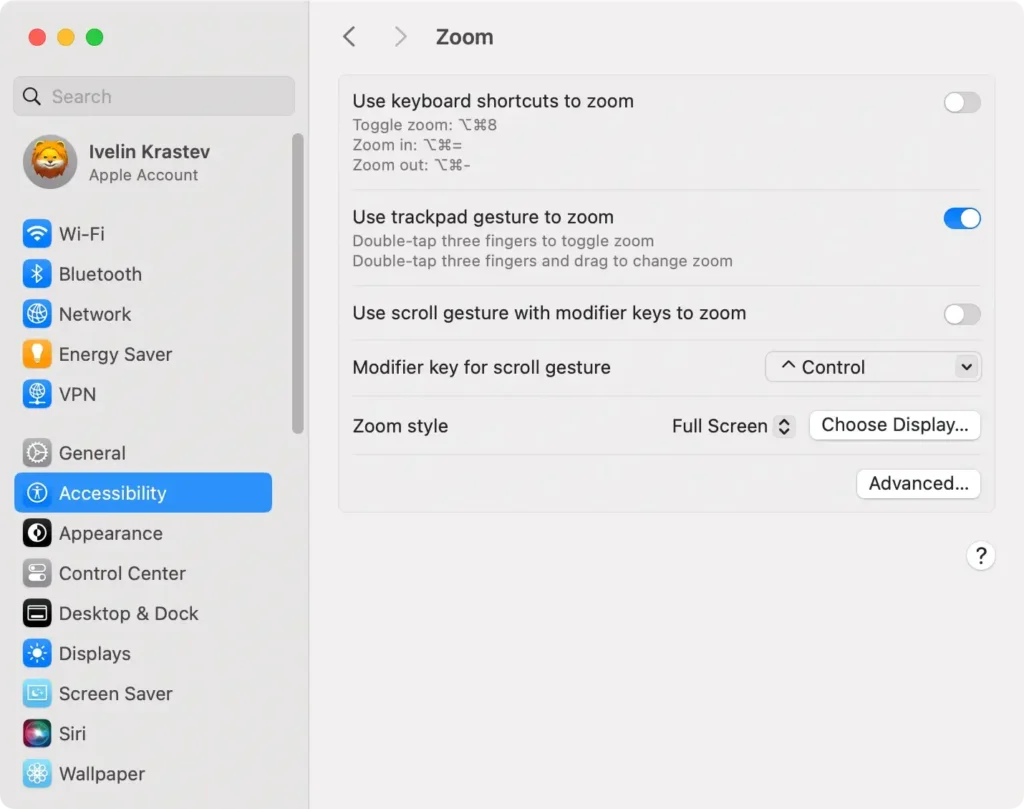
- Head to the
System Settingsvia the Apple menu. - Navigate to the
Accessibilitysection and clickZoom. - Check the option
Use trackpad gesture to zoom. - To zoom in or out, double-tap with three fingers and drag up or down accordingly.
Alternatively, you can enable the option to zoom while scrolling. To do that:
- Click on the Apple menu and select
System Settings. - Navigate to
Accessibility > Zoom. - Toggle the box for
Use scroll gesture with modifier keys to zoom.

- Choose a modifier key from the options (
Control,Option, orCommand).
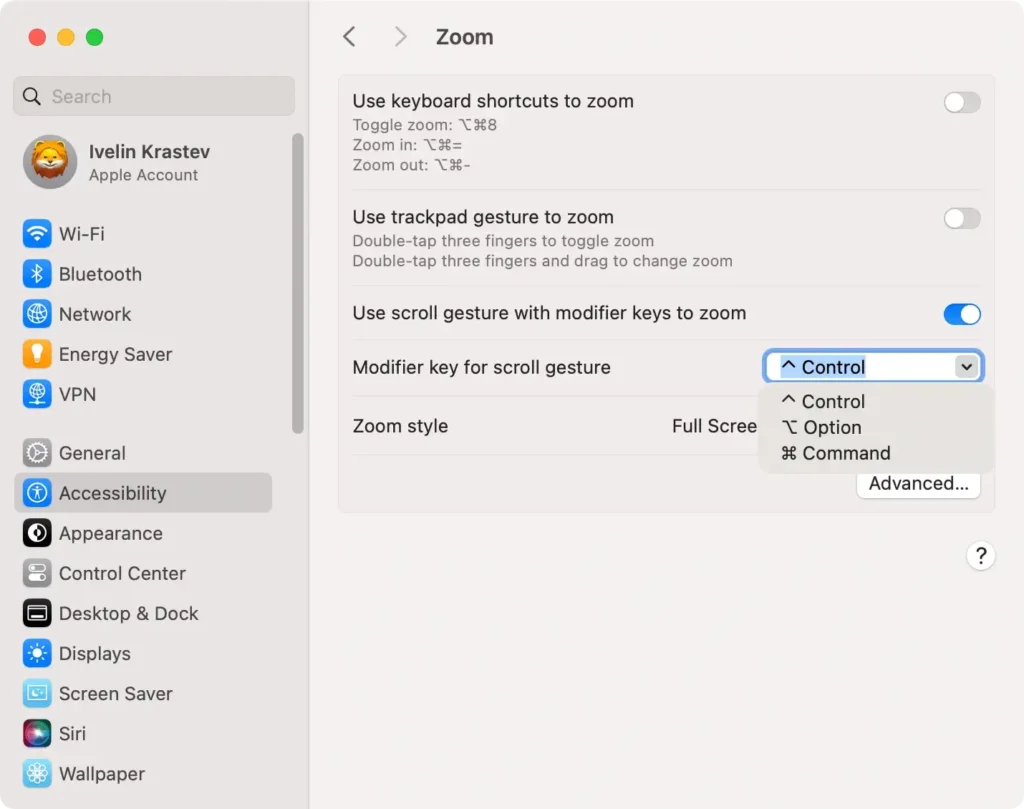
Now, simply scroll while holding the chosen modifier key in order to zoom in or out.
This method is perfect for users looking for a seamless and intuitive way to control zoom, leveraging the familiar gesture controls of the trackpad.
How to zoom in and out using Magic Mouse
The Apple Magic Mouse does not support the typical pinch-to-zoom gesture found on most trackpads. However, it does accommodate zooming differently.
You can double-tap with one finger on the mouse’s surface (known as the “smart zoom” feature), which is perfect for quickly zooming into text or images. Yet, this does not allow for incremental changes in zoom.
For complete control over the zoom level, you can combine the Apple Magic Mouse with the “scroll gesture with modifier keys” option described above.
How to zoom with Touch Bar
If your Mac comes equipped with a Touch Bar, you can use it to zoom in and out.
Even if your Mac doesn’t have a physical Touch Bar, you can enable a virtual version on your screen to use as a convenient zoom control.
Here’s how to zoom with Touch Bar:
- Open
System Settings(orSystem Preferences) from the menu bar. - Click
ZoomwithinAccessibility. - Toggle the box next to
Enable Touch Bar zoom.
Now, slide your finger across the Touch Bar to quickly zoom in and out on your Mac.
This technique provides a fast and intuitive way to adjust zoom levels.
How to set advanced zoom options using Accessibility features
For those who want to customize their zoom experience further, macOS has advanced options within the Accessibility settings.
These features allow you to fine-tune how zoom works on your Mac, enhancing readability and tailoring it to your specific needs.
- Click on the Apple menu located in the top-left corner of your screen.
- Select
System Settings(previouslySystem Preferences) from the dropdown menu. - Scroll down and open the
Accessibilitysection. - Click
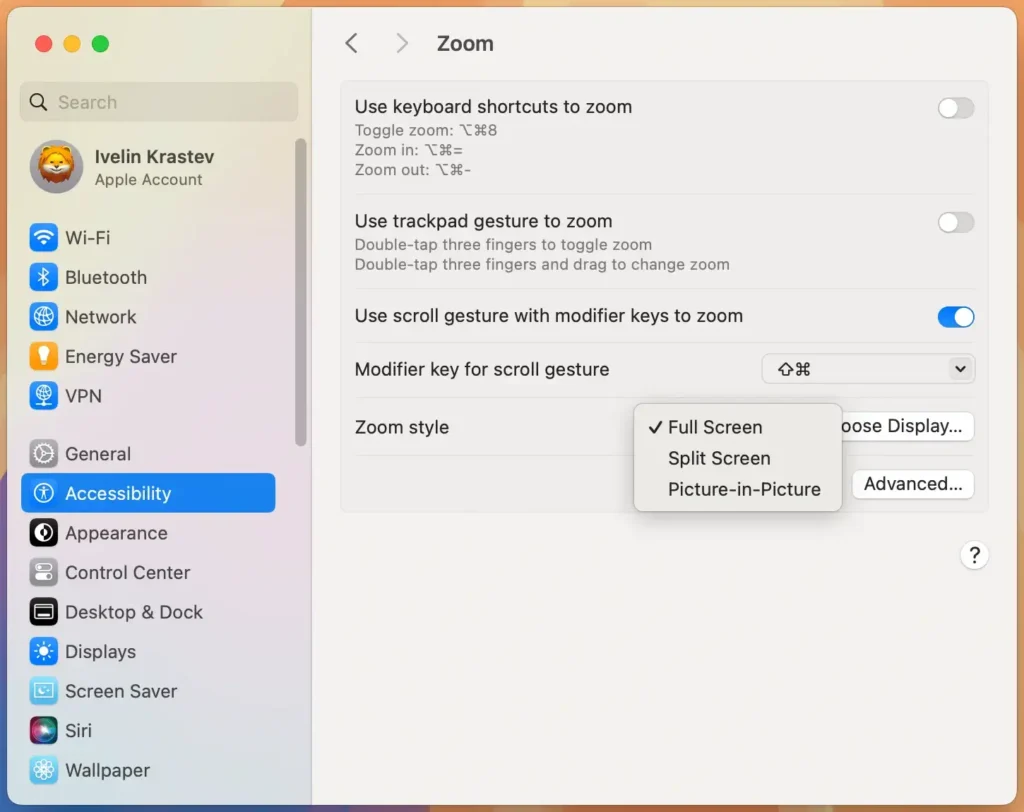
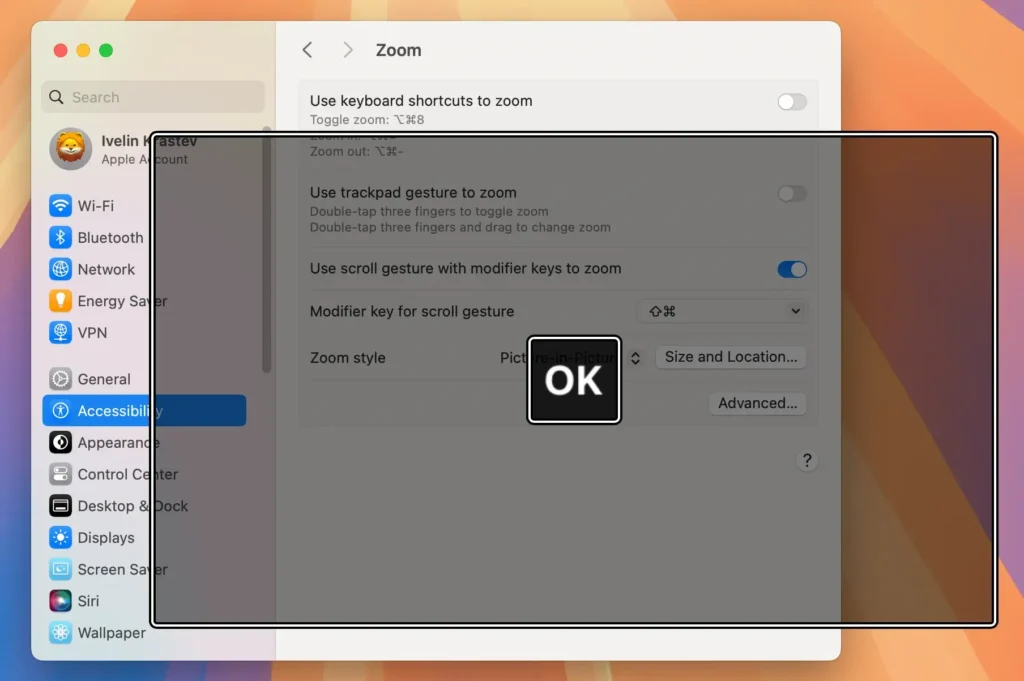
Zoomto view all zoom-related options. - Select your preferred zoom style from the
Zoom styleoptions:- Full-Screen Zoom: Magnifies the entire Mac screen rather than a single window.
- Split Screen Zoom: Displays the zoomed area alongside the normal view.
- Picture-in-Picture Zoom: Shows a resizable zoom window that follows your cursor.
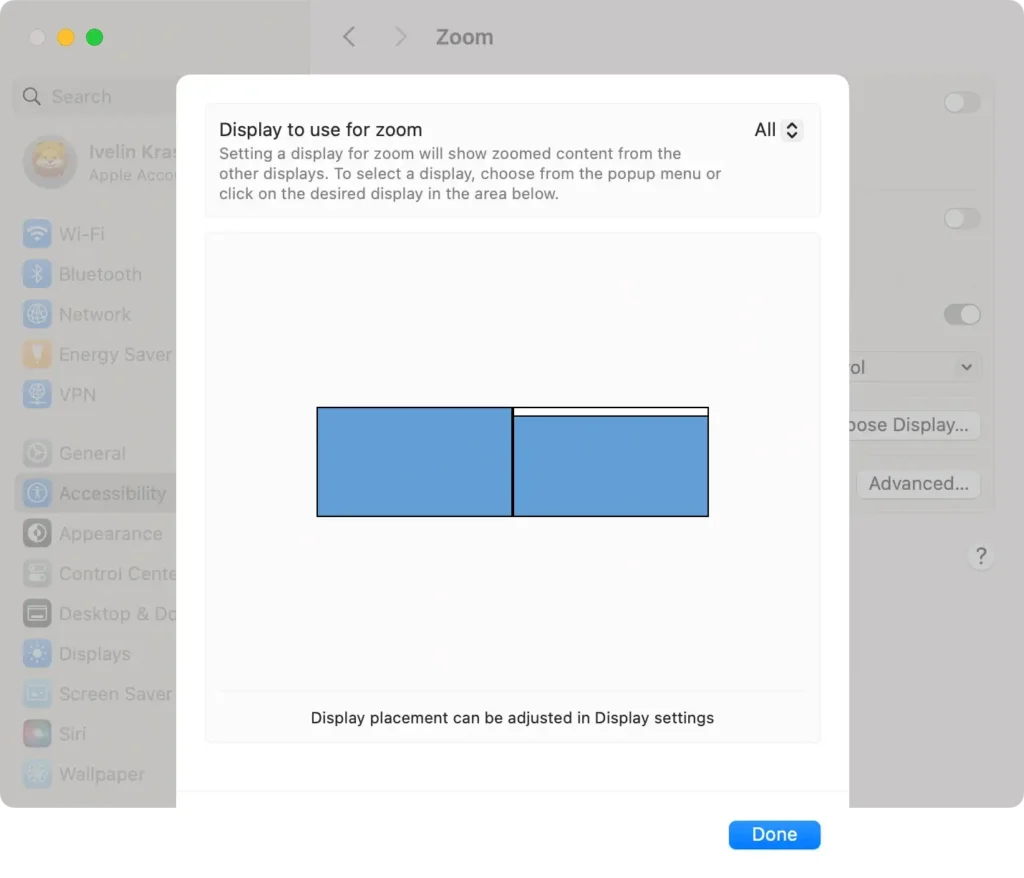
- If you have multiple displays, you can zoom each screen independently without affecting the zoom on the others. To show a zoomed version of the content from one display on another one, click
Choose Display, then select the second display.
- For
Split ScreenandPicture-in-Picturemodes, you can modify the size and position of the zoom window:- Click on
Size and Location. - Resize the zoom window and move it to your desired location on the screen.
- Click on
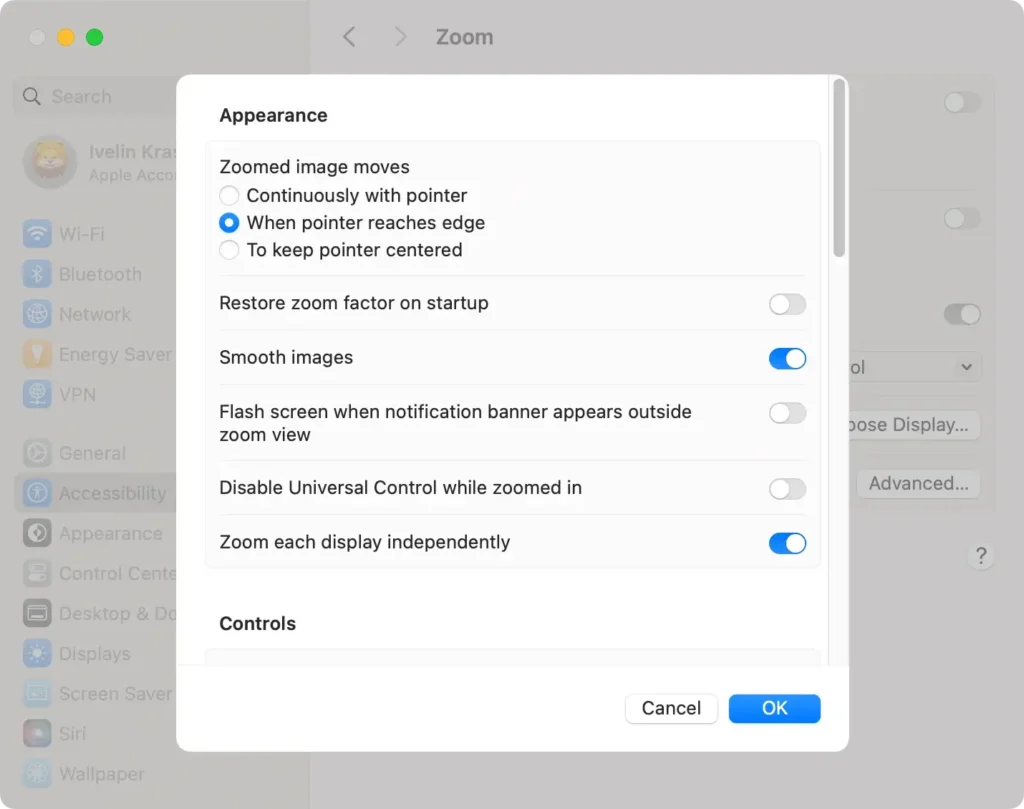
- Click on the
Advancedbutton to furtne your zoom settings. - He furtherre, you can adjust additional features such as:
- Decide whether the entire screen moves continuously with the cursor or only when the cursor reaches the edge.
- Allow temporary zooming when a specific modifier key is held down.
- Control how quickly the zoom function responds when activated.
- Enhance the clarity of magnified text and images.
By exploring these options, you can personalize how zoom operates on your Mac, making it more intuitive and aligned with your workflow.
Whether you’re focusing on detailed design work or improving general readability, these settings provide greater control over your viewing experience.
Tip: Don’t hesitate to experiment with different combinations of settings to find what works best for you. Adjusting these advanced options can enhance your productivity and comfort when using your Mac.