‘macOS Sequoia Cannot Be Installed On Macintosh HD’ [Fixed]
Before we dive in
Before we dive in, let's make sure you stay safe online. We created SpyHunter because your security matters to us.
Protect your computer today — download SpyHunter right here! Check out our top tips below to keep your computer safe and secure.
Did you see the frustrating macOS Sequoia cannot be installed on Macintosh HD error? Well, you’re not alone.
Many users have faced issues when trying to install macOS Sequoia, only to be stopped by these error messages.
Whether it’s due to disk space, a corrupted installer, or issues with your startup disk, it can feel like a major roadblock.
But don’t worry—there are 10 easy fixes to get your macOS Sequoia installation back on track.
In this post, we’ll walk you through step-by-step solutions, from checking your Mac’s compatibility to using Disk Utility and even creating a bootable USB installer.
Let’s begin!
What causes the "macOS Sequoia cannot be installed on Macintosh HD" message?
If you’re seeing the macOS Sequoia cannot be installed on Macintosh HD message, it doesn’t provide much detail about what’s causing the issue.
There are a few common reasons why the installation might fail:
- Your Mac may not be compatible with macOS Sequoia, especially if it’s an older model.
- You need to have enough free space on your startup disk to complete the installation.
- A poor or unstable internet connection.
- The macOS installer is corrupted.
- Problems with the file system on your Macintosh HD.
- An issue with the Apple upgrade servers.
How to fix 'macOS Sequoia cannot be installed on Macintosh HD'
If you’re getting the error message that macOS Sequoia cannot be installed on Macintosh HD, there are several potential solutions.
These range from clearing up disk space to checking your Mac’s compatibility or re-downloading a potentially corrupted installer file.
Follow the steps below to resolve the issue and get your macOS Sequoia installation running smoothly.
1. Check if your Mac is compatible with macOS Sequoia
One of the first things to check is whether your Mac is compatible with macOS Sequoia.
You can check your Mac’s specifications by clicking the Apple menu and selecting About This Mac.
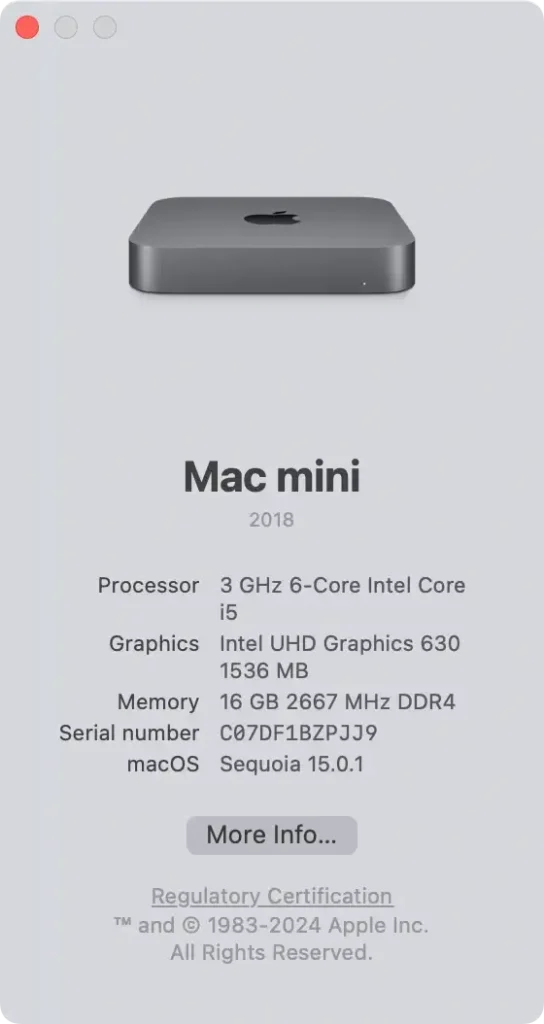
Check if your model and year are available in the Mac models listed below. Otherwise, Sequoia will not install on your Mac.
- MacBook Pro: 2018 and later
- MacBook Air: 2020 and later
- Mac mini: 2018 and later
- iMac: 2019 and later
- iMac Pro: 2017 and later
- Mac Pro: 2019 and later
- Mac Studio: 2022
2. Free up enough space on your startup disk
One of the most common reasons for the macOS Sequoia update error is a lack of free storage space.
Sequoia requires sufficient space for the installation files and the operating system to function correctly, so ensuring your startup disk has enough room is essential.
Open System Settings and go to General > Storage to see how much free space is available on Macintosh HD.
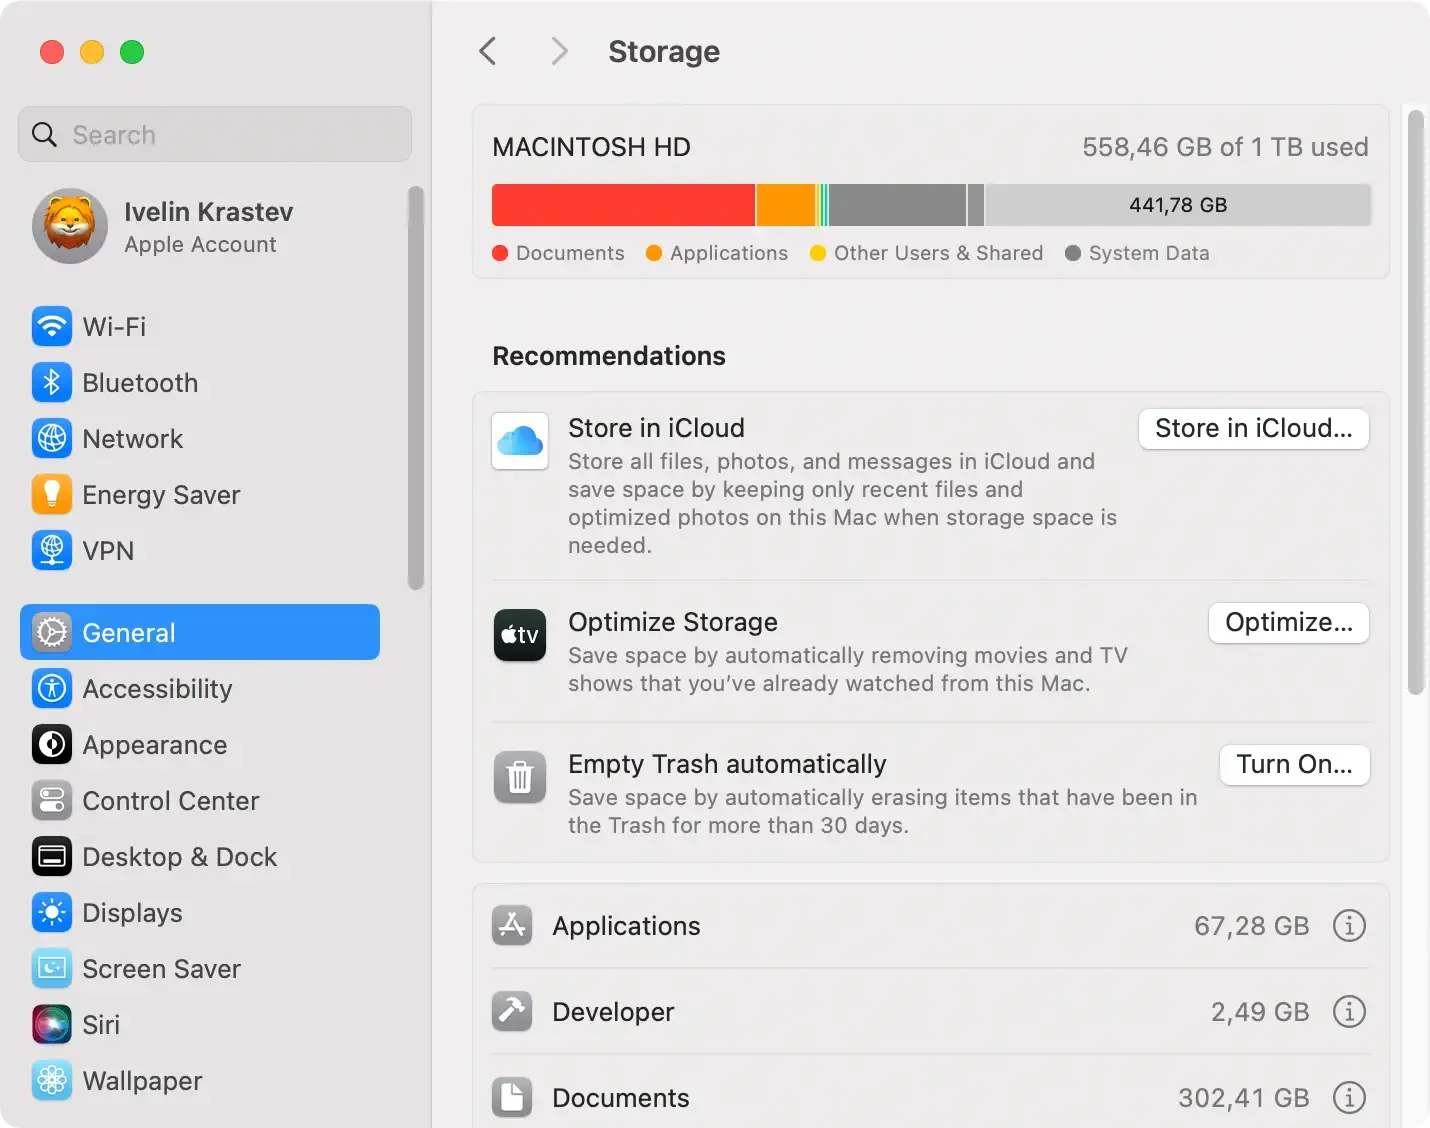
If you’re running low on space, start by deleting unnecessary files, such as old downloads, large media files, or unused applications. After deleting files, remember to empty your Trash to reclaim the free storage space fully.
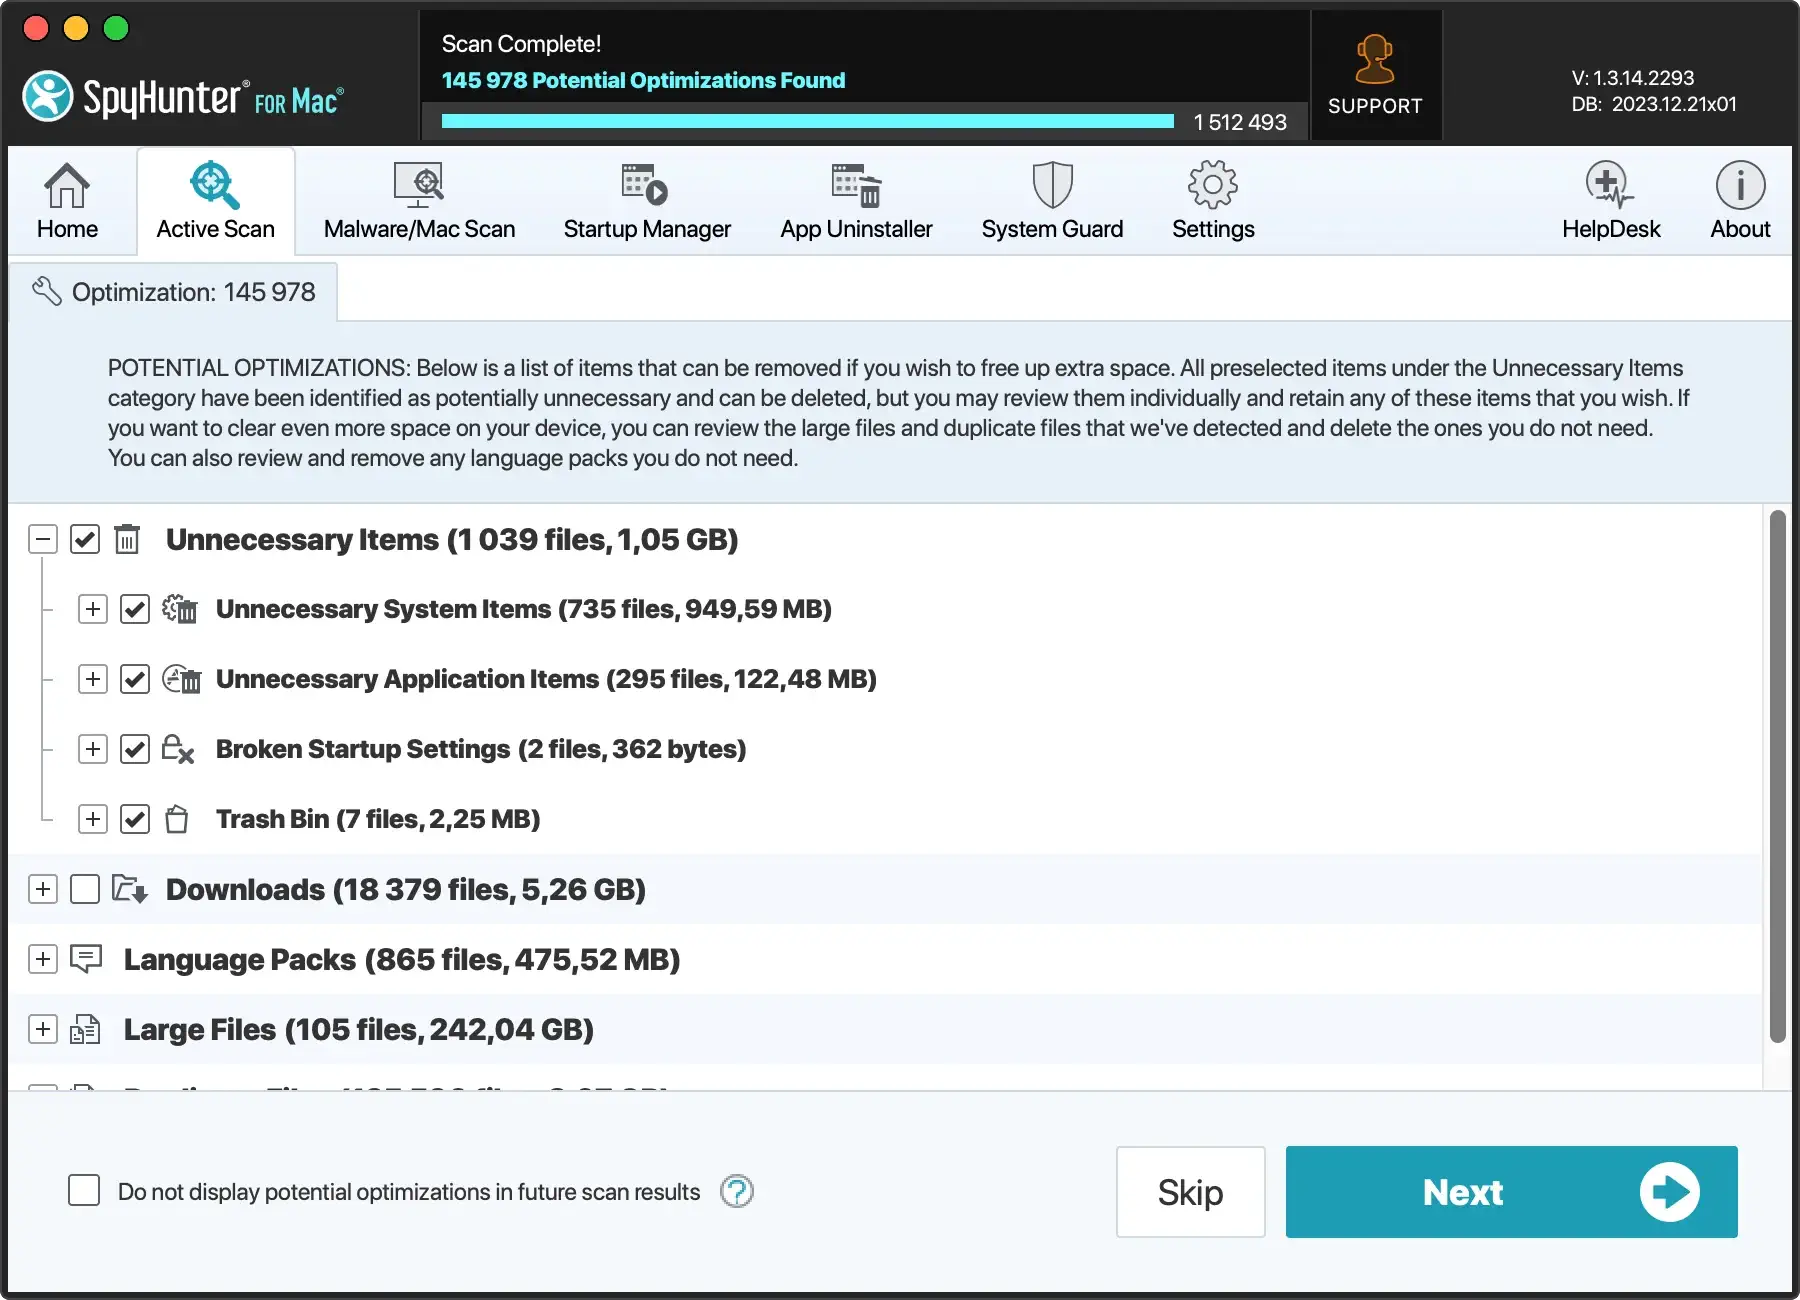
To make the process easier and faster, consider using SpyHunter to help clean up your Mac. SpyHunter’s system optimization tools can:
- Scan for System Junk: SpyHunter can find and delete junk files, temporary files, and unnecessary system clutter that may be taking up valuable disk space.
- Find Large and Duplicate Files: The built-in scanner helps you locate large files and duplicates that are taking up space unnecessarily.
- App Uninstaller: Use SpyHunter’s app uninstaller to remove unused or outdated apps and ensure that no leftover files remain on your system.
Download SpyHunter now to quickly scan and free up storage space, making sure you have enough room to proceed with the macOS Sequoia installation without any issues.
By efficiently clearing out system junk and large files, you’ll be able to resolve the macOS Sequoia cannot be installed error and enjoy a smooth installation.
3. Check your internet connection
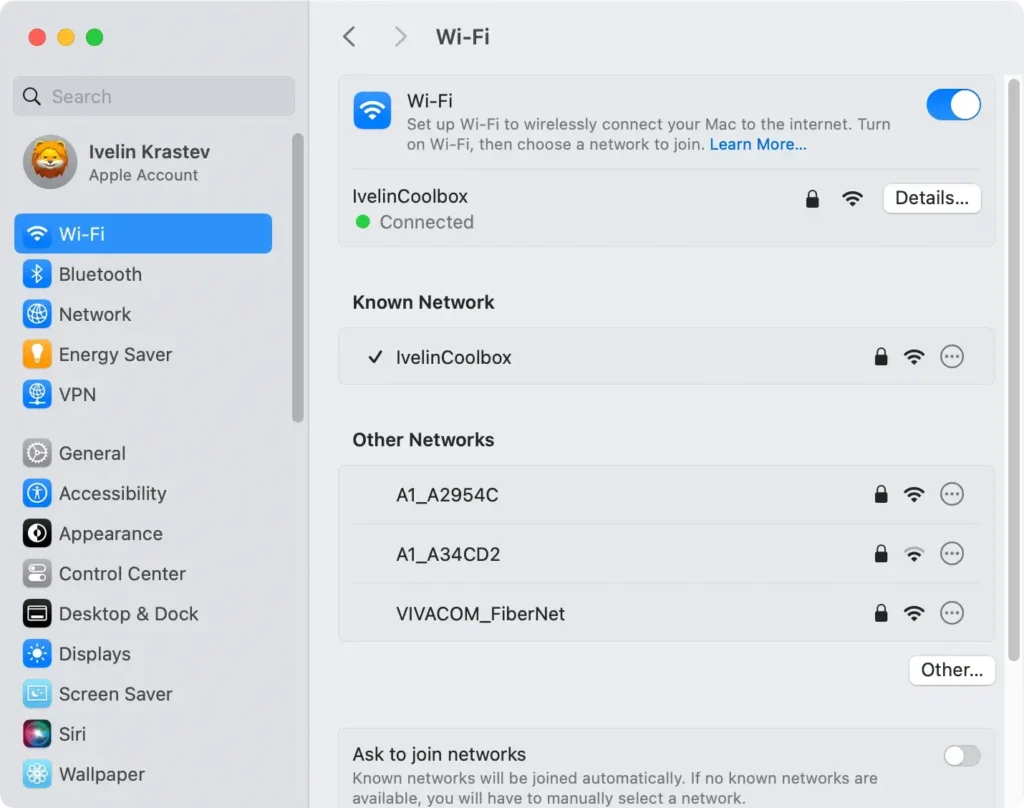
Sometimes, a weak or unstable internet connection can prevent the successful installation of macOS Sequoia. To avoid this issue, ensure your connection is strong.
- Go to
System Preferences > Networkand check your Wi-Fi or Ethernet connection status. - Try switching to a wired connection if you’re using Wi-Fi.
- Restart your router if your internet connection appears unstable, then retry the macOS update.
4. Check Apple’s Server Status
Occasionally, the issue may not be with your Mac but with Apple’s servers.
When Apple’s servers are down or overloaded, it can result in an error message preventing you from completing the macOS installation.
- Visit Apple’s System Status page.
- Check for ongoing issues with the macOS Software Update or App Store services.
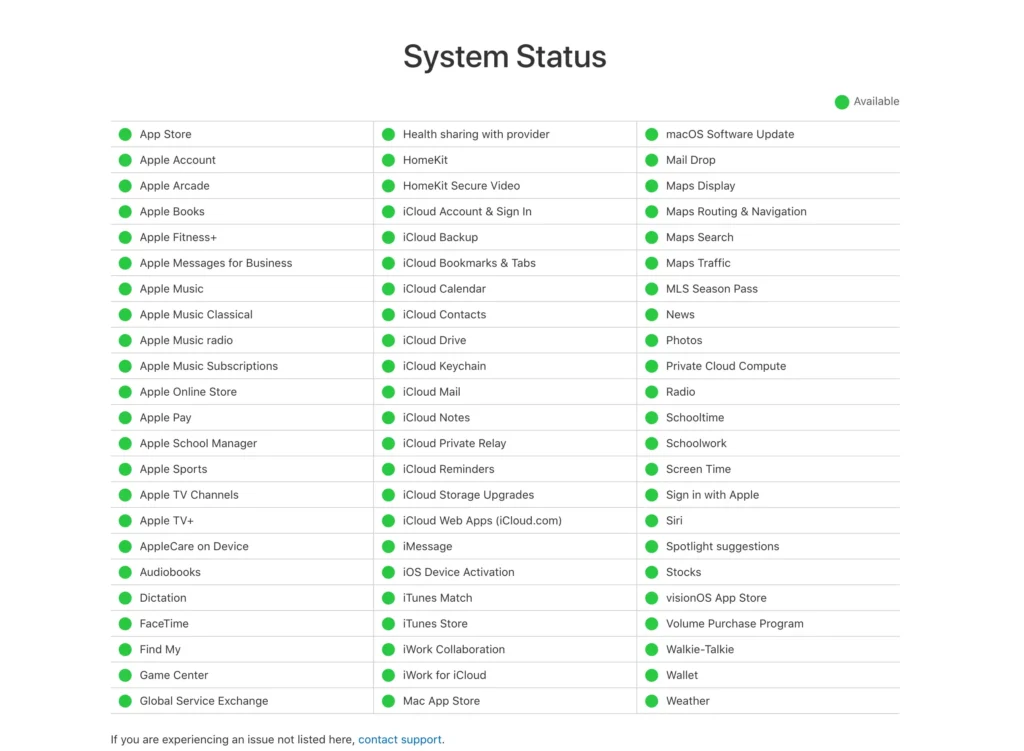
If Apple is experiencing downtime, wait and try again later.
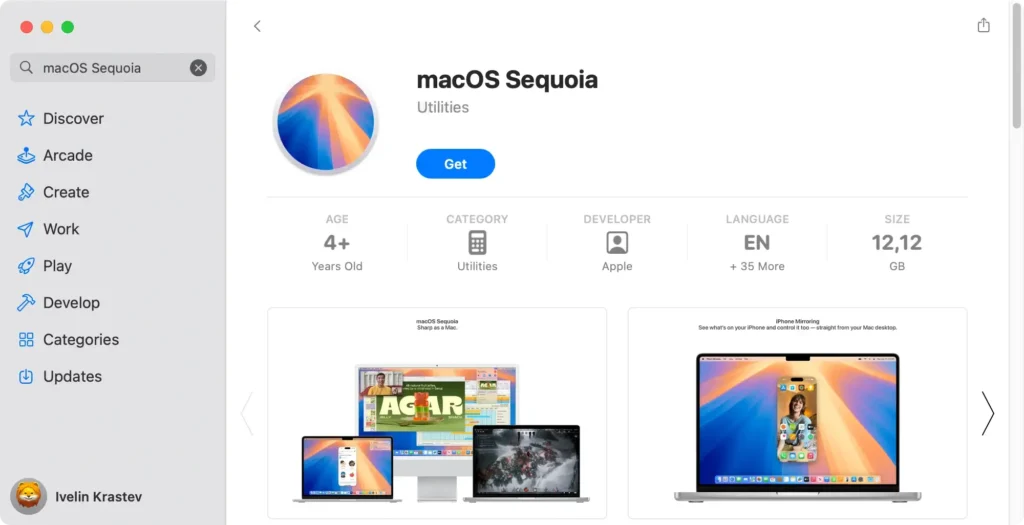
5. Re-download the macOS Sequoia installer
If the installer file is corrupted, you may need to download it again. A bad download can cause the macOS Sequoia cannot be installed on Macintosh HD error.
- Open the App Store and search for macOS Sequoia.
- Click on the macOS Sequoia installer and download it again.
- Delete the previous, potentially corrupted installer file, and retry the installation process with the fresh download.
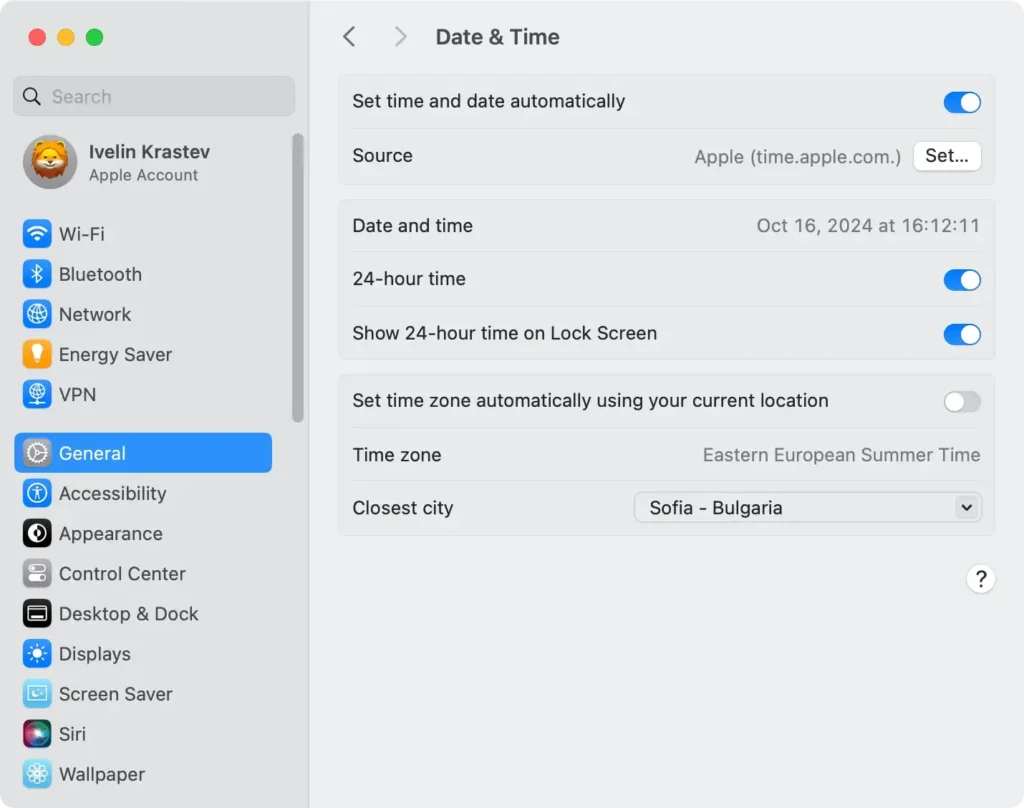
6. Set a correct date and time
Sometimes, an incorrect date and time setting can lead to installation issues.
This can cause authentication errors and prevent the Sequoia installation from completing.
- Open
System Settingsand go toDate & Time. - Ensure that the option to set a date and time automatically is enabled.
- If necessary, correct the settings and try to install macOS Sequoia again.
7. Repair the startup disk
Disk permissions issues can often prevent macOS Sequoia from being installed on Macintosh HD.
Although macOS Mojave and later no longer allow users to repair disk permissions as a standalone process, you can still ensure that your filesystem is in a healthy state by running First Aid:
- Open
Disk Utilityby going toApplications > Utilities. - Select your startup disk from the sidebar.
- Click
First Aidto check for any file system issues.

This will check the disk for errors and repair any it finds, which can help resolve any problems that might be preventing macOS from installing correctly.
Once the repair process is complete, try to install macOS Sequoia again
8. Install macOS Sequoia in Safe Mode
Installing macOS Sequoia in Safe Mode helps resolve issues by running your Mac with only the essential components, preventing third-party apps and unnecessary extensions from interfering with the installation process.
Here’s how to do it:
- Shut down your Mac, then turn it back on.
- As soon as your Mac starts, press and hold the
Shiftkey. - Keep holding
Shiftuntil the login window appears, indicating that you’re in Safe Mode. - Once in Safe Mode, try to install Sequoia again.
In Safe Mode, your Mac will operate with minimal background processes, allowing you to troubleshoot installation issues and potentially complete the Sequoia installation without any interference.
9. Install macOS Sequoia from a bootable USB drive
If you still can’t install macOS Sequoia, creating a bootable installer might help you. This method can help resolve various installation issues.
Here’s how to create a bootable installer and use it to finish the installation:
- Prepare the USB Drive: Ensure you have a USB stick with a minimum of 16GB storage Use
Disk Utilityto format the USB device asMac OS Extended (Journaled). - Turn Off the Firewall: Open
System Settings > Network > Firewall. Turn off the firewall or set it to allow all incoming connections, as this can sometimes interfere with the installation process. - Modify Startup Security Utility (for T2 Macs): For Macs with a T2 security chip, restart your Mac and hold
Command + Rto enter Recovery Mode. In theUtilitiesmenu, selectStartup Security Utility. Set the security settings to allow booting from an external drive or removable media. - Boot from USB Drive: Restart your Mac computer and hold down the
Optionkey while it boots. Select the USB installer from the list of bootable drives. Follow the on-screen instructions to install macOS Sequoia from the USB.
10. Reset PRAM and SMC
Resetting PRAM and SMC can fix various hardware-related issues that may prevent macOS Sequoia from installing on your Macintosh HD.
Follow the steps below based on your Mac model.
Apple Silicon Macs
Resetting PRAM and SMC on Apple Silicon Macs isn’t necessary, as these processes are automatically handled during startup.
Instead, you can refresh the system by shutting down your Mac, waiting for 30 seconds, and powering it back on.
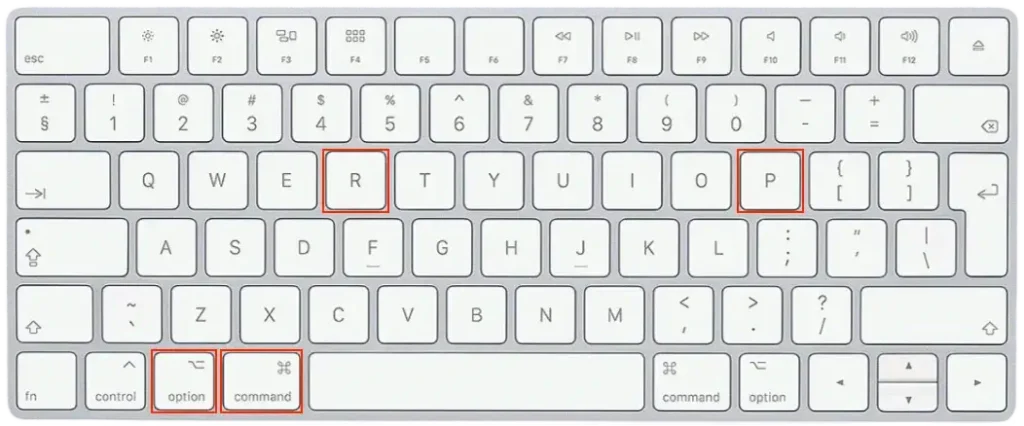
Reset PRAM on Intel Macs
- Shut down your Mac.
- Turn it on again and immediately press and hold
Command + Option + P + R. - Hold the keys for about 20 seconds, then release them.
- Your Mac will restart, and the PRAM will be reset.
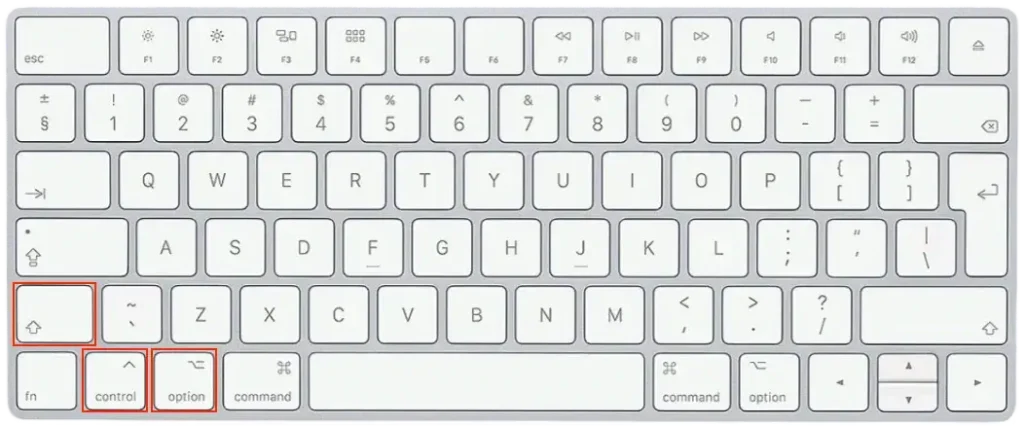
Reset SMC on Intel Macs
- Shut down your Mac.
- Hold
Shift + Control + Optionalong with the power button for 10 seconds. - Release all keys and turn your Mac back on by pressing the power button.
After completing these steps, retry the macOS Sequoia installation to see if the issue is resolved. Resetting PRAM and SMC can often fix persistent installation problems on older Macs.
Final words
Installing a new OS version, like Sequoia, brings exciting new features and improvements. However, it can be frustrating to encounter the macOS Sequoia cannot be installed on Macintosh HD error.
Don’t worry—by following the solutions outlined above, step by step, you should be able to resolve the issue and complete the macOS installation.
Whether it’s freeing up disk space, repairing the startup disk, or reinstalling the macOS installer, these fixes will help you enjoy all that Sequoia has to offer.