3 Easy Ways To Downgrade macOS Sequoia To Sonoma
Before we dive in
Before we dive in, let's make sure you stay safe online. We created SpyHunter because your security matters to us.
Protect your computer today — download SpyHunter right here! Check out our top tips below to keep your computer safe and secure.
If you recently upgraded to macOS Sequoia and are experiencing issues or simply prefer the stability of macOS Sonoma, you might consider a downgrade.
The good news is that you can downgrade macOS Sequoia to Sonoma without losing your important data.
In this guide, we’ll walk you through the steps to safely revert to macOS Sonoma.
Whether it’s due to performance problems or compatibility issues, downgrading doesn’t have to mean losing your files.
Let’s dive into the process!
Why downgrade from macOS Sequoia to Sonoma?
There are several reasons why Mac users may choose to downgrade MacOS Sequoia to MacOS Sonoma.
One of the most common issues is slow performance, or frequent system freezes, especially if your Mac is older or has limited resources.
Some users may also experience app compatibility issues, as specific programs have yet to be fully optimized for macOS Sequoia.
In other cases, macOS Sequoia bugs or glitches may lead to system crashes, making it difficult to work efficiently.
Additionally, some users simply prefer the stability and familiarity of a previous macOS, as newer versions of the operating system can sometimes introduce unexpected changes or remove features that you rely on.
Before you downgrade macOS Sequoia
Before you begin the downgrade process from macOS Sequoia to Sonoma, it’s crucial to take a few preparatory steps to ensure the transition goes smoothly and without data loss.
1. Prepare a Time Machine backup
Creating a backup before downgrading is essential to ensure you don’t lose any important files or data.
Before you begin, you’ll need an external storage device. Ideally, the device should be twice the size of your Mac’s hard drive to store all your files safely.
Here’s how to prepare your backup:
- Connect the external backup drive to your Mac.
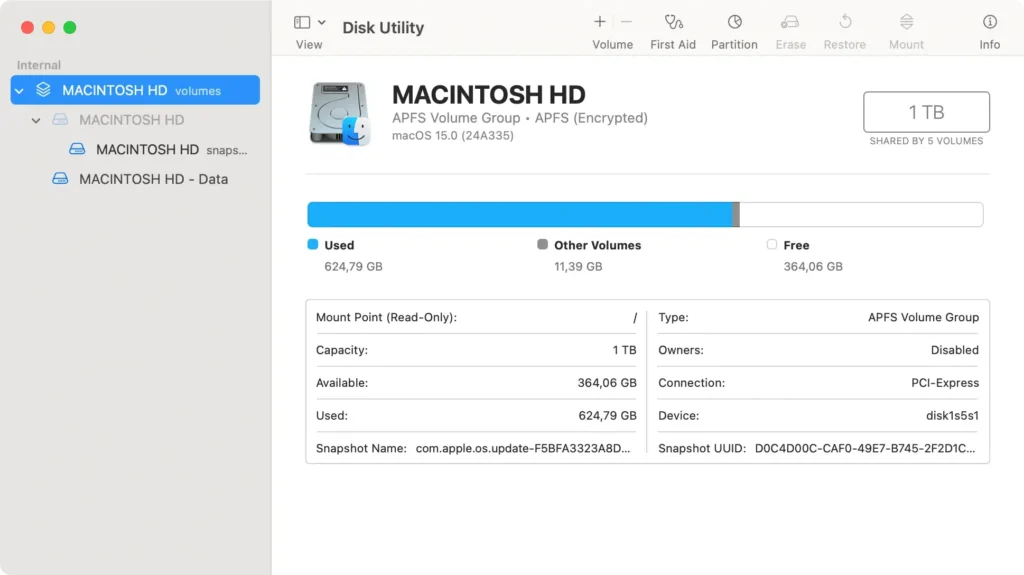
- Open
Disk UtilityfromApplications > Utilities. - Select your backup drive and click
Erase. - In the Format drop-down menu, choose APFS (for macOS High Sierra and later) or
Mac OS Extended (Journaled)(for earlier macOS versions), then clickErase. - Once the drive is formatted, close
Disk Utility.
Now, you’re ready to set up your Time Machine:
- Connect an external backup drive to your Mac.
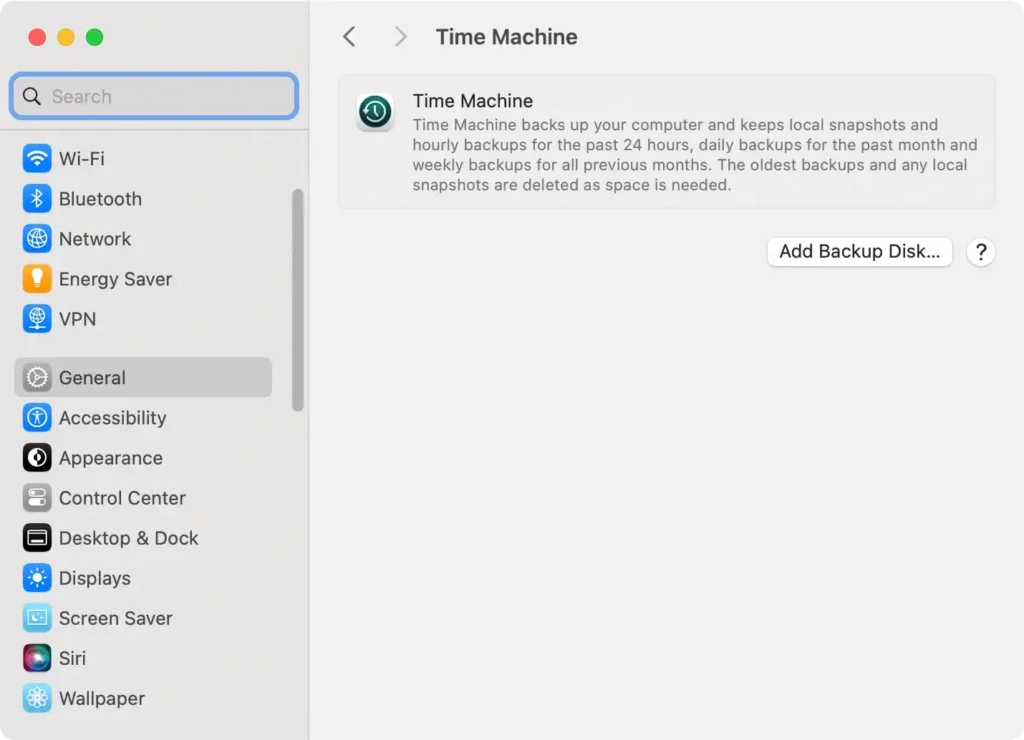
- Go to
System Settings > Time Machine. - Select
Add Backup Diskand choose the desired disk. - Click on
Set Up Diskand configure which files to back up and how often.
With your backup ready, you can start downgrading macOS Sequoia, knowing that your files are securely stored and recoverable if needed.
2. Clean your Mac from junk files
Before downgrading, it’s a good idea to clear out any junk files and unnecessary data that may be cluttering your startup disk.
This ensures a smoother downgrade process and better performance once macOS Sonoma is installed.
The easiest way to do this is to use SpyHunter for Mac, which can help identify and remove junk files, old logs, and other unnecessary data with just a few clicks
This not only frees up valuable disk space but also helps prevent potential issues during the downgrade.
- Download SpyHunter from here and install it.
- Run a
Quick Scanand review the detected junk files. - Select the files you want to remove and follow SpyHunter’s prompts to free up space on your Mac.
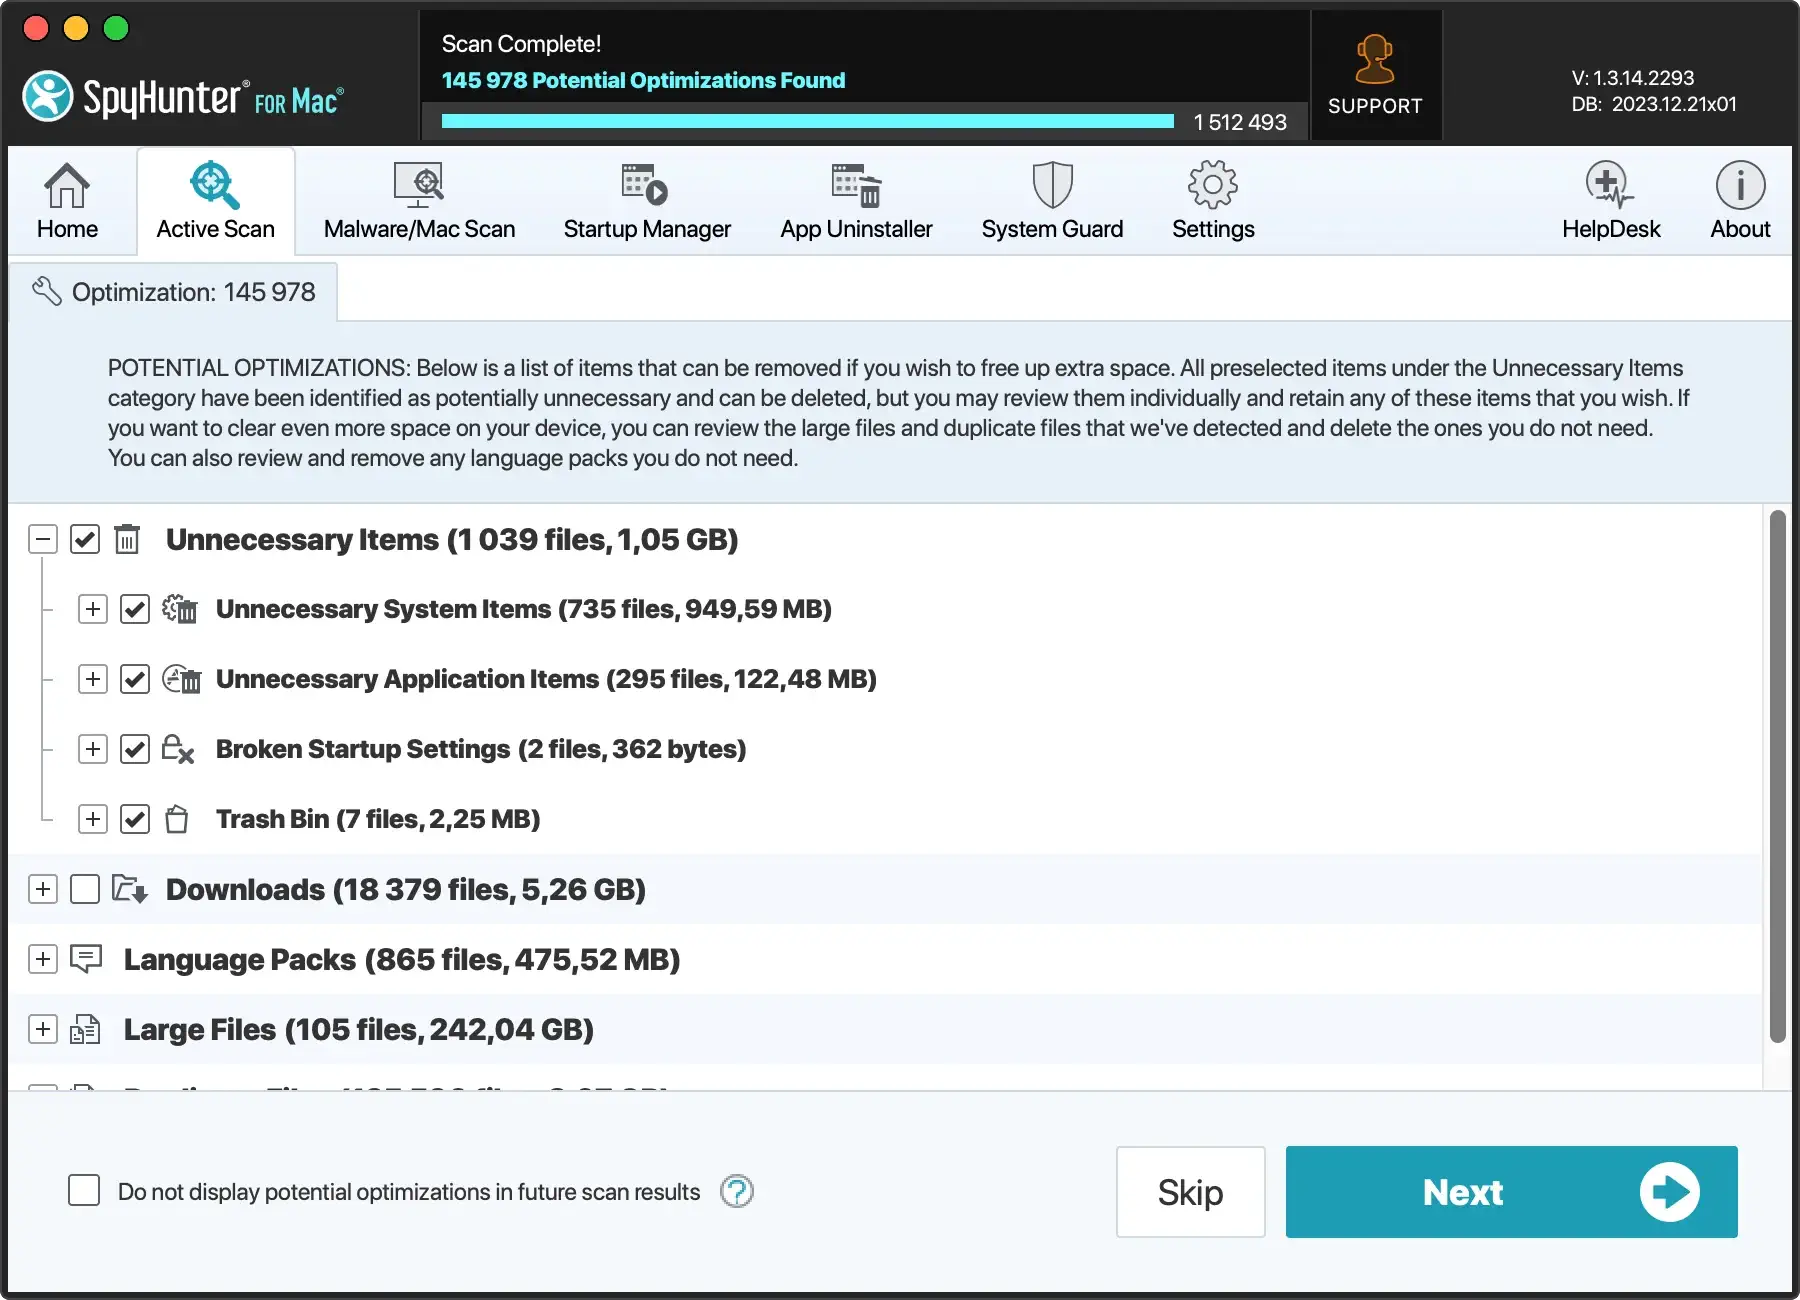
By cleaning up your Mac with SpyHunter, you can ensure that your macOS downgrade goes smoothly and your system remains optimized.
How to downgrade macOS Sequoia to Sonoma
If you’ve decided to downgrade macOS Sequoia to Sonoma, there are several reliable methods to make the transition without losing your data.
Below, we’ll outline three practical ways to revert to macOS Sonoma: using a Time Machine backup, macOS Recovery Mode, or a bootable macOS installer.
1. Downgrade using Time Machine
If you made a Time Machine backup before upgrading to Sequoia, downgrading to macOS Sonoma is straightforward. By restoring from a previous backup, you can revert to the earlier macOS version while keeping your files intact.
Here’s how to downgrade macOS Sequoia using your backup:
- Connect the drive with your Time Machine backup to your Mac.
- Restart your Mac in Recovery Mode:
- For an Intel Mac: Press and hold
Command + Ras you power on your Mac until the Apple logo appears. - For an Apple Silicon Mac: Hold down the power button until you see the
Startup Optionsscreen. SelectOptionsand clickContinue.
- For an Intel Mac: Press and hold
- Once you enter the macOS Recovery environment, select
Restore from Time Machine. - Choose the Time Machine backup drive as the restore source.
- Select the backup from which you want to restore. Ideally, choose a recent backup made before upgrading to macOS Sequoia (labeled as being created with Sonoma).
- Click
Restoreand follow the on-screen instructions.
After completing these steps, your Mac will reboot with macOS Sonoma installed, bringing your system back to its previous state while keeping your important files intact.
2. Downgrade in macOS Recovery Mode (Internet Recovery)
If you don’t have a recent backup, you can still downgrade macOS Sequoia to macOS Sonoma using macOS Recovery Mode.
This method, known as Internet Recovery, allows you to reinstall the version of macOS that initially came with your Mac or the closest compatible version, which might be macOS Sonoma.
Follow these steps based on your Mac type:
For Intel Macs:
- Shut down your Mac completely.
- Press and hold
Shift + Option + Command + R, then press the power button. This key combination ensures your Mac reinstalls the version of macOS that originally came with your Mac. - Release the keys when you see the Apple logo.
- When the Mac Utilities window appears, choose
Reinstall macOS. - Follow the on-screen instructions to reinstall the previous version of macOS.
For Apple Silicon Macs:
- Shut down your Mac completely.
- Press and hold the power button until you see the startup options screen.
- Click
Options, then selectContinueto entermacOS Recovery. - Then, click
Reinstall macOSfrom the Utilities window and follow the on-screen instructions.
Once the installation is complete, your Mac will restart with the downgraded macOS version. From here, you can upgrade to macOS Sonoma if needed.
3. Downgrade using a bootable installer
If you prefer a clean install, downgrading macOS Sequoia using a bootable installer is a reliable method. To download the macOS Sonoma installer, you’ll need a USB drive (preferably 32GB) and access to another Mac.
Follow these steps to create the installer and use it to downgrade.
- Insert a USB stick (32GB recommended) into your Mac.
- Open
Disk UtilityfromApplications > Utilities, select the USB drive, and clickErase. ChooseMac OS Extended (Journaled)as the format and name the drivemacOS Sonoma Installer.
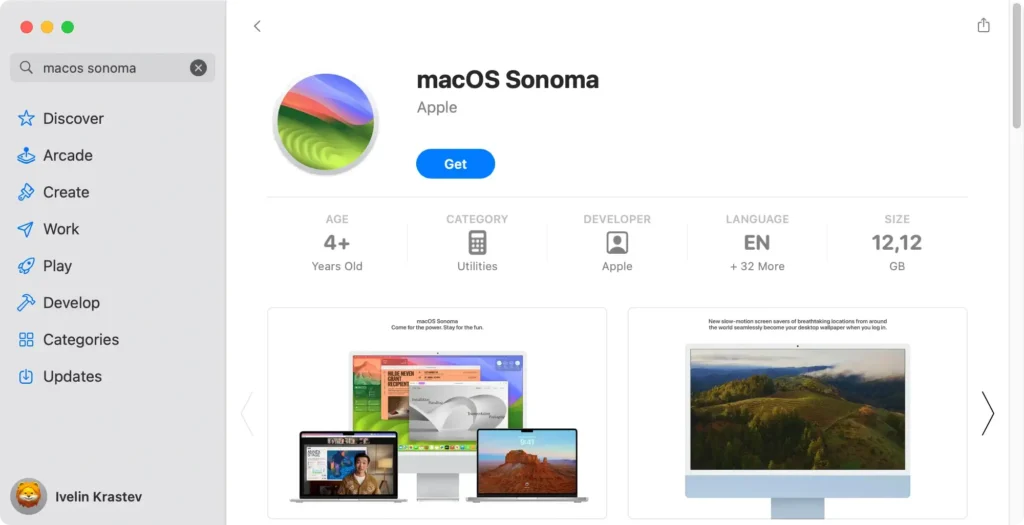
- Download macOS Sonoma from the Mac App Store. Once the download completes, the installer will open automatically—press
Command + Qto quit. The installer will now be saved in yourApplicationsfolder.
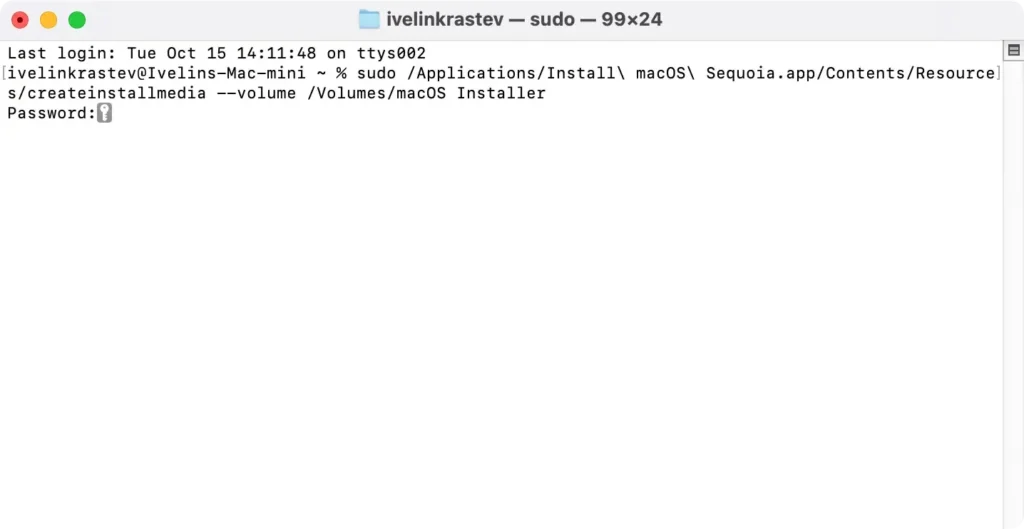
- Open
Terminaland enter the following command:sudo /Applications/Install\ macOS\ Sonoma.app/Contents/Resources/createinstallmedia --volume /Volumes/macOS\ Sonoma\ Installer - Press
Return, enter your admin password, and wait for the bootable USB installer to be created. This process may take some time.
- When the installer is ready, restart your Mac.
- Hold the power button (on Apple Silicon Macs) or the
Optionkey (on Intel-based Macs) until the startup options screen appears. - Select the USB installer as the startup disk, then click
Continue. - Once the macOS Utilities window appears, select
Disk Utilityand choose your startup disk (usually labeled Macintosh HD). - Click
Erase, format it as APFS, and confirm. - After erasing your startup disk, exit
Disk Utilityand chooseInstall macOS Sonomafrom the macOS Utilities window. - Follow the on-screen instructions to install macOS Sonoma. The installation process will take about 30 minutes, during which your Mac may restart several times.
By following these steps, you’ll successfully downgrade from macOS Sequoia to macOS Sonoma using a bootable installer. Remember to back up your data beforehand to avoid any potential data loss.
Now that you know how to uninstall macOS Sequoia and revert to macOS Sonoma, you can restore your Mac to a version that works better for your needs.
Whether you experienced performance issues, app incompatibility, or simply prefer the previous version, the methods outlined above will help you safely downgrade without losing your data.
Just remember to backup files before starting the process to ensure a smooth transition. Downgrading doesn’t have to be complicated, and with the proper steps, you’ll be back to your preferred macOS version in no time.