macOS Sequoia Wi-Fi Issues? Try These 12 Fixes
Before we dive in
Before we dive in, let's make sure you stay safe online. We created SpyHunter because your security matters to us.
Protect your computer today — download SpyHunter right here! Check out our top tips below to keep your computer safe and secure.
Experiencing Wi-Fi issues after upgrading to macOS Sequoia?
Many Mac users have reported problems with Wi-Fi networks dropping or failing to connect, leaving them without stable internet access.
These connection issues can be frustrating, especially when your Mac refuses to stay connected to your Wi-Fi network despite a seemingly strong signal.
In this post, we’ll explore the most effective solutions to fix macOS Sequoia Wi-Fi problems and help you get back online.
Follow along as we troubleshoot and resolve these internet issues step by step.
Is your Mac’s Wi-Fi the problem? Here’s how to check
The first thing to do is to determine whether your Mac is the actual source of the problem. Sometimes, WiFi problems can stem from your network, router, or even a specific app.
Here’s how to quickly check if your Mac is at fault:
- Check if another device, such as your phone or tablet, can connect to the same Wi-Fi network.
- If the issue happens in one app, open a web browser or another app that requires internet access and check if they can connect.
- Power cycling your router can fix many Wi-Fi problems. Turn it off using the power switch, wait for about 10 seconds, then turn it back on. Once your router has fully rebooted, try connecting your Mac again.
If none of this helped, it’s time to focus on fixing the macOS Sequoia Wi-Fi network issues.
Why won’t my Mac connect to Wi-Fi on macOS Sequoia?
There are several reasons why your Mac might have trouble connecting to Wi-Fi after installing macOS Sequoia.
Here are some of the most common causes:
- Your Wi-Fi network is out of range.
- The router is malfunctioning.
- There are issues with your internet connection.
- Problems with the Wi-Fi network itself.
- macOS Sequoia bugs or software glitches.
Identifying the root cause can help you choose the right solution and get your Wi-Fi connection back on track.
How to fix macOS Sequoia Wi-Fi not working
If you’re facing persistent internet issues on macOS Sequoia, try these detailed solutions to restore a stable and reliable internet connection.
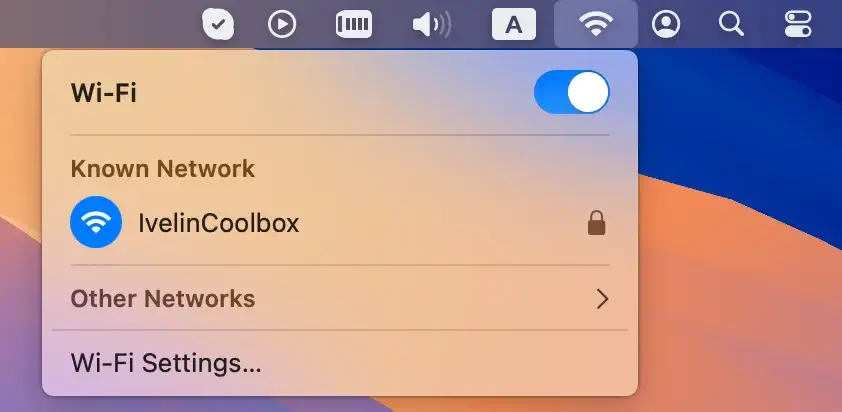
1. Turn Wi-Fi off and on again
This simple trick can often reset any Wi-Fi network issues caused by temporary system glitches. By toggling Wi-Fi off and on, you refresh your network, potentially fixing the problem.
- Click on the Wi-Fi icon in the menu bar.
- Toggle the Wi-Fi off and wait for 10–15 seconds to let the current internet connection fully disconnect.
- Turn the Wi-Fi on again and allow your Mac to reconnect to the network.
2. Restart your Mac
Restarting your Mac clears system caches and temporary files that could be affecting Wi-Fi performance. It also refreshes the network hardware connections.
Click the Apple menu in the menu bar and choose Restart.
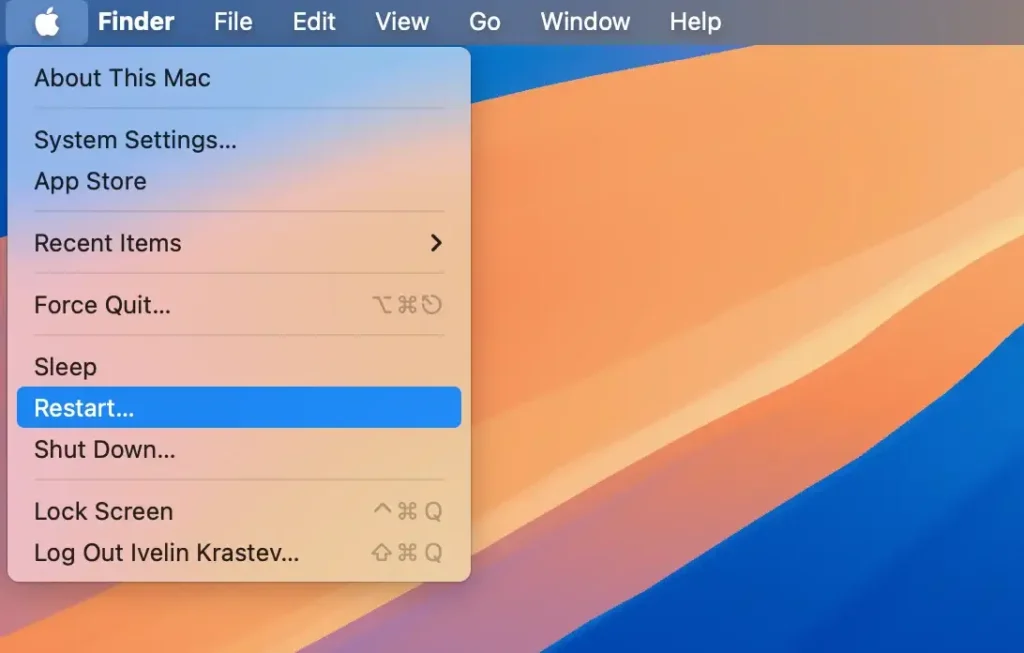
Once your Mac reboots, reconnect to your preferred network. If your internet connection is restored, your issue has likely been caused by a temporary software glitch.
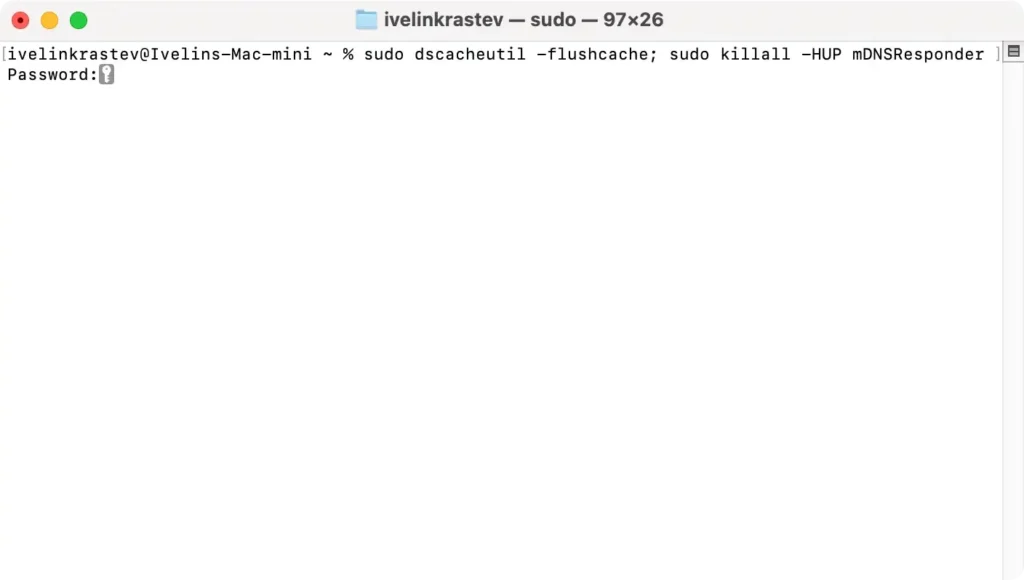
3. Flush the DNS cache
Flushing the DNS cache helps clear outdated or corrupted network data that may be causing Wi-Fi issues. This process can resolve problems with loading web pages or connecting to certain websites.
- Open
TerminalfromApplications > Utilities. - Enter the following command:
sudo dscacheutil -flushcache; sudo killall -HUP mDNSResponder - Press
Returnand enter your admin password when prompted. - Reboot your device and attempt to reconnect to your network.
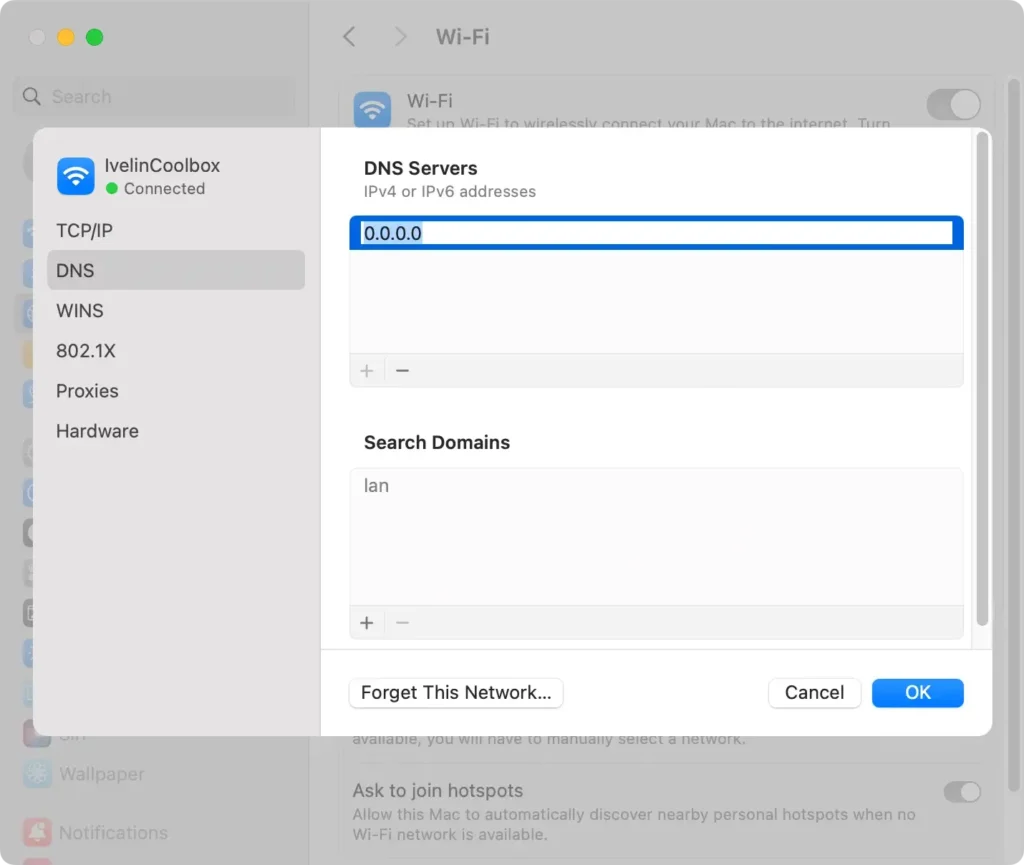
4. Change your DNS servers
If your network is unstable, switching to reliable DNS servers (like Google’s DNS or Cloudflare’s DNS) can often resolve issues related to slow network access or dropped connections.
- Go to
System Settings > Networkand select Wi-Fi. - Click
Detailsnext to your active network and scroll down to DNS. - Delete the current DNS entries and add the following DNS addresses for Google’s DNS:
- 8.8.8.8
- 8.8.4.4
- Alternatively, for Cloudflare DNS, use:
- 1.1.1.1
- 1.0.0.1
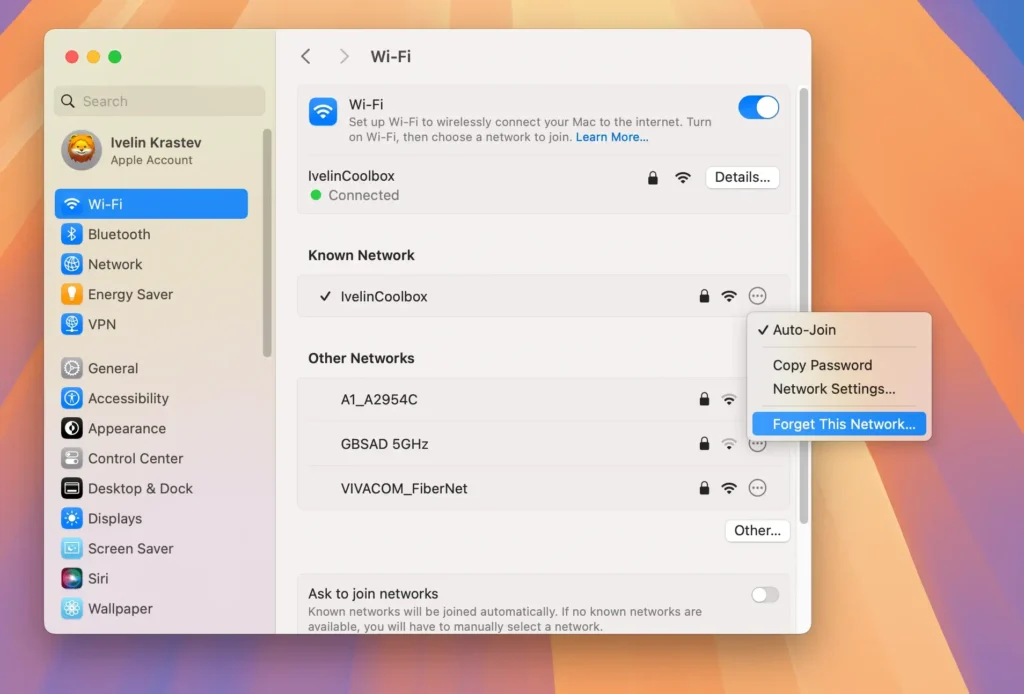
5. Forget and re-add the Wi-Fi network
Forgetting and reconnecting to your network can resolve issues where your Mac may have stored corrupt network data.
This clears out any cached settings or network filters that might have been causing issues with the connection.
- Go to
System Settings > Wi-Fi, then selectDetailsnext to your connected network. - Choose
Forget This Networkand confirm your selection. - After forgetting the network, reconnect by selecting the WiFi network from the list and entering the password.
6. Turn off Firewall temporarily
Your Mac’s firewall is designed to protect against unwanted incoming connections, but it can also block essential internet traffic.
Temporarily disabling it can help determine if the firewall is causing the issue.
- Open
System Settings > Network > Firewall. - Toggle off the
Firewallsetting to deactivate it temporarily. - Test your Wi-Fi connection to see if the problem is resolved.

7. Check third-party apps and extensions
Many users report that certain third-party apps or extensions, such as a VPN provider or security software, can interfere with your internet and cause problems. Turning off these apps can resolve the issue.
Try turning off such apps and extensions and testing the ethernet connection again. If you cannot close or disable an app, uninstall it.
Also, make sure that you update all of your apps to ensure they do not cause any conflicts.
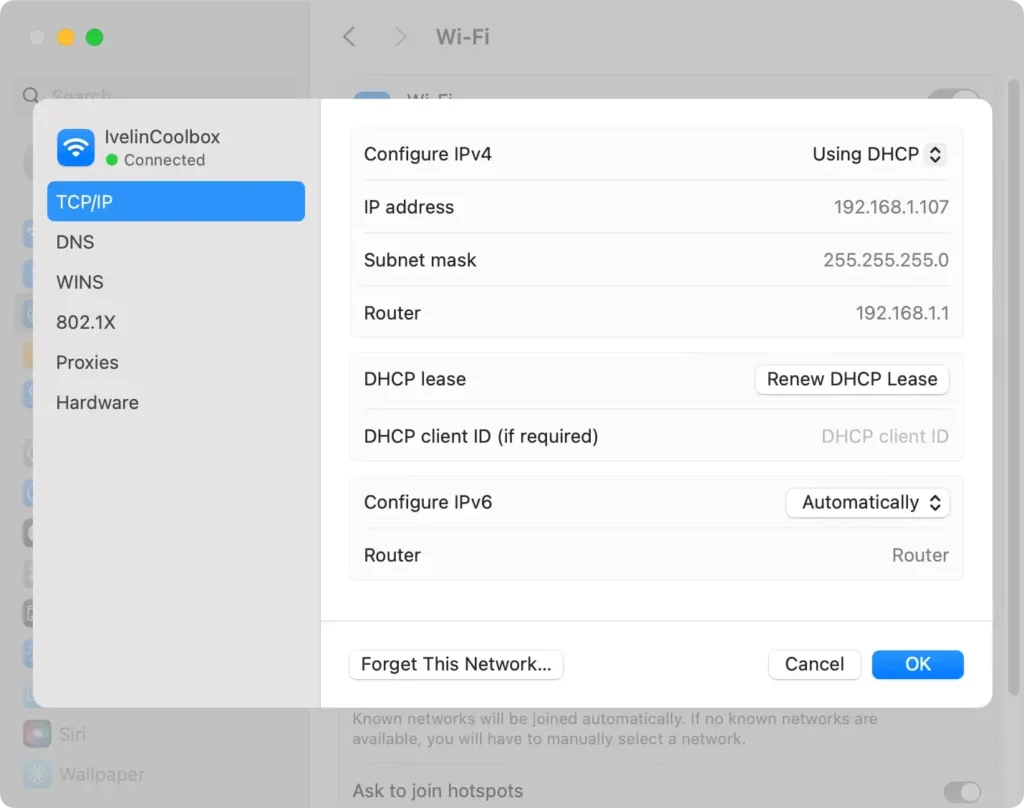
8. Update the DHCP lease
Refreshing your DHCP lease can renew your Mac’s IP address, potentially solving connection issues that stem from the internet configuration. To do this:
- Open
System Settings > Wi-Fi. - Select the problematic Wi-Fi connection.
- Click
Detailsand select TCP/IP in the sidebar. - Click the
Renew DHCP Leasebutton.
9. Disconnect external USB devices
Certain USB devices connected to your Mac—especially USB 3.0 devices—can interfere with Wi-Fi signals. If you’re experiencing WiFi issues, try disconnecting external devices.
Simply unplug all USB devices from your Mac and check if your connection improves. If the issue is resolved, one of the devices might be causing interference. Reconnect them one by one to identify the culprit.
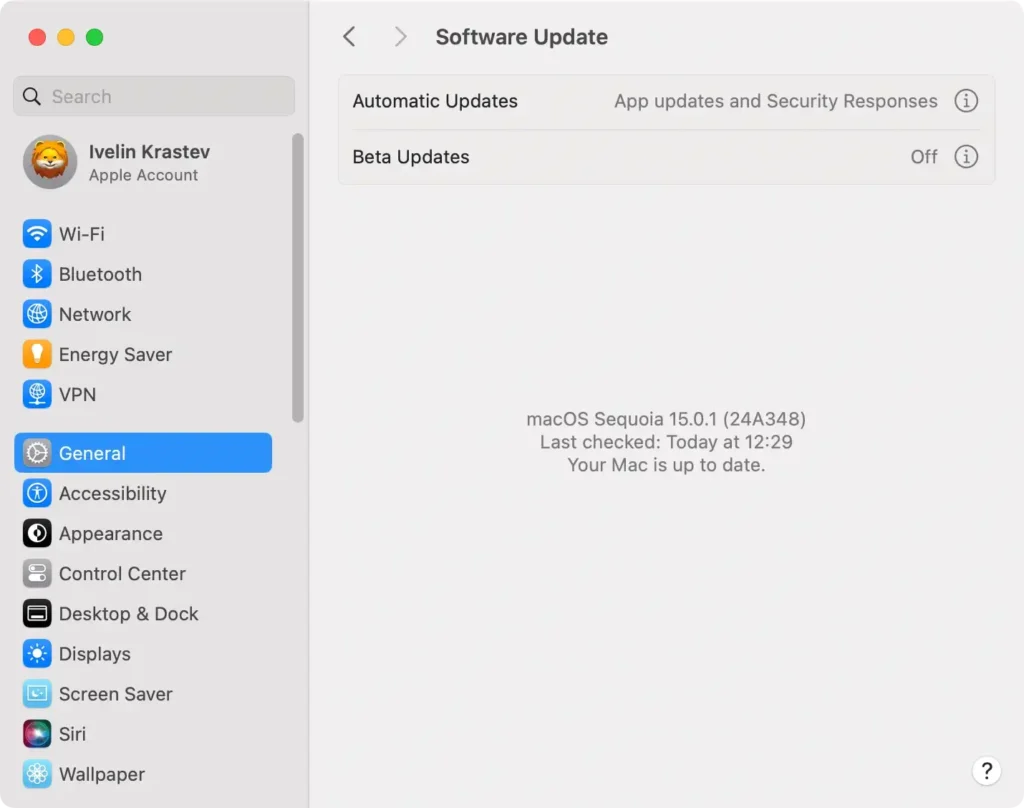
10. Install the latest macOS Sequoia
Keeping your macOS up to date ensures that any bugs introduced in earlier versions are patched.
- Navigate to
System Settings > General > Software Update. - Check for any available updates.
- Download and install any macOS updates.
- Restart your device.
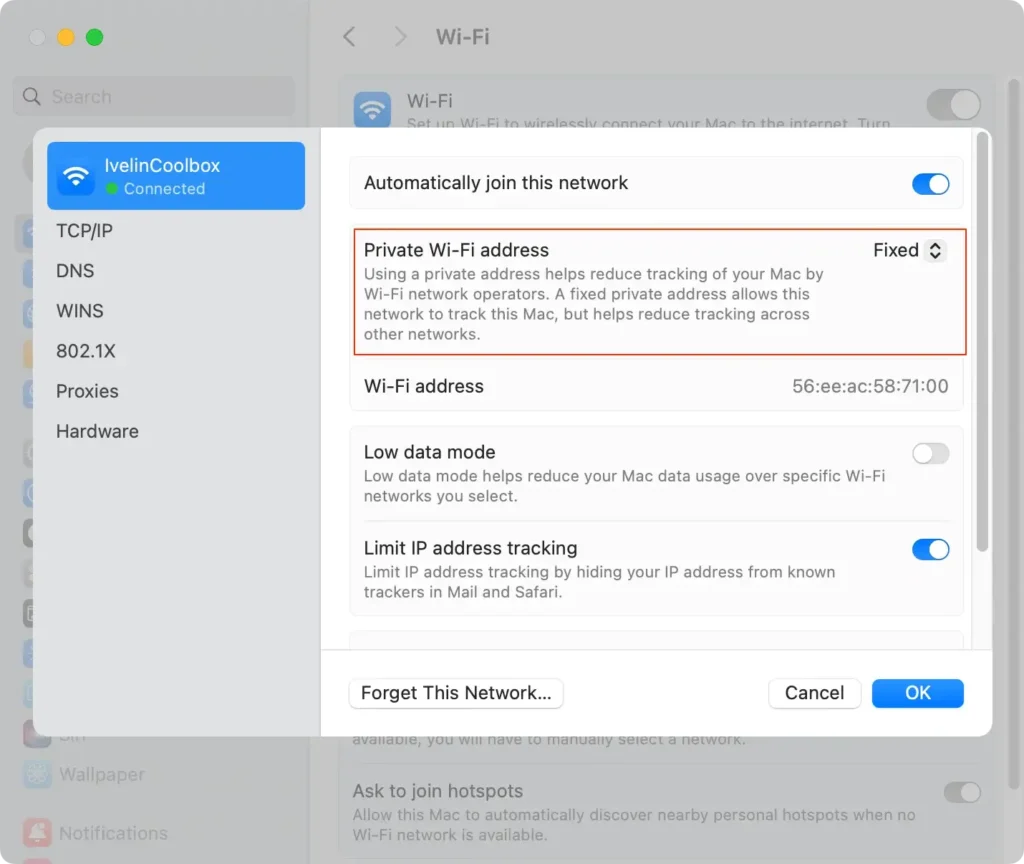
11. Set private Wi-Fi address to fixed
The private Wi-Fi Address feature helps improve privacy, but it can sometimes cause connectivity issues on certain Wi-Fi networks. Setting it to a fixed address can resolve these problems.
- Navigate to
System Settings > Wi-Fi. - Select
Detailsnext to your network. - Set the private address of the network to
Fixed.
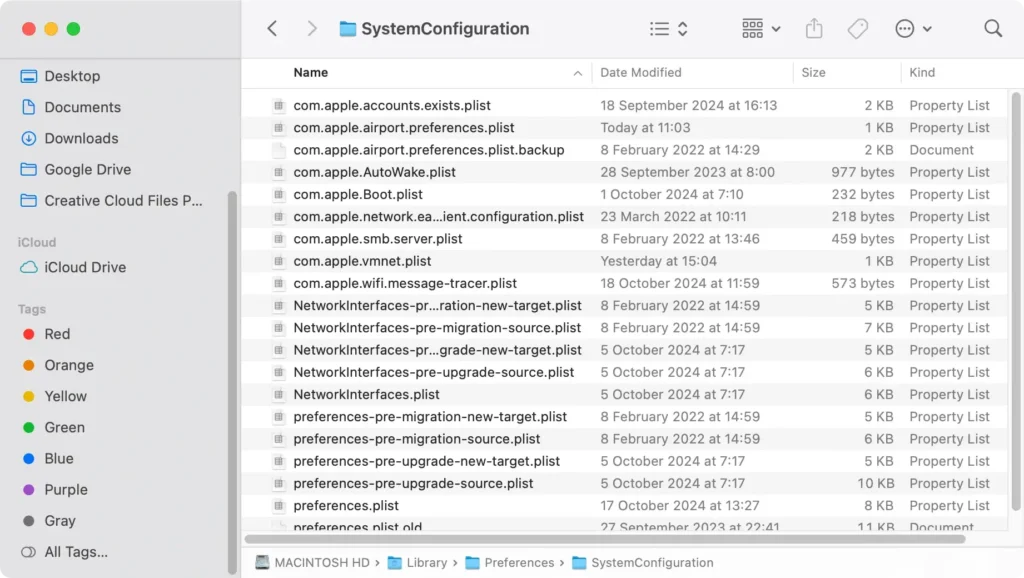
12. Reset system configuration files
If none of the above solutions work, deleting the System Configuration files can resolve deep-seated network issues.
- Open a
Finderwindow. - Press
Command + Shift + G. - Type the following path into the search box:
/Library/Preferences/SystemConfiguration/ - Delete the following files:
com.apple.airport.preferences.plistcom.apple.wifi.message-tracer.plistcom.apple.network.identification.plistcom.apple.network.eapolclient.configuration.plistNetworkInterfaces.plistpreferences.plist
- Reboot your Mac and reconnect to your WiFi.
By following these steps, you should be able to resolve most WiFi problems on macOS Sequoia and restore a stable internet connection to your device.