How To Clean Install macOS Sequoia (Complete Guide)
Before we dive in
Before we dive in, let's make sure you stay safe online. We created SpyHunter because your security matters to us.
Protect your computer today — download SpyHunter right here! Check out our top tips below to keep your computer safe and secure.
If you’re looking to give your Mac a fresh start, performing a clean install of macOS Sequoia might be the perfect solution.
By wiping your system and starting from scratch, you can remove accumulated clutter, boost performance, and enjoy a smoother experience with the latest macOS version.
In this post, we’ll take you through the step-by-step process, from creating a bootable installer to erasing your disk so you can install macOS Sequoia cleanly.
Ready to get your Mac running at its best?
Let’s dive in!
What is a clean install of macOS Sequoia?
To clean install Sequoia essentially means starting fresh with a spotless slate. This means erasing your Mac’s current operating system, wiping all files, photos, and other data, and then installing macOS Sequoia from scratch.
It’s important to remember that when you erase your Mac, all Touch ID fingerprints, card details, and stored passwords will be deleted. If you sync these with iCloud, the passwords and card data will re-sync automatically once you log in. However, you will need to set up Touch ID again from scratch.
This method is particularly beneficial if you want to boost performance, remove junk files, or resolve persistent macOS Sequoia problems. It’s also a great way to ensure a smooth transition to the new operating system, especially on older Macs that might be showing signs of wear.
In the rest of this guide, we’ll walk you through the step-by-step process to clean install macOS Sequoia, whether you’re using an Apple Silicon Mac or an Intel-based Mac.
Before you clean install macOS Sequoia
Before performing a clean install of macOS Sequoia, it’s crucial to prepare your Mac properly.
Skipping these steps could lead to data loss or compatibility issues, making the installation more complicated than it needs to be.
Taking a few moments to ensure your system is ready will save you from potential headaches down the road.
Here’s what you need to do before starting the macOS Sequoia clean installation process:
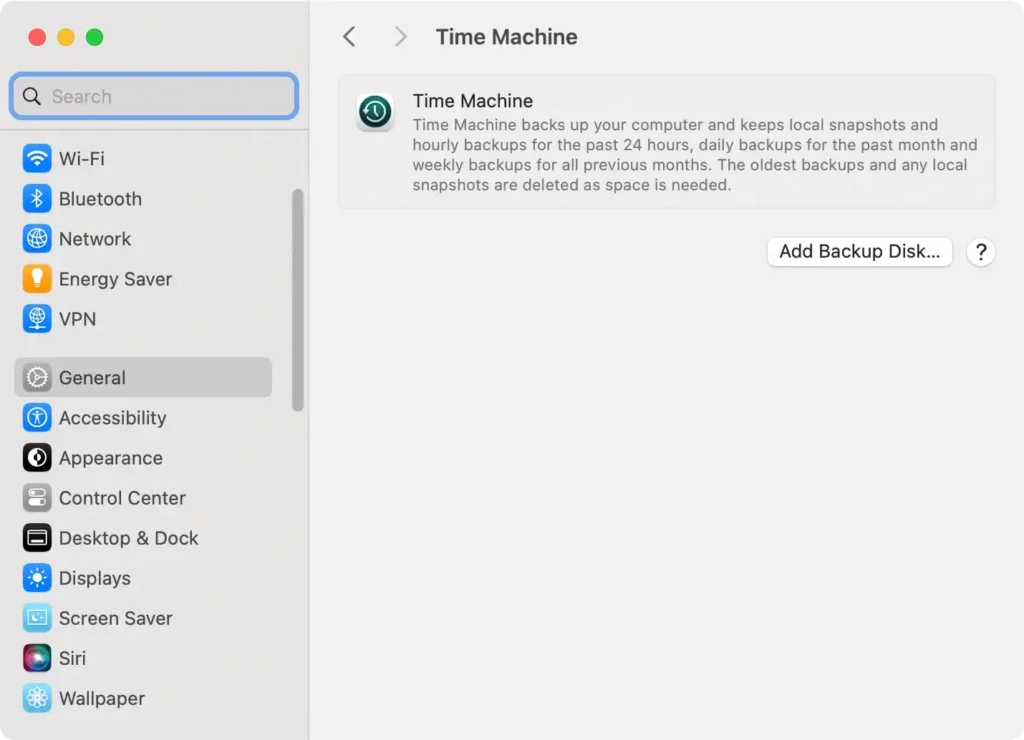
1. Back up your Mac
A clean install will completely erase your startup disk, which means all your personal files, applications, and settings will be wiped. To avoid losing important data, make sure to back up everything before proceeding.
The easiest way to do this is by using Time Machine or an external backup drive. This way, you can restore your files after the installation and keep your important documents safe.
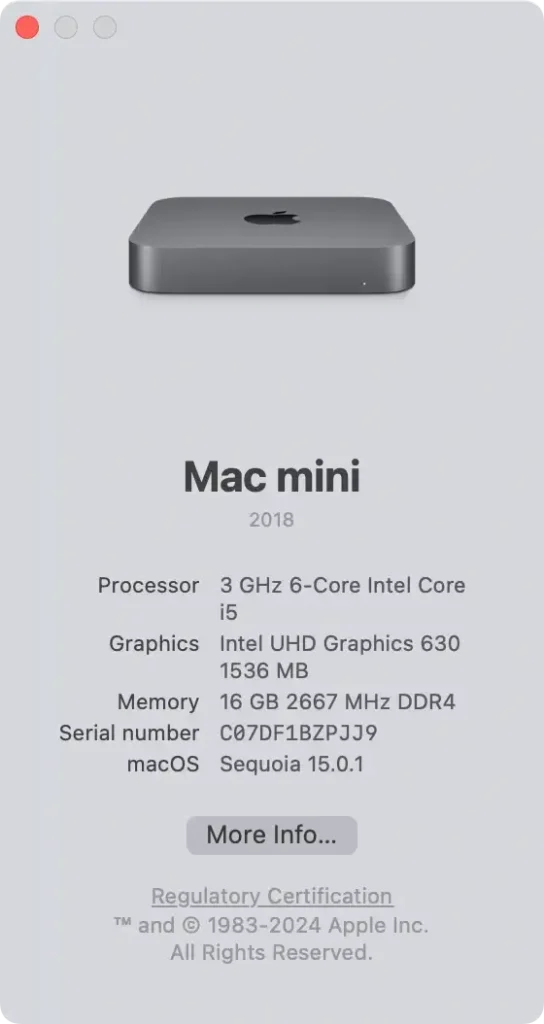
2. Ensure Your Mac is Compatible with macOS Sequoia
Not all Macs are compatible with macOS Sequoia, so it’s essential to check whether your device supports the new OS.
To check your Mac model, click on the Apple menu in the top left corner of your screen, select About This Mac, and review your model details and year.
The new macOS 15 update supports a select range of models. Check if yours is on the list below.
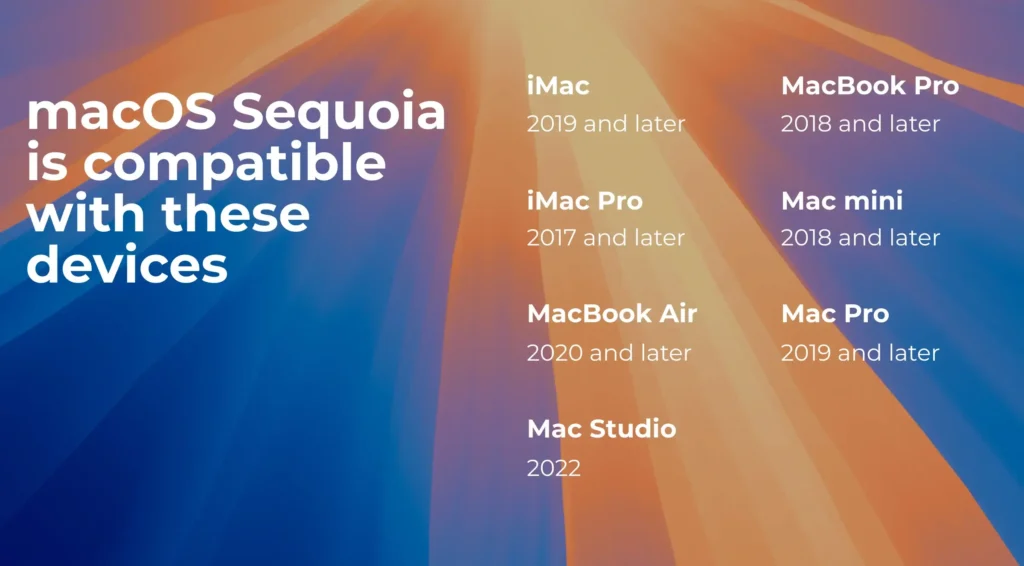
By making sure your Mac is compatible and your data is backed up, you’ll be well-prepared for a smooth macOS Sequoia clean install. Now, you’re ready to move on to the installation process itself!
How to clean install macOS Sequoia
Ready to give your Mac a fresh start with macOS Sequoia? Follow these steps to clean install macOS Sequoia, ensuring everything runs smoothly on your device.
Here’s how to get the job done right.
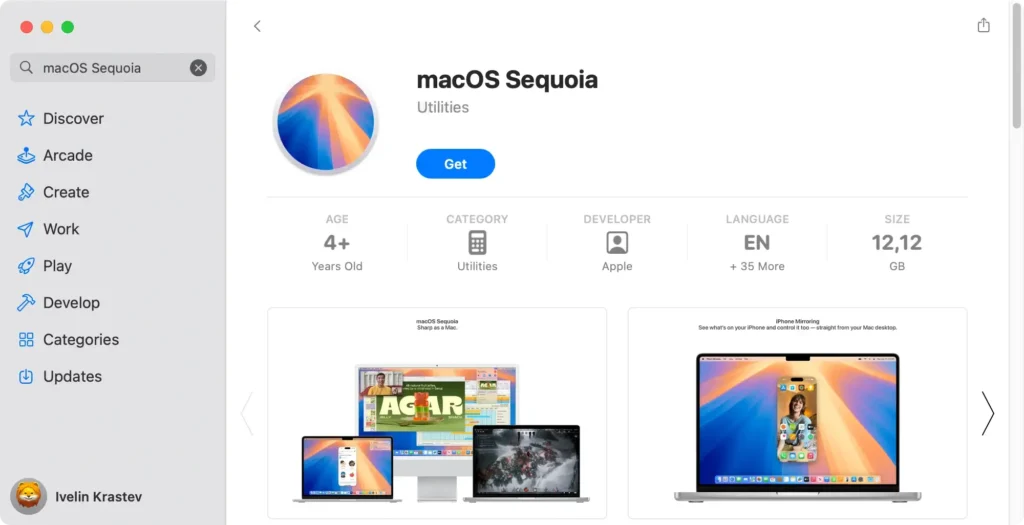
1. Download the macOS Sequoia installer
The first step is to download the official macOS Sequoia installer from Apple’s website or the Mac App Store.
Make sure you have a stable internet connection and enough free disk space to store the installer file.
- Open the Mac App Store or go to
System Settings > Software Update. - Search for macOS Sequoia and click
Get. - The installer will be saved in your
Applicationsfolder once downloaded.
2. Create a bootable USB installer for macOS Sequoia
A bootable USB drive allows you to install macOS Sequoia without relying on an existing OS, which is essential for a clean install.
To create a bootable installer, you’ll need a USB drive with at least 16GB of available storage.
- Insert the USB drive into your Mac.
- Open
Disk UtilityfromApplications > Utilities - Select the USB drive, and click
Erase. - Format it as
Mac OS Extended (Journaled). - Once formatted, open
Terminal. - Enter the following command:
sudo /Applications/Install\ macOS\ Sequoia.app/Contents/Resources/createinstallmedia --volume /Volumes/macOS Installer - Press
Return. - Enter your admin password
- Wait for the process to finish.
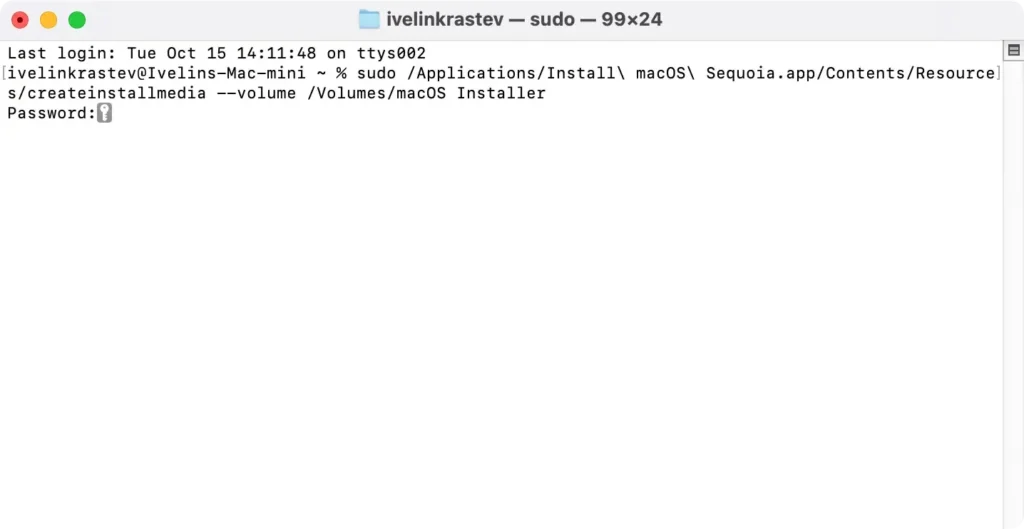
Your USB drive is now a bootable macOS installer.
3. Erase your Mac
Once you’ve created your bootable USB installer, the next step is to erase your startup disk to prepare your Mac for the clean install of macOS Sequoia.
The process differs slightly depending on whether you have an Apple Silicon Mac or an Intel-based Mac.
Follow the instructions that apply to your Mac model.
For Apple Silicon Macs and Intel Macs with a T2 Security Chip:
- Click the Apple logo in the menu bar and select
System Settings. - Navigate to
General > Transfer or Reset.
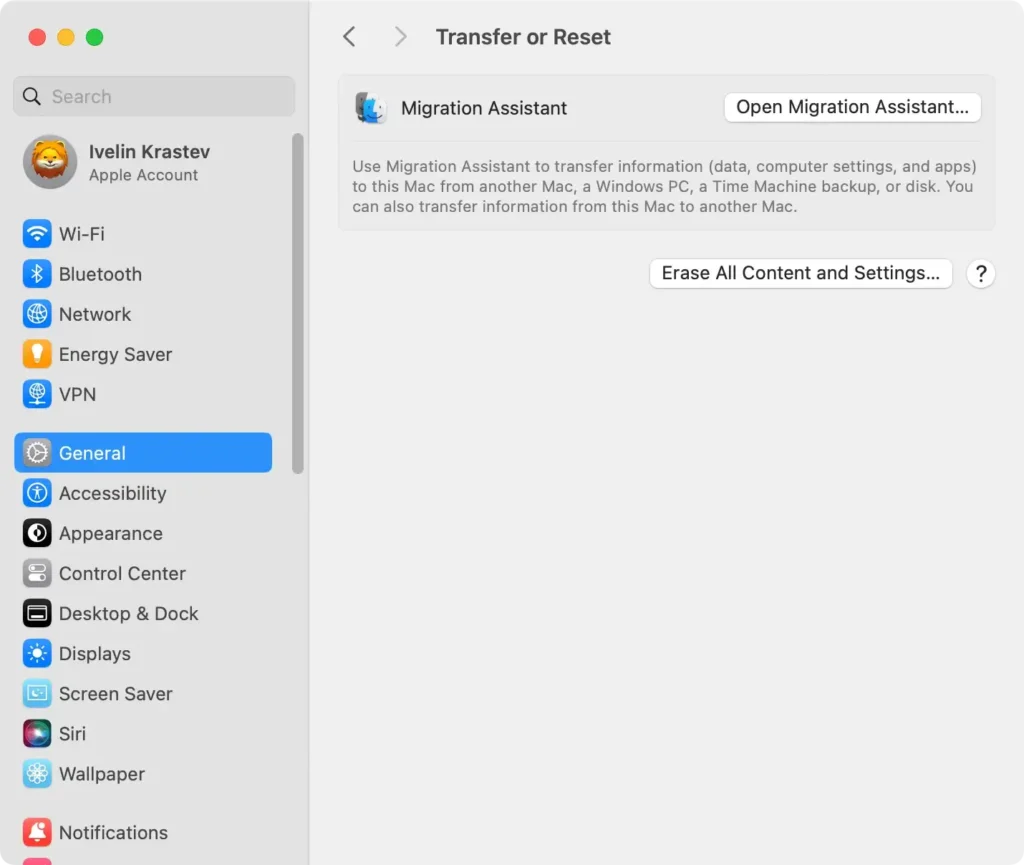
- Choose
Erase All Content and Settings. This option allows you to quickly wipe your Macintosh HD while keeping system settings streamlined for the new macOS Sequoia installation. - Follow the instructions to complete the erasure of your Mac.
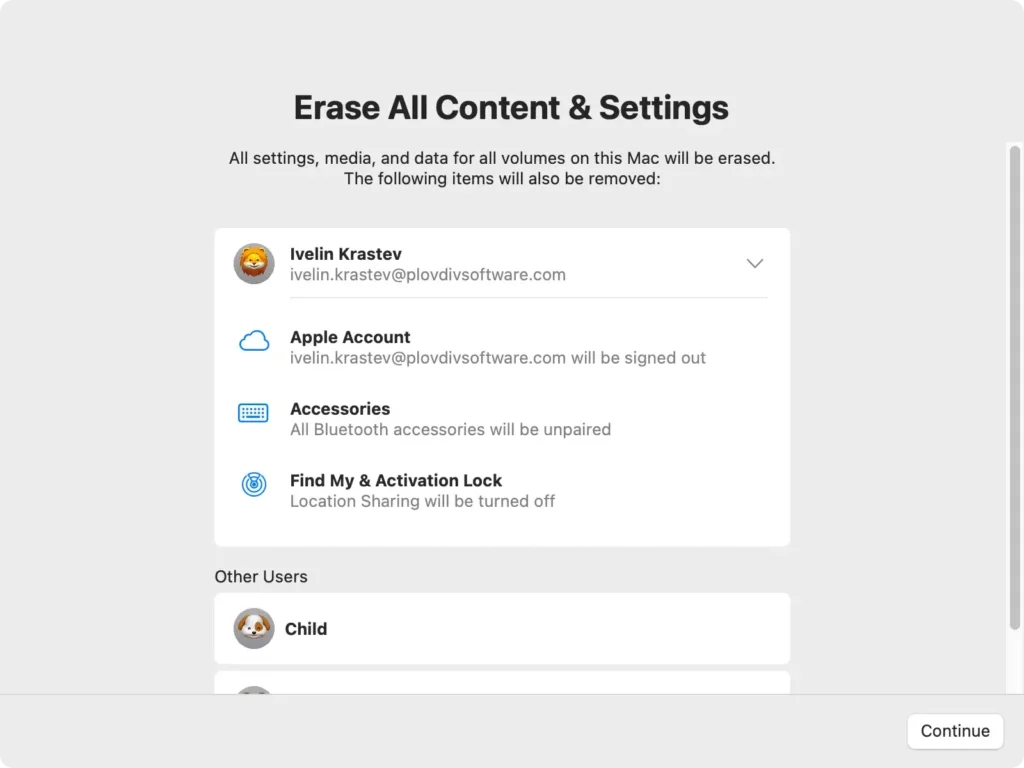
This process simplifies erasing the disk for Apple Silicon and Intel Macs with a T2 security chip, providing a secure and efficient way to prepare your Mac for a clean installation.
For Intel-based Macs (Without T2 Security Chip):
- Shut down your Mac completely.
- Press and hold
Command + Rand then press the power button to boot into Recovery Mode. - Once the macOS Utilities window appears, select
Disk Utility. - In the
Disk Utilitysidebar, select your startup disk (often named Macintosh HD). - Click
Erase, and when prompted, format the disk as APFS (Apple File System). If you’re installing on an older Mac with macOS Ventura or earlier, you may need to chooseMac OS Extended (Journaled). - Select
Eraseagain to confirm and wait for the process to finish.
Once your startup disk is erased and formatted, you’re ready to proceed with the installation of macOS Sequoia.
4. Clean install macOS Sequoia
Now that your Mac computer is wiped clean, it’s time to install macOS Sequoia. Ensure that the USB stick with the bootable installer is still connected to your Mac.
Start by rebooting your Mac:
- If you have a Mac with Apple Silicon, press and hold the power button until you see the startup options screen.
- If you’re using an Intel-based Mac, hold down the
Optionkey as you press the power button.
In both cases, you’ll be presented with the available startup options. Select the bootable USB installer from the list, and wait for your Mac to boot from the USB drive. This may take a few moments, so be patient.
Once your Mac boots from the USB, the macOS Sequoia installer will launch automatically.
To complete the installation:
- Follow the on-screen instructions provided by the installer.
- When prompted, select the freshly erased startup disk (typically labeled Macintosh HD) as the installation location.
- Proceed with the installation prompts, and let the process run.
- Your Mac will restart multiple times throughout the installation.
Once these steps are finished, your Mac will have a fresh, clean installation of macOS Sequoia, fully prepared for you to customize and start using.
5. Finalize the installation of macOS Sequoia
Once the installation is complete, your Mac will guide you through the setup process. You’ll need to:
- Set up your Apple ID, Wi-Fi, and other system preferences.
- Restore your data from the backup from the preparation stage if needed.
- Install any apps or software required for your workflow.
By completing these steps, you’ll have successfully performed a clean install of macOS Sequoia, ensuring that your Mac runs with maximum efficiency and free of any old system clutter or junk files.
How to reinstall macOS Sequoia
If you’re experiencing persistent issues or simply want to start fresh without performing a clean install, you can easily reinstall macOS Sequoia using Recovery Mode.
Here’s how:
- Restart your Mac and hold down
Command + Rduring startup to enter Recovery Mode. - Select
Reinstall macOSfrom themacOS Utilitiesmenu. - Follow the instructions to complete the OS installation process.
- Your Mac will download and install a fresh copy of macOS Sequoia.
This process is ideal if you’re looking to troubleshoot or refresh your Sequoia installation without wiping your entire system.
FAQ: Can I install macOS Sequoia beta now that the official version is out?
No, once the official version of macOS is released, the beta versions are generally no longer available for download.
However, if you’re enrolled in Apple’s developer beta program or public beta testing, you can still test future updates or versions.