How To Uninstall Slack On Mac (Complete Cleanup Guide)

Before we dive in

Trying to uninstall an app completely? SpyHunter for Mac includes an App Uninstaller that removes unwanted apps and their leftover files in just a few clicks.

Avoid clutter and save time — download SpyHunter right here and follow the steps to clean up your system.

Download SpyHunter

Have you ever considered uninstalling Slack from your Mac but weren’t sure why or how to do it effectively?

This guide will provide a straightforward process to remove Slack and its associated files from your system, ensuring your Mac remains optimized for your current needs.

Let’s dive into the steps to efficiently uninstall Slack, freeing up space and potentially improving your Mac’s performance.

Reasons to uninstall Slack on Mac

There are several compelling reasons to consider removing Slack from your Mac:

  • Performance Optimization: Slack can consume significant system resources, potentially slowing down your Mac.
  • Space Conservation: Uninstalling Slack frees up valuable disk space, which is especially important for users with limited storage.
  • Privacy Concerns: Some users may uninstall Slack due to privacy considerations or a desire to limit data sharing.
  • Workflow Simplification: Removing unused or redundant apps, including Slack, can simplify your digital workspace and reduce distractions.
  • Alternative Solutions: Switching to a different communication platform that fits your team’s needs or preferences might require Slack’s removal.
a white cube with colorful shapes on a green and yellow background

Deciding to uninstall Slack can enhance your Mac’s efficiency, safeguard privacy, and better tailor your digital environment to suit your workflow and communication preferences.

Uninstall Slack manually from your Mac

Follow these manual uninstallation steps for a clean and thorough removal of Slack from your Mac.

This process removes the application and any related files and folders that might linger on your system.
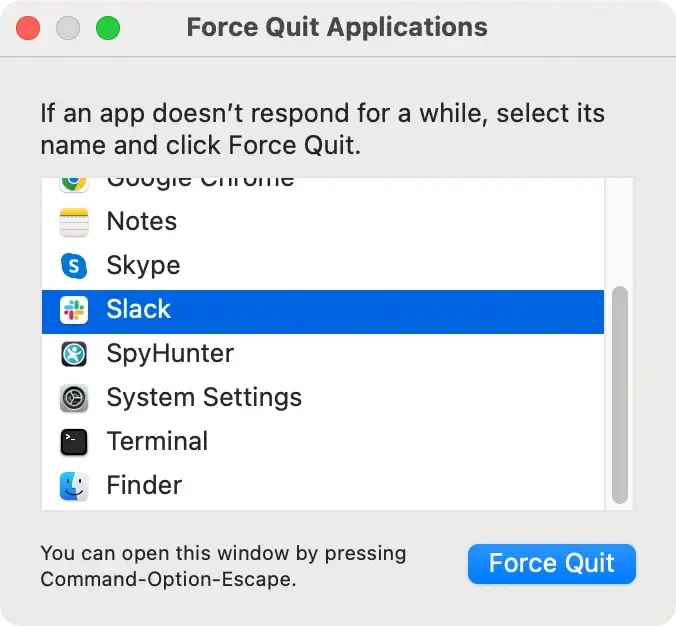
Step 1: Quit Slack

Before proceeding with the uninstallation, make sure Slack is not running.

  1. Check if Slack is active in your Dock. If there’s a dot beneath the Slack icon, it indicates the app is open.
  2. Right-click (or control-click) on the Slack icon in the Dock and choose Quit from the contextual menu.
quit slack app from dock

If Slack doesn’t quit as expected, use the Force Quit option: press Command + Option + Esc and select Slack from the list. Then click the Force Quit button.

force quit slack

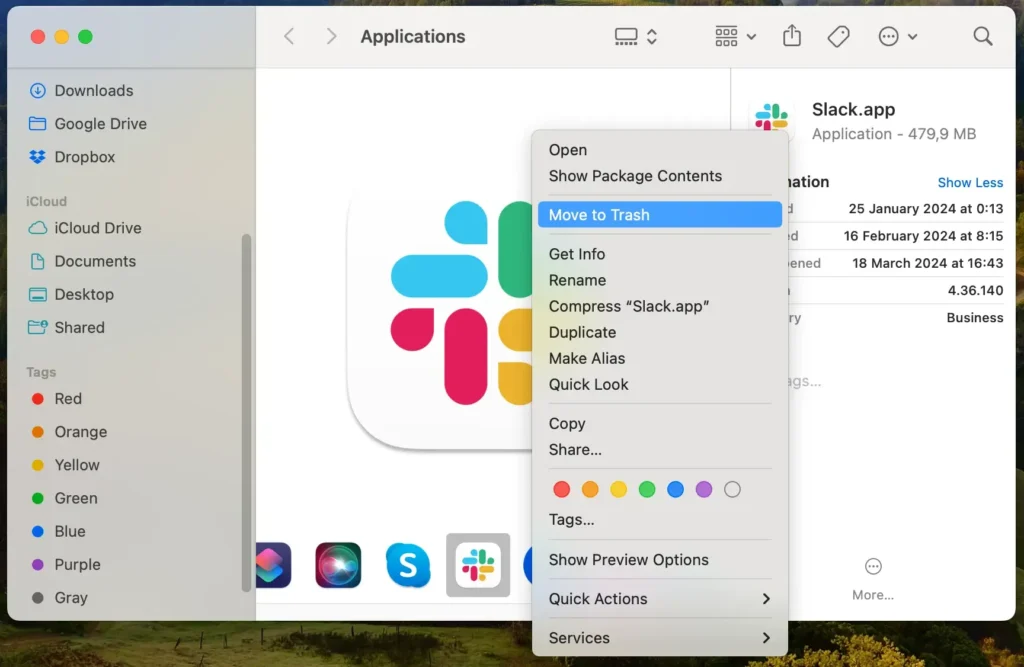
Step 2: Delete the Slack app

After ensuring Slack is completely shut down, the next step involves removing the application from your Mac.

This action clears space and prepares your system for a clean reinstall of Slack, should you choose to do so later.

  1. Open Finder: Navigate to the Finder to begin the uninstallation process.
  2. Access the Applications Folder: In Finder, locate the Applications folder from the sidebar to find all apps installed on your Mac.
  3. Find Slack: Within the apps folder, search for Slack. This can be done by scrolling through the list or using the search feature at the window’s top right corner.
  4. Move to Trash: Once you’ve found Slack, drag it to the Trash bin located in your Dock. Alternatively, you can right-click (or control-click) on the Slack app and select Move to Trash from the dropdown menu.
  5. Empty the Trash: Right-click on the Trash bin and select Empty Trash to ensure you can permanently delete the app.
delete the slack application

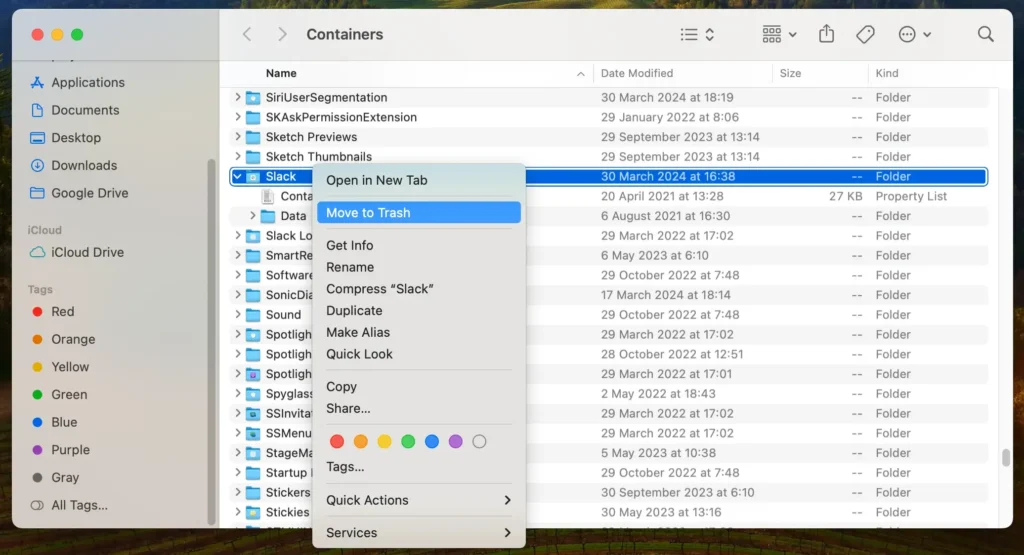
Step 3: Remove Slack-related files and folders

After uninstalling the Slack app, it’s crucial to eliminate any remaining Slack-related files and folders to ensure your Mac is thoroughly cleansed.

These files can include chat history, account settings, and various data that Slack stores outside the main application folder.

  1. Launch Finder: Start by opening a new Finder window to search for residual files.
  2. Go to Folder: Use the Go > Go to Folder option from the Finder menu bar. This lets you navigate directly to specific directories where Slack may have stored files.
  3. Check Common Locations: Enter the following paths into the Go to Folder search box, looking for and removing any Slack-related directories or files:
    • ~/Library/Application Support/ for Slack support files and data.
    • ~/Library/Caches/ to remove Slack’s cache, which can take up space.
    • ~/Library/Preferences/ for any Slack preference files.
    • ~/Library/Logs/ for logs that Slack might have generated.
    • ~/Library/Cookies/ for Slack-related cookie files.
  4. Delete Related Files: For any Slack files you find, move them to the Trash and empty it to permanently remove these files from your Mac.
  5. Restart Your Mac: Restart your Mac to ensure all changes take effect and all Slack residues are fully cleared from the system.
delete slack files and folders

By thoroughly following these steps, you can effectively remove all traces of Slack from your Mac.

This frees up valuable disk space and safeguards your privacy by ensuring that residual data is erased.

Whether you’re planning to reinstall Slack or shift to a different communication tool like Microsoft Teams or Discord, these actions contribute to a more organized and efficient computer.

Completely uninstall Slack using SpyHunter

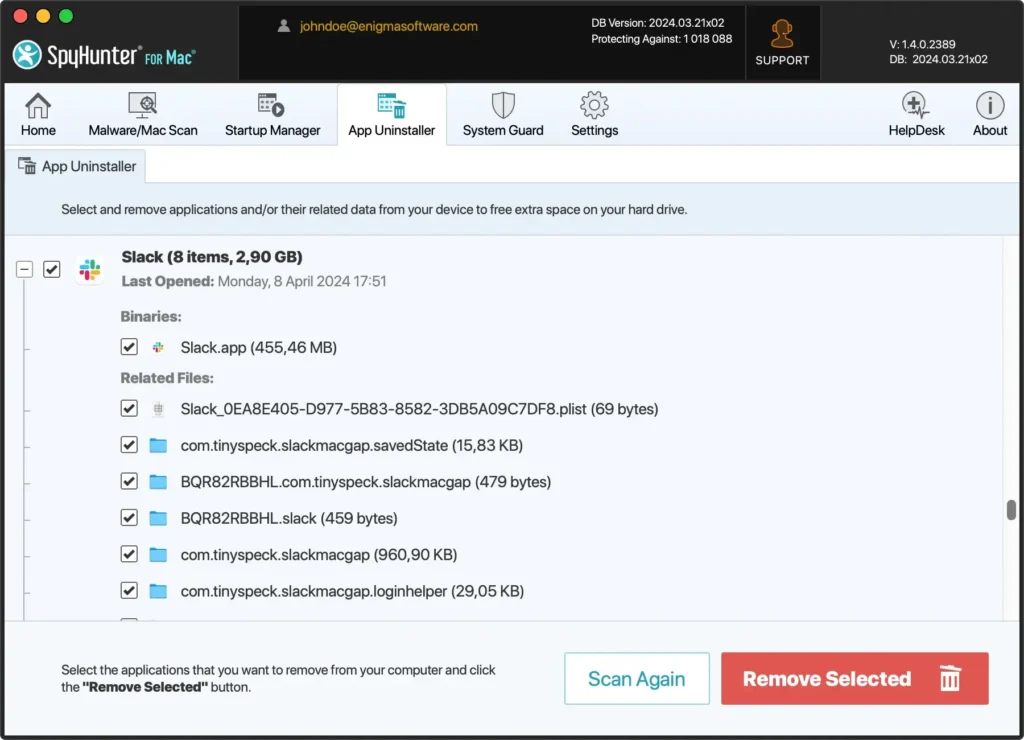
For a thorough and effortless uninstallation of Slack from your Mac, leveraging SpyHunter’s advanced capabilities offers a streamlined solution.

SpyHunter can detect and eliminate the Slack app and any lingering files and associated data that manual removal might miss.

uninstall slack on mac using spyhunter

Here’s how to utilize SpyHunter for a complete Slack removal:

  1. Download SpyHunter from here and follow the on-screen instructions to install the app on your Mac. Administrator permissions may be required.
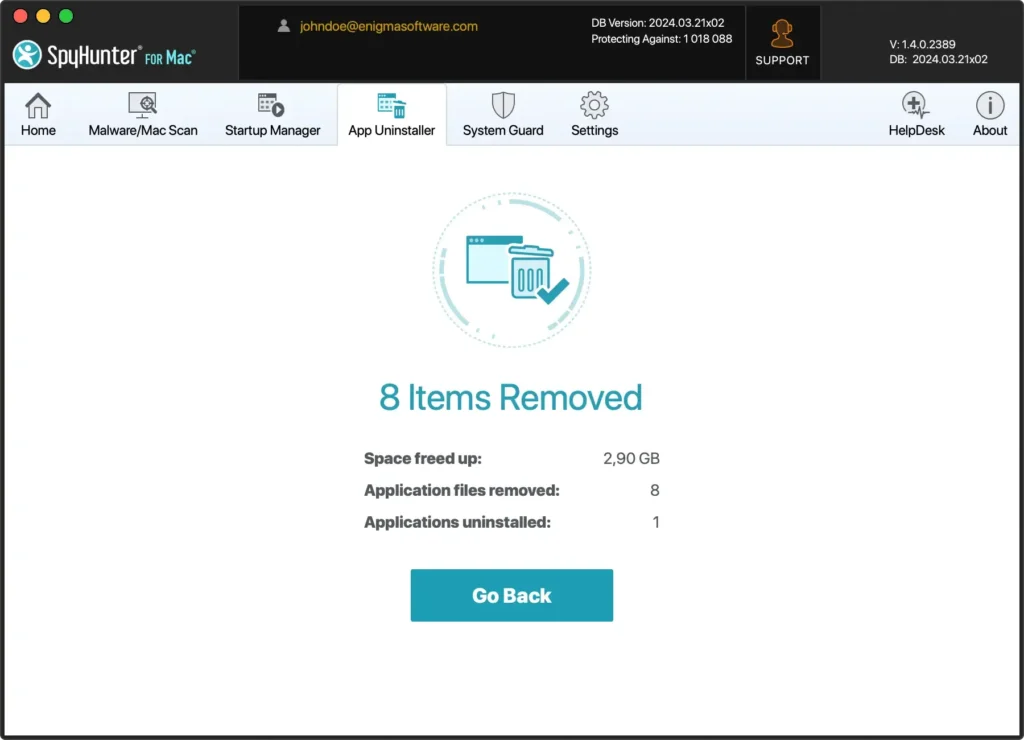
  2. With SpyHunter installed, navigate to the App Uninstaller tab to initiate an application scan. SpyHunter will search for Slack and any related files or leftovers across your system.
  3. After the scan, SpyHunter will display a list of detected items. Find Slack in the list of apps and select it for removal.
  4. Follow SpyHunter’s prompts to remove Slack from your Mac completely.
spyhunter can completely uninstall slack desktop from mac

By using SpyHunter to uninstall Slack, you benefit from an automated, in-depth cleaning process that safeguards your Mac against incomplete removals and enhances your device’s overall health and efficiency.

Transfer Slack workspace ownership

When managing a Slack workspace, there might come a time when you need to transfer ownership to another member.

This could be due to organizational changes, role adjustments, or personal decisions to step down from managing the workspace.

Transferring ownership is a significant action that ensures the continuous, smooth operation of the workspace administration.

Preparation steps

Before initiating the transfer, it’s crucial to prepare both the workspace and its members for the transition:

  • Confirm New Owner’s Account: The intended new owner must already be a workspace member with an active Slack account.
  • Check Permissions: Ensure the new owner has the necessary permissions to accept ownership.
  • Inform the Team: Communicate the upcoming change to the team members to maintain transparency and prepare them for the transition.

How to transfer ownership

  1. The current owner should log into Slack, visit the Slack website, and go to the workspace’s Settings & Permissions via the Settings & Administration option.
  2. In the Manage Members section, locate the future owner’s profile.
  3. Click on the three dots next to the member’s name and click Transfer Workspace Ownership from the menu. Then, follow the on-screen instructions to complete the process.

Final thoughts

Successfully uninstalling Slack from your Mac optimizes device performance and frees up valuable storage space.

By carefully removing Slack and its associated files, users can achieve a more efficient and clean operating system.

Utilizing tools like SpyHunter for Mac enhances this cleanup process by effectively removing app residues and safeguarding against potential security threats, streamlining the maintenance of your Mac’s health.

The transition to a new communication platform can be seamlessly navigated, with various options available to suit different workflows and preferences.

The aim is to foster a streamlined, secure digital workspace on your Mac, enhancing performance and organization.

Share this post on your favorite social media
Keep Your Mac Fast and Secure
Optimize your Mac and stay malware-free with SpyHunter

For a better understanding of our policies, please review our Free Trial Offer below, EULA, and Privacy/Cookie Policy.

SpyHunter Free Trial: Important Terms & Conditions

The SpyHunter Trial version includes, for one device, a one-time 7-day Trial period for SpyHunter 5 Pro (Windows) or SpyHunter for Mac, offering comprehensive malware detection and removal functionality, high-performance guards to actively protect your system from malware threats, and access to our technical support team via the SpyHunter HelpDesk. You will not be charged upfront during the Trial period, although a credit card is required to activate the Trial. (Prepaid credit cards, debit cards, and gift cards are not accepted under this offer.) The requirement for your payment method is to help ensure continuous, uninterrupted security protection during your transition from a Trial to a paid subscription should you decide to purchase. Your payment method will not be charged a payment amount upfront during the Trial, although authorization requests may be sent to your financial institution to verify that your payment method is valid (such authorization submissions are not requests for charges or fees by EnigmaSoft but, depending upon your payment method and/or your financial institution, may reflect on your account availability). You can cancel your Trial by contacting EnigmaSoft’s payment processor (identified in your confirmation email) or EnigmaSoft directly no later than two business days before the 7-day Trial period expires to avoid a charge coming due and being processed immediately after your Trial expires. If you decide to cancel during your Trial, you will immediately lose access to SpyHunter. If, for any reason, you believe a charge was processed that you did not wish to make (which could occur based on system administration, for example), you may also cancel and receive a full refund for the charge any time within 30 days of the date of the purchase charge. See FAQs.

At the end of the Trial, you will be billed upfront immediately at the price and for the subscription period as set forth in the offering materials and registration/purchase page terms (which are incorporated herein by reference; pricing may vary by country per purchase page details) if you have not timely canceled. Pricing typically starts at $72 for 3 months (SpyHunter Pro Windows) and $42 for 3 months (SpyHunter for Mac). Your purchased subscription will be automatically renewed in accordance with the registration/purchase page terms, which provide for automatic renewals at the then applicable standard subscription fee in effect at the time of your original purchase and for the same subscription time period, provided you’re a continuous, uninterrupted subscription user. Please see the purchase page for details. Trial subject to these Terms, your agreement to EULA/TOS, Privacy/Cookie Policy, and Discount Terms. If you wish to uninstall SpyHunter, learn how.

For payment on the automatic renewal of your subscription, an email reminder will be sent to the email address you provided when you registered before your next payment date. At the onset of your trial, you will receive an activation code that is limited to use for only one Trial and for only one device per account. Your subscription will automatically renew at the price and for the subscription period in accordance with the offering materials and registration/purchase page terms (which are incorporated herein by reference; pricing may vary by country per purchase page details), provided that you are a continuous, uninterrupted subscription user. For paid subscription users, if you cancel, you will continue to have access to your product(s) until the end of your paid subscription period. If you wish to receive a refund for your then current subscription period, you must cancel and apply for a refund within 30 days of your most recent purchase, and you will immediately stop receiving full functionality when your refund is processed.

For CALIFORNIA CONSUMERS, please see the notice provisions:
NOTICE TO CALIFORNIA CONSUMERS: Per the California Automatic Renewal Law, you may cancel a subscription as follows:

  1. Go to www.enigmasoftware.com and click the "Login" button at the top right corner.
  2. Log in with your username and password.
  3. In the navigation menu, go to "Order/Licenses." Next to your order/license, a button is available to cancel your subscription if applicable. Note: If you have multiple orders/products, you will need to cancel them on an individual basis.

Should you have any questions or problems, you can contact our EnigmaSoft support team by phone at +1 (888) 360-0646 (USA Toll-Free) / +353 76 680 3523 (Ireland/International) or by email at support@enigmasoftware.com.
How do you cancel a SpyHunter Trial? If your SpyHunter Trial was registered via MyCommerce, you can cancel the trial via MyCommerce by logging into the MyAccount section of MyCommerce (see your confirmation email for further details). You can also contact MyCommerce by phone or email to cancel. To contact MyCommerce via phone, you can call +1-800-406-4966 (USA Toll-Free) or +1-952-646-5022 (24x7x356). You can contact MyCommerce by e-mail at ordersupport@mycommerce.com. You can easily identify if your trial was registered via MyCommerce by checking the confirmation emails that were sent to you upon registration. Alternatively, all users may also contact EnigmaSoft Limited directly. Users can contact our technical support team by emailing support@enigmasoftware.com, opening a ticket in the SpyHunter HelpDesk, or calling +1 (888) 360-0646 (USA) / +353 76 680 3523 (Ireland/International). You can access the SpyHunter HelpDesk from SpyHunter's main screen. To open a support ticket, click on the "HelpDesk" icon. In the window that appears, click the "New Ticket" tab. Fill out the form and click the "Submit" button. If you are unsure of what "Problem Type" to select, please choose the "General Questions" option. Our support agents will promptly process your request and respond to you.

———

SpyHunter Purchase Details
You also have the choice of subscribing to SpyHunter immediately for full functionality, including malware removal and access to our support department via our HelpDesk, typically starting at $42 for 3 months (SpyHunter Basic Windows) and $42 for 3 months (SpyHunter for Mac) in accordance with the offering materials and registration/purchase page terms (which are incorporated herein by reference; pricing may vary by country per purchase page details). Your subscription will automatically renew at the then applicable standard subscription fee in effect at the time of your original purchase subscription and for the same subscription time period, provided you’re a continuous, uninterrupted subscription user and for which you will receive a notice of upcoming charges before the expiration of your subscription. Purchase of SpyHunter is subject to the terms and conditions on the purchase page, EULA/TOS, Privacy/Cookie Policy and Discount Terms.

———

General Terms
Any purchase for SpyHunter under a discounted price is valid for the offered discounted subscription term. After that, the then applicable standard pricing will apply for automatic renewals and/or future purchases. Pricing is subject to change, although we will notify you in advance of price changes.
All SpyHunter versions are subject to your agreeing to our EULA/TOS, Privacy/Cookie Policy, and Discount Terms. Please also see our FAQs and Threat Assessment Criteria. If you wish to uninstall SpyHunter, learn how.