macOS Sequoia Not Recognizing USB Drive? Try These 13 Fixes
Before we dive in
Before we dive in, let's make sure you stay safe online. We created SpyHunter because your security matters to us.
Protect your computer today — download SpyHunter right here! Check out our top tips below to keep your computer safe and secure.
Is your USB drive not recognized on macOS Sequoia? Many Mac users face this frustrating issue, especially after updating to the latest version.
Whether it’s a flash drive, external disk, or another USB device, it’s tough when your Mac fails to detect it.
This can disrupt workflows, prevent access to important files, and even affect your backup processes.
But don’t worry—there are several solutions to help you get your USB devices working again.
Let’s dive into the solutions so you can quickly resolve any connection issues and get your USB devices back up and running smoothly on macOS Sequoia.
But first:
What causes USB device issues on macOS Sequoia?
When macOS Sequoia fails to recognize a USB drive, it can be due to several underlying issues. Here are some common reasons your USB devices might not be recognized:
- Faulty or incompatible USB ports or cables
- Flash drive formatted with an unsupported or corrupted file system
- Insufficient power supply to the connected external drive
- Security and privacy settings blocking access to USB flash drives
- Hardware failure in the USB flash drive/external drive
- Unstable system settings following the update to macOS Sequoia
Identifying these common issues can help you pinpoint the source of the problem and quickly resolve it.
Next, we’ll explore practical fixes to get your USB flash drives recognized on macOS Sequoia.
How to fix macOS Sequoia not recognizing USB drives
If macOS Sequoia isn’t recognizing your USB drive or is disconnecting from it, try these troubleshooting steps to get your USB devices working again.
Each solution is easy to follow and helps address different issues that could be affecting the connection.
1. Check the USB port
Begin by testing the USB port where you’ve connected the USB drive. Ports can wear out or even malfunction over time, so testing multiple ports is a straightforward way to rule out physical damage.
- Try plugging the USB drive into another USB port on your Mac desktop or MacBook. If you have multiple types of ports (e.g., USB-C and USB-A), test both to see if there’s a difference.
- If possible, use the same port with another flash drive (like a USB flash drive) to confirm if the port itself is functional.
- Make sure that no dust or debris is blocking the USB port. Sometimes, small particles can disrupt the connection between your USB drive and your Mac.
If the USB drive works fine in another port, the initial port may have an issue and might need professional repair.
2. Try a different cable
When using external disks that connect through a USB cable, the cable itself may be the culprit. A damaged or incompatible cable can prevent data from transferring and cause the USB drive not to be recognized.
Try using a different cable, ideally a high-quality or Apple-certified one. Connect the USB drive with the new cable and observe if macOS Sequoia recognizes it.
3. Reboot your Mac
Restarting your Mac refreshes system preferences and can resolve minor software glitches, including issues with flash drives not being recognized.
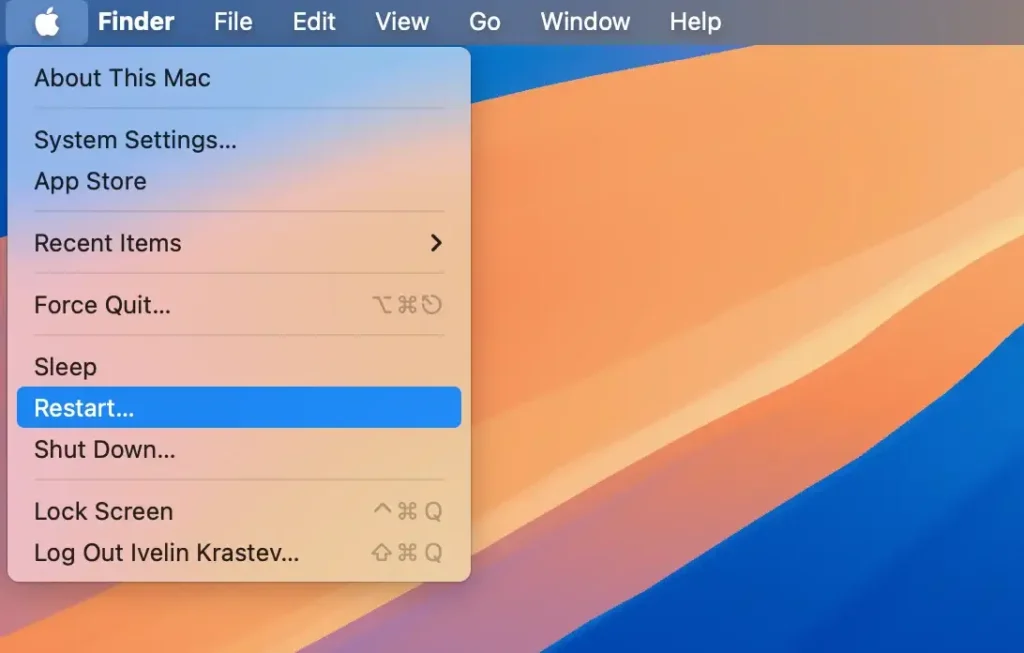
- Click on the Apple menu in the upper-left corner of your screen.
- Select
Restartfrom the dropdown menu. - Confirm when prompted.
Wait for your Mac to restart. Then, reconnect your flash drive to check if macOS Sequoia now detects it.
4. Plug the flash drive on another computer
If your USB drive isn’t recognized on macOS Sequoia, try connecting it to a different computer.
Testing it on another Mac or even a Windows PC can help determine if the issue is specific to your macOS Sequoia device or if the flash drive itself is faulty.
If the USB flash drive works on another device, the problem likely lies with macOS Sequoia’s system settings or USB port compatibility.
If it doesn’t work on any Mac or PC, there might be an issue with the USB drive.
This simple test can save you time and help you decide if further troubleshooting is necessary on your Mac or if the flash drive may need repair or replacement.
5. Check for software updates
Outdated software can cause compatibility issues with USB devices on macOS Sequoia.
Keeping your Mac updated ensures that you have the latest bug fixes and performance improvements for recognizing USB devices.
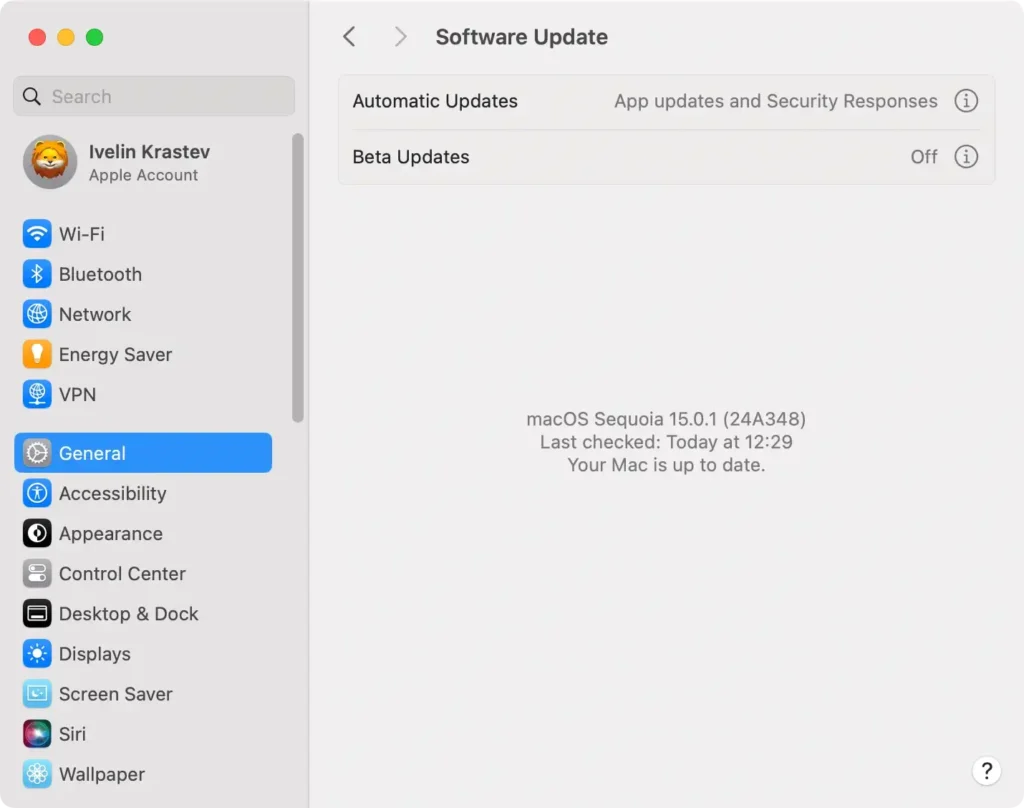
- Open
System Settingsfrom the Apple menu. - Go to
Software Updateand allow your Mac to check for updates. - If updates are available, click
Update Nowand follow the on-screen prompts.
6. Verify the USB drive in Disk Utility
If macOS Sequoia detects the USB device but does not automatically mount it, you can use Disk Utility to force a manual mount.
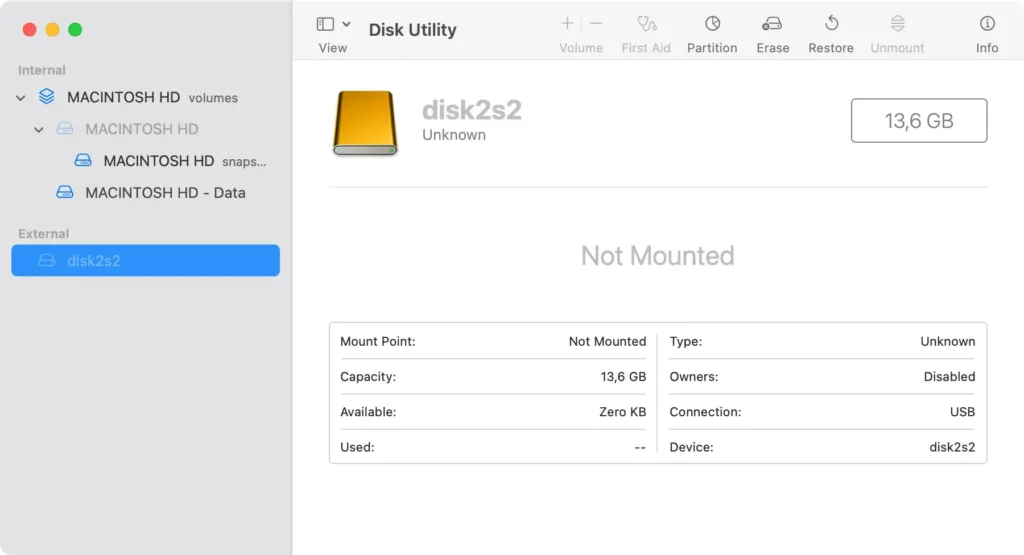
- Open
Disk Utilityby going toApplications > Utilities > Disk Utility. - Locate your USB flash drive in the sidebar. If it appears but is greyed out, it means it’s not mounted.
- Select the USB device and click
Mountin the toolbar.
If Disk Utility cannot mount the drive, the issue may be more complex, and the drive could require reformatting or repair.
7. Reformat the USB drive
If macOS Sequoia cannot read the flash drive due to an unsupported file system, reformatting the drive in a compatible format can resolve the issue.
Important: Reformatting erases all data on the drive.
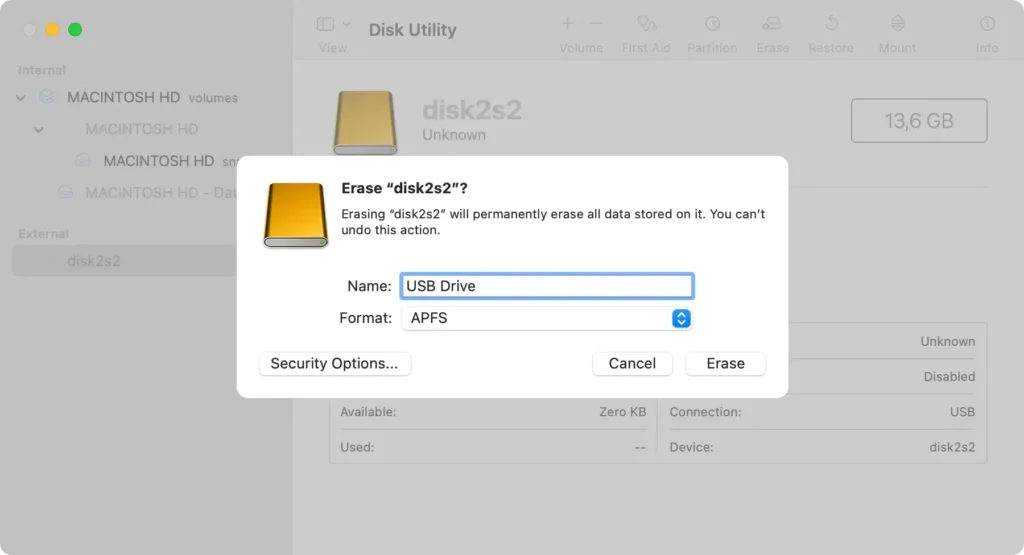
- Open
Disk Utilityand select the USB drive from the sidebar. - Click
Erasein the toolbar - Choose a format compatible with macOS like
APFSorMac OS Extended (Journaled), and rename the drive. - Click
Eraseagain to confirm. - Once complete, reconnect the USB drive.
8. Mount the USB drive in Terminal
For situations where Disk Utility cannot mount your USB drive, Terminal can provide a more direct approach.
- Open
TerminalfromApplications > Utilities. - Type
diskutil listand pressEnter. This command will display all connected disks, including identifiers like disk2 for your USB drive. - Once you identify the correct disk (e.g., disk2), type
diskutil mount disk2(replace disk2 with your specific identifier) and pressEnter.
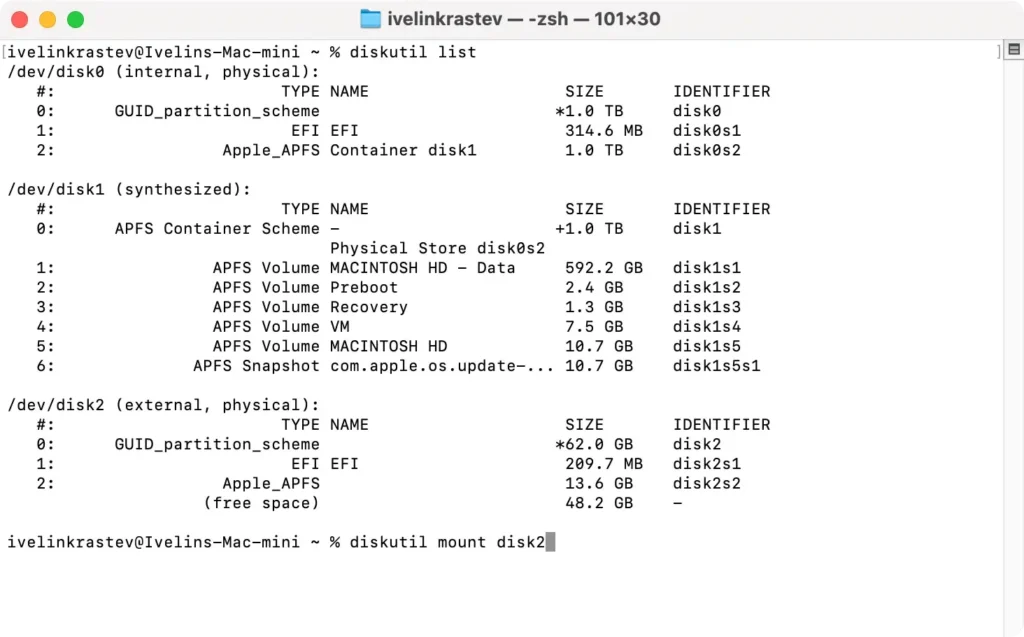
Using Terminal to mount the drive manually can sometimes help macOS Sequoia recognize drives that were otherwise inaccessible.
9. Test with a power supply
Larger external drives often require more power than a Mac USB port alone can provide. Connecting your drive to a powered USB hub can stabilize the connection.
Plug the powered dock or hub to your Mac and observe whether the drive appears. This can determine if the external drive needs additional power to operate correctly.
10. Modify Finder settings
Sometimes, macOS Sequoia doesn’t show external hard drives simply because the Finder app isn’t set up to display them.
A quick settings adjustment in Finder can make your USB drive visible on your Mac desktop or Finder sidebar.
Here’s how to check and fix it:
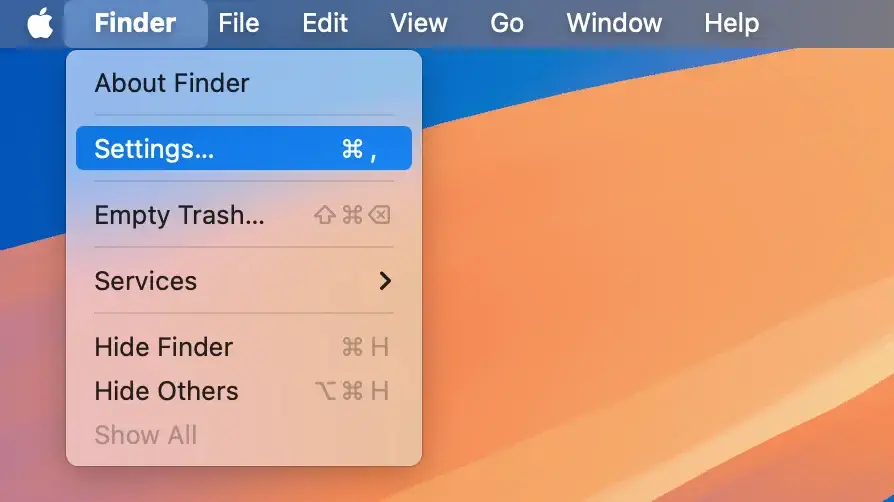
- Click
Finderin the top-left corner of your screen and selectSettingsfrom the dropdown menu.
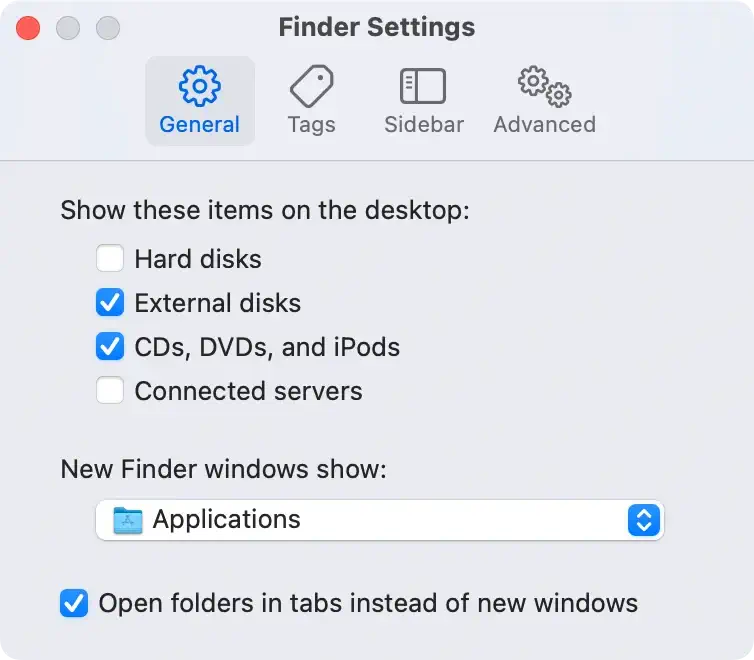
- In the
Generaltab of Finder Preferences, check the box next toExternal disksto make your USB device visible on the desktop.
- Switch to the
Sidebartab in Finder Preferences. UnderLocations, ensureExternal disksis checked here as well, so it appears in theFindersidebar.
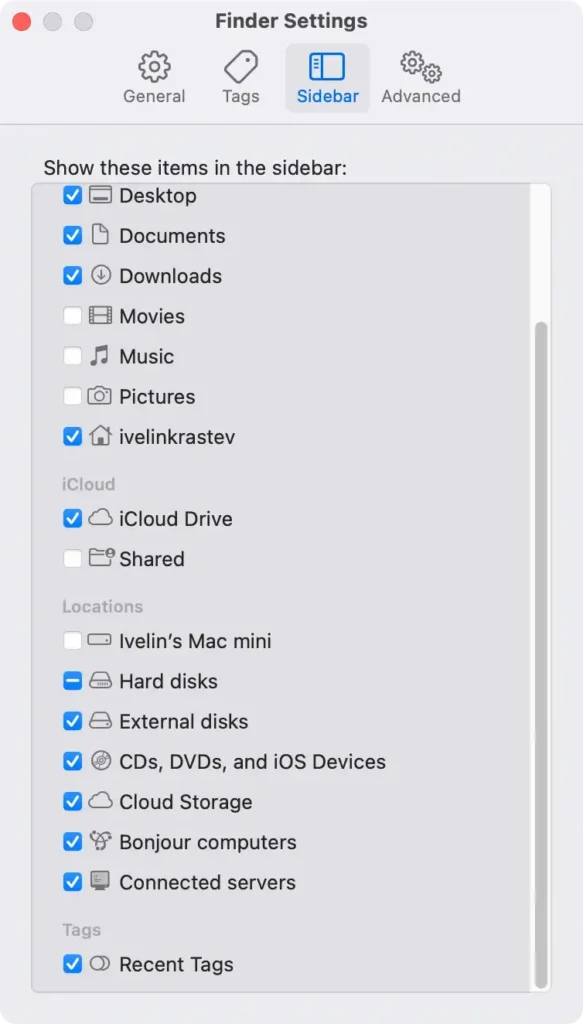
Once you’ve adjusted these settings, reconnect your USB drive to see if it now appears on the desktop or in Finder. This small change can often solve visibility issues with external drives on macOS Sequoia.
11. Boot your Mac in Safe Mode
Safe Mode turns off non-essential services, which can help identify software conflicts affecting USB device recognition.
- For Apple Silicon Macs: Shut down your Mac. Hold the Power button until the startup options appear, select your startup disk, then hold
Shiftand clickContinuein Safe Mode. - For Intel-based Macs: Shut down your Mac. Restart while holding the
Shiftkey until the login screen appears.
Once in Safe Mode, reconnect your USB flash drive and check if it appears.
12. Reset NVRAM
Resetting NVRAM can resolve settings issues that might prevent external USB devices from being recognized on a Mac.
- Shut down your Mac.
- Turn it on and immediately press
Option + Command + P + R. - Hold the keys for 20 seconds, then release them once the startup chime sounds.
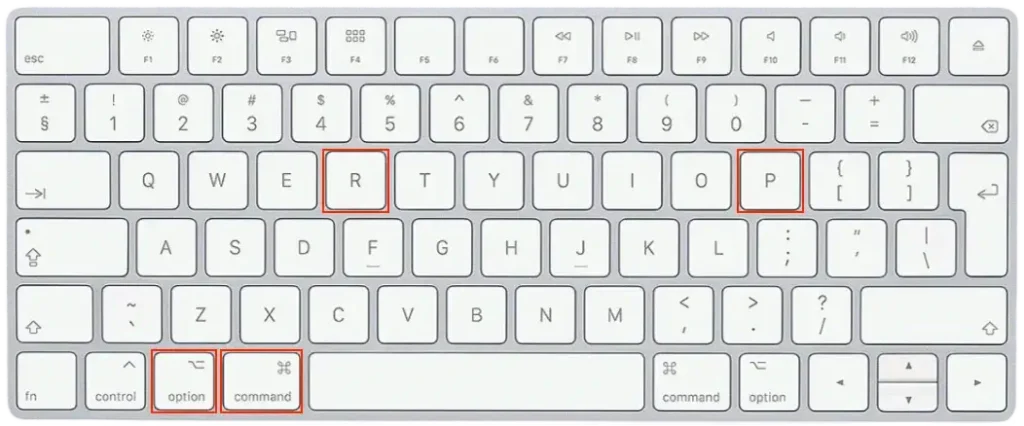
Resetting NVRAM clears saved settings, which may help your Mac detect the USB device.
If you’ve tried all the above fixes and your USB drive is still not recognized, give your Mac some time—sometimes, it performs background tasks that can affect connectivity.
Additionally, if none of these steps work, it could be worth contacting Apple Support, as there may be a deeper issue with your USB device or macOS Sequoia.
USB keyboard or mouse not working on macOS Sequoia?
If your USB keyboard or mouse isn’t working after upgrading to macOS Sequoia, there could be a few reasons for the issue:
- Faulty keyboard or mouse: Try connecting a different USB keyboard or mouse to see if the problem persists.
- Problem with the USB cable: If the device is removable or has a replaceable cable, try a different one.
- Faulty USB port: Connect the device to a different USB port on your Mac to determine if the original port is defective.
If the device is connected via a USB hub, try plugging it directly into your Mac instead.
Testing with another USB drive can help identify if the issue is with the USB port or the peripheral itself.
If none of these steps resolve the issue, restarting your Mac or checking for the latest system updates may help.