Free Up Disk Space Mac [7 Effective Strategies Explained]
Before we dive in
Before we dive in, let's make sure you stay safe online. We created SpyHunter because your security matters to us.
Protect your computer today — download SpyHunter right here! Check out our top tips below to keep your computer safe and secure.
Struggling to manage space on your Mac? A cluttered hard drive can slow down your device and reduce efficiency.
This guide outlines 7 straightforward strategies to free up disk space on your Mac, ensuring smooth and optimal performance.
Whether you’re a seasoned Mac user or new to the ecosystem, these tips will give you the knowledge you need to optimize your storage space effectively. Let’s dive into how you can maximize space on your Mac, keeping it running like new.
1. Remove junk files and system data: Free up space on Mac
As you navigate the daily tasks on your Mac, system junk files will inevitably start to gather, stealthily eating away at your available disk space.
While initially serving essential functions for your macOS and applications, these files often remain long after they’re needed, cluttering your storage and potentially slowing down your Mac.
Understanding the role these files play in the regular operation of your system and apps is crucial. Their buildup, however, can significantly impact your Mac’s efficiency over time.
To reclaim your storage space and enhance your Mac’s performance, it’s important to recognize several typical junk file varieties:
- App leftovers: Residual files from removed apps.
- System and app caches/logs: Temp files supporting system and app processes.
- Corrupt preference files: Damaged app configuration files.
- Extra language resources: Unneeded localization files for app languages you don’t use.
- Mail attachments: Stored email attachments, including photos and documents.
- Outdated app versions: Previous updates and versions of your applications.
Manually sorting through and deleting these system junk files might seem daunting and pose the risk of mistakenly removing critical system files.
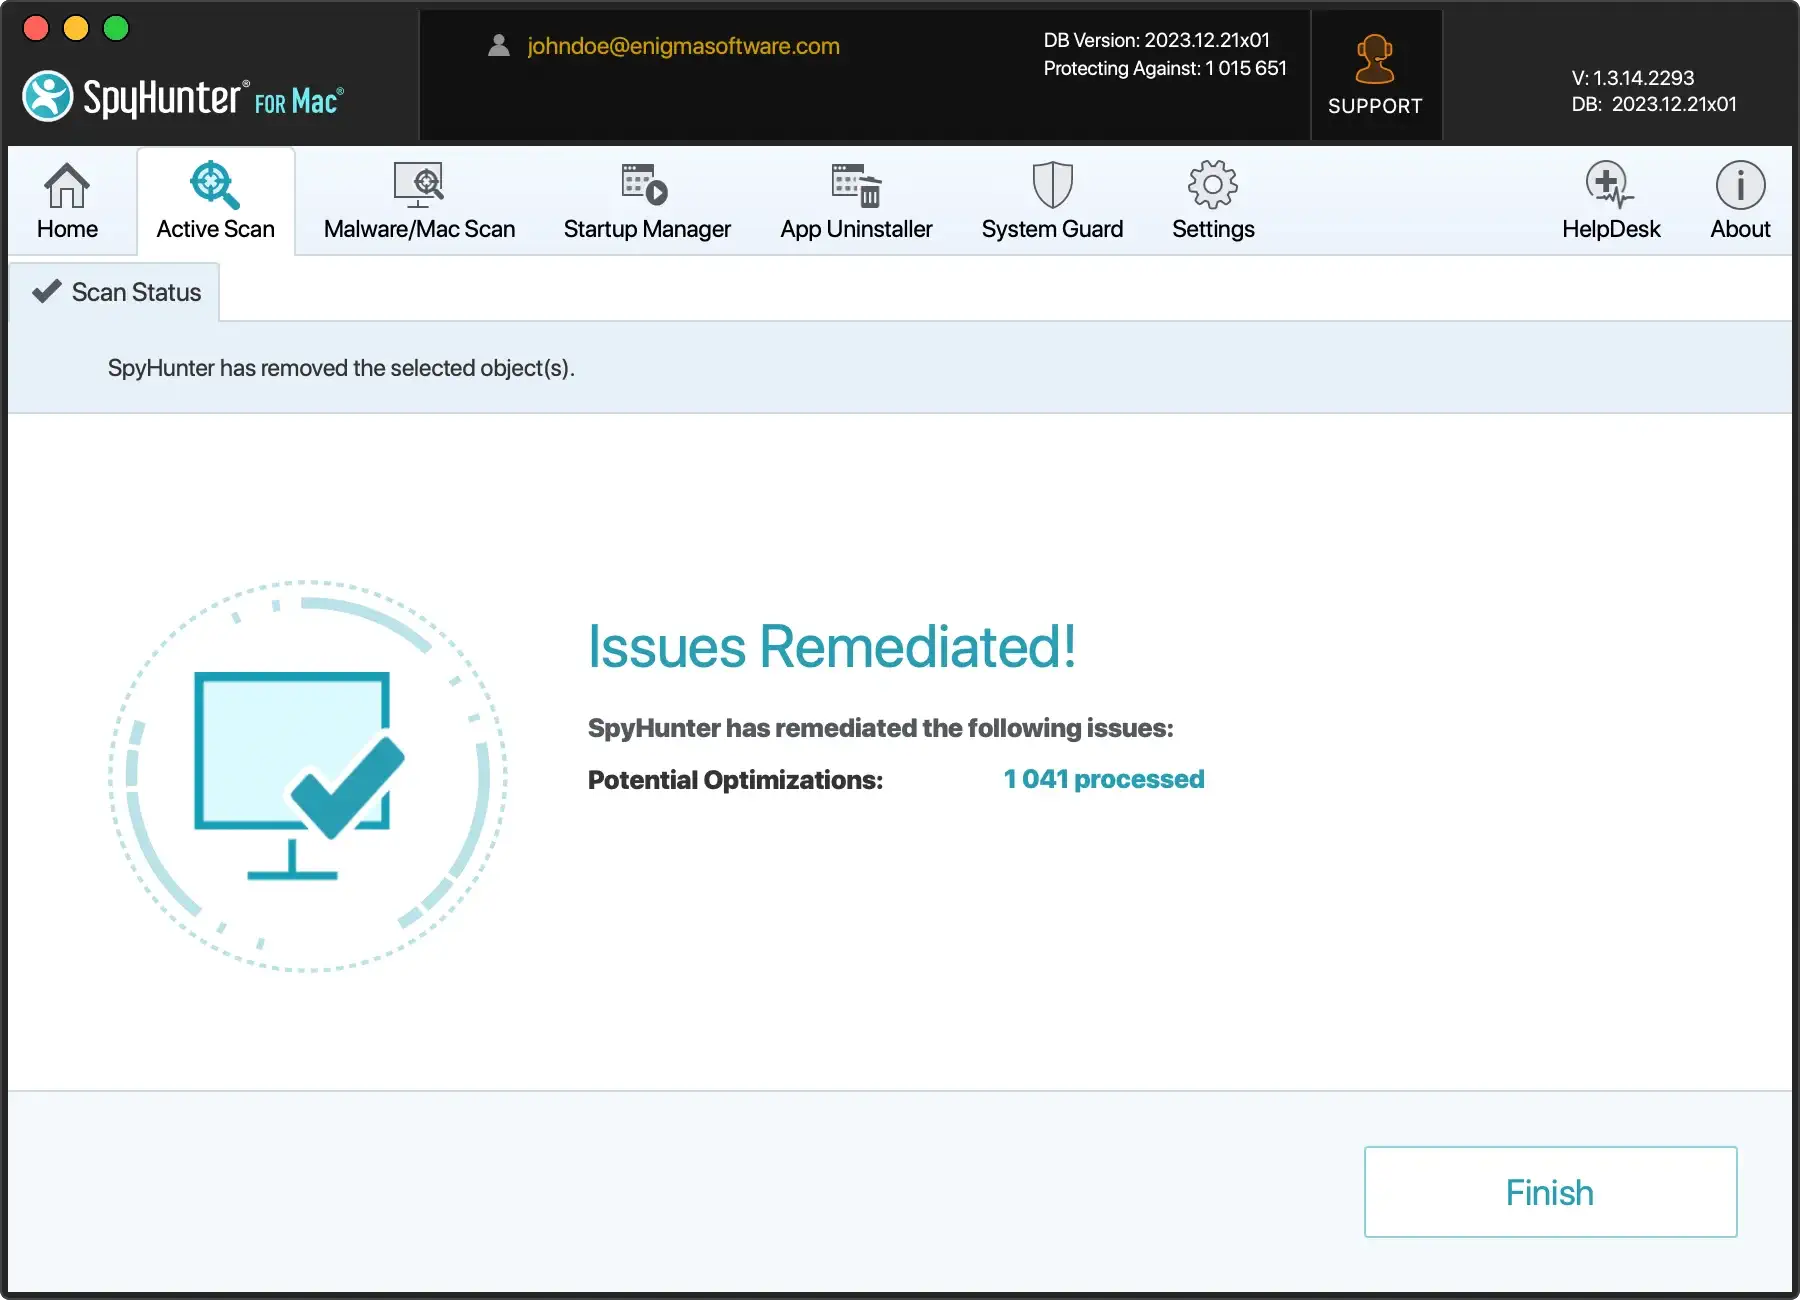
Consider using a dedicated tool like SpyHunter for Mac for a safe and efficient cleanup. This advanced solution targets malware and excels in system optimization and cleaning up unnecessary files with built-in tools.
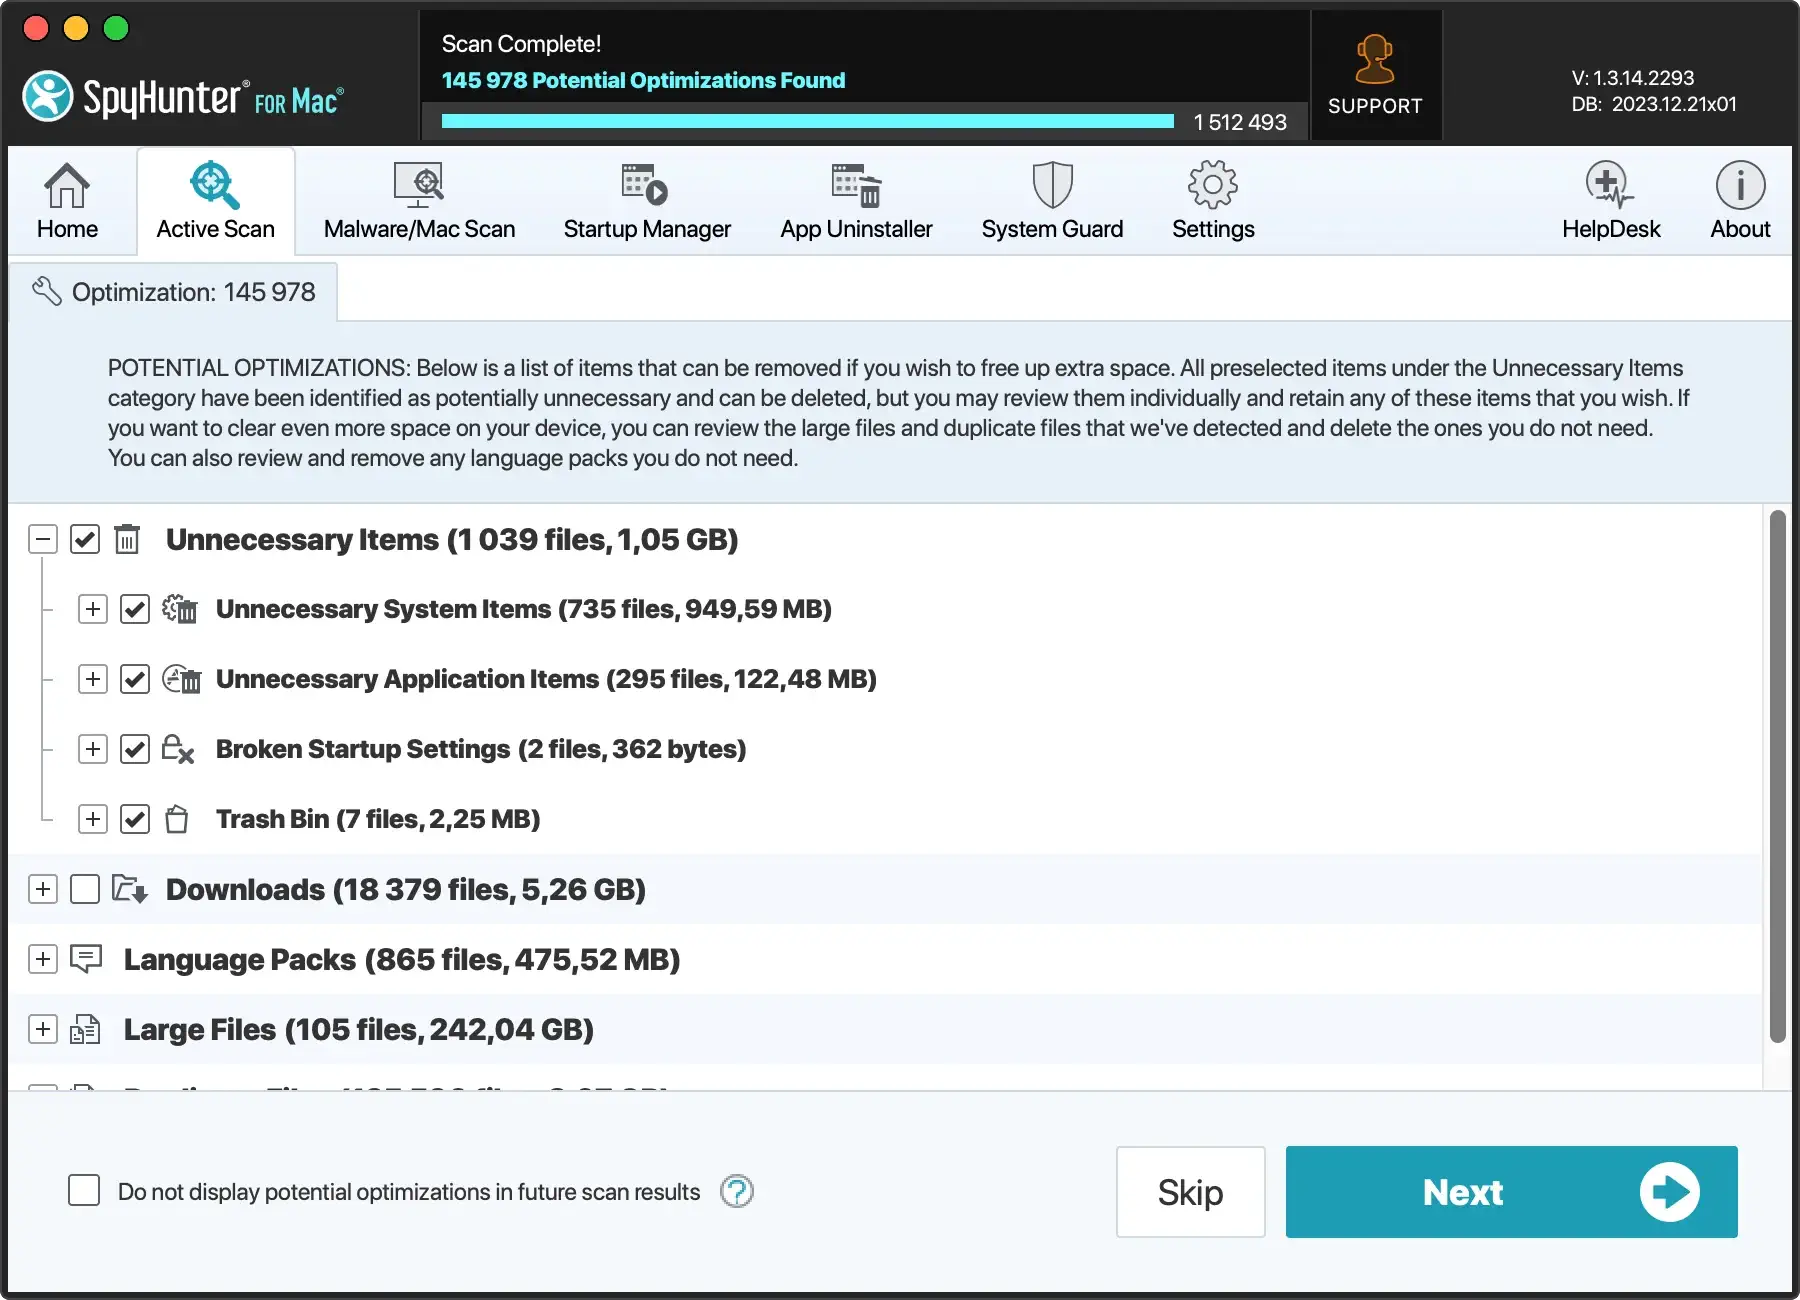
Download SpyHunter for free here and empower your Mac with a comprehensive tool that scans for and identifies expendable data, streamlining the process of freeing up disk space.
Follow the simple installation steps, let SpyHunter do its work, and soon, you’ll enjoy a cleaner, faster Mac with plenty of space for what truly matters.
2. Organize your Downloads folder: Maximize free space on Mac
Is your Downloads folder overflowing with files, slowly eating away at the available space on your Mac? It’s a common sight: a digital archive of downloads that seemed important but now merely contribute to the clutter.
Fortunately, clearing out your Downloads can significantly free up disk space, enhancing your Mac’s performance.
Why focus on your Downloads?
This folder is a prime contributor to unnecessary storage, acting as a default landing spot for media files, documents, and applications.
Left unchecked, it takes up precious space on your Mac and affects how much free space you have for essential tasks.
Practical steps to free up disk space:
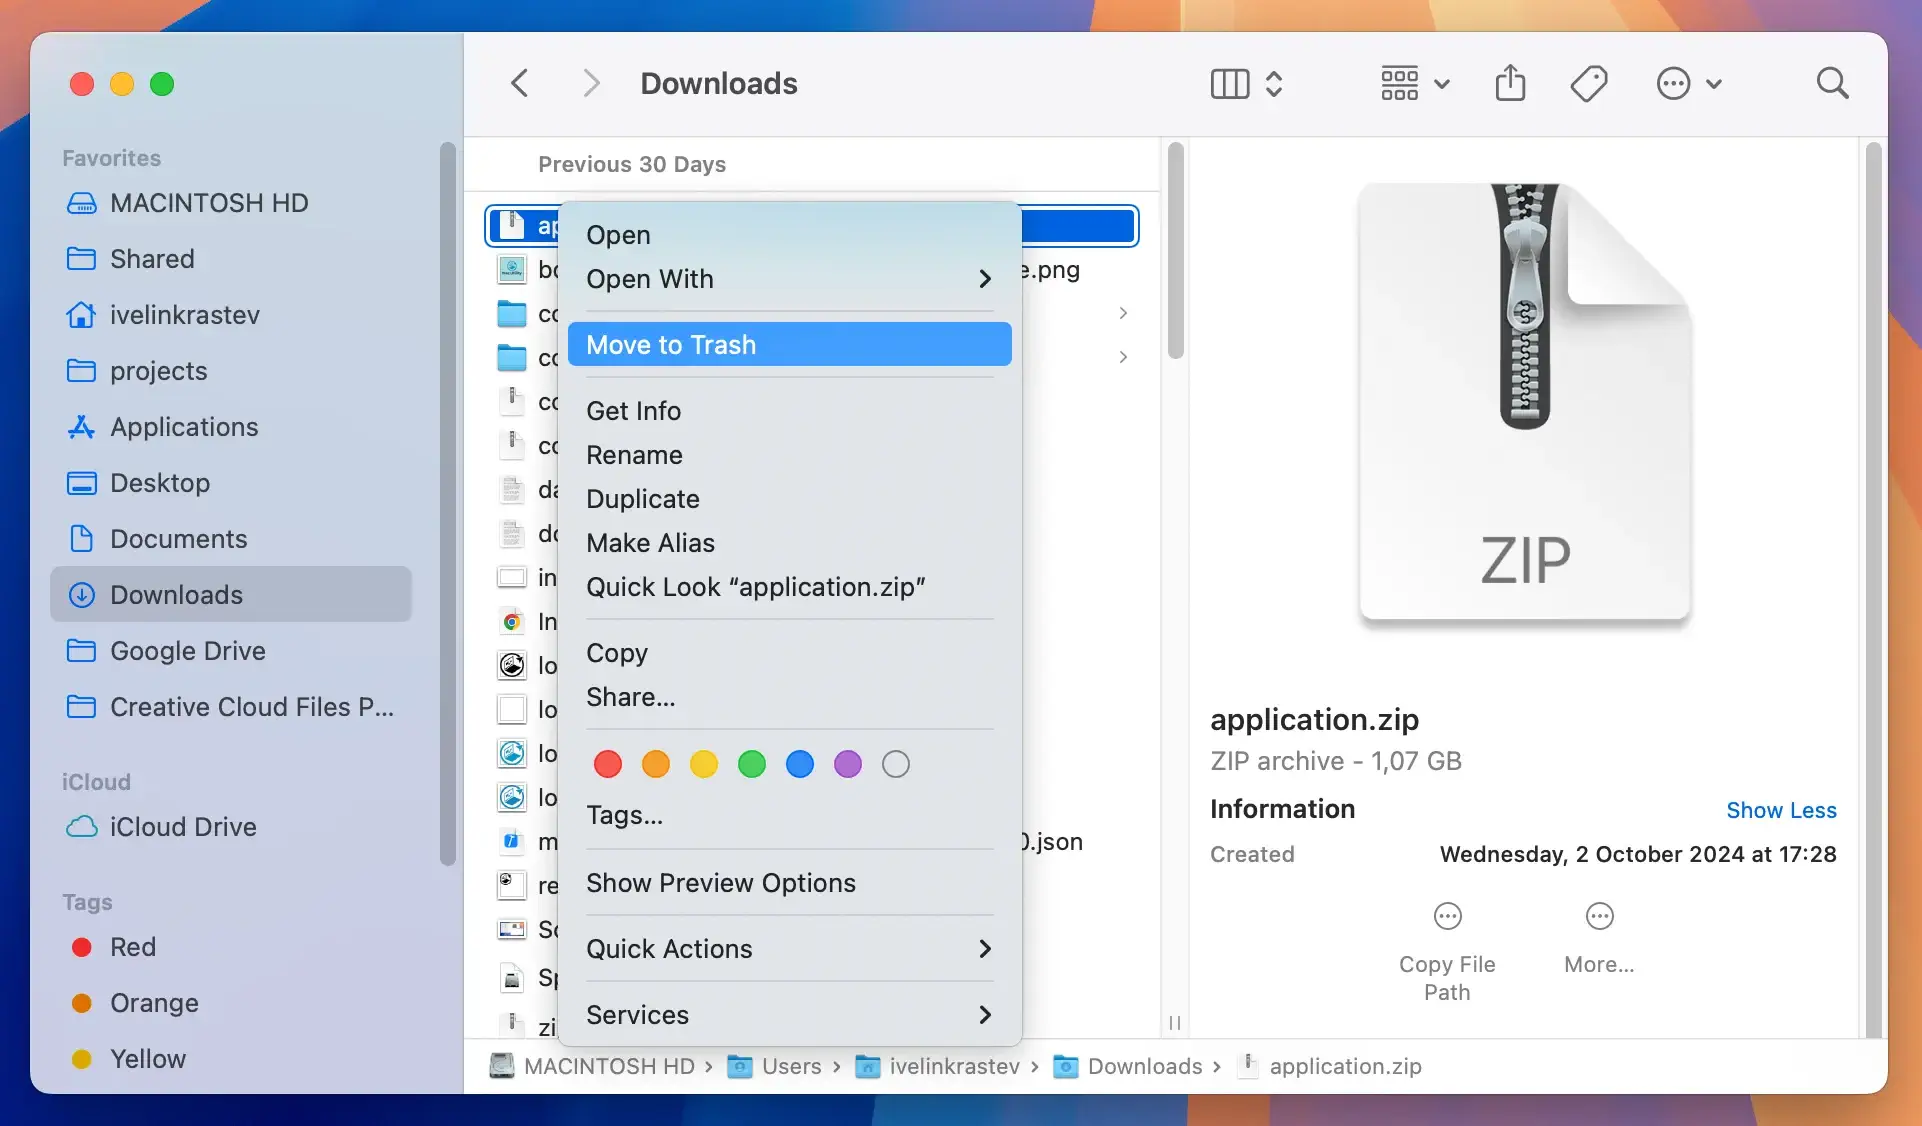
- Find Your Downloads: Launch Finder and head straight to your Downloads folder, often found in the sidebar or among your “Favorites.”
- Evaluate and Decide: Take a close look at each file. Ask yourself, “How much space is this file using? Do I really need it?” It’s time to make some decisions about what stays and what goes.
- Delete to Clear Disk Space: Select the files that no longer serve a purpose and right-click to choose “Move to Trash/Bin.” This action doesn’t immediately free up space but prepares these files for removal.
- Empty the Trash: This critical step frees up your Mac’s space. By emptying the Trash, you permanently remove those unwanted files, effectively increasing the free space on your Mac.
Implementing these steps not only tidies up your Downloads folder but also optimizes your Mac’s storage, allowing it to run more efficiently.
Regularly managing your downloads is a straightforward strategy to maintain and even increase the available space on your Mac, ensuring it stays swift and responsive for all your needs.
3. Remove unused apps: Enhance Mac performance
Properly uninstalling a Mac app reclaims valuable hard drive space and boosts your Mac’s overall performance. When removing apps, you have several options, each with its benefits.
Let’s explore how to delete apps manually or opt for a more convenient automated approach using a trusted tool like SpyHunter for Mac.
Note: The guidelines below are practical on any Mac device you might have, including MacBook Air, Mac mini, MacBook Pro, and iMac.
Delete apps manually via Finder
- Open
Finderand navigate to theApplicationsfolder. - Review the list of installed applications and identify those you no longer need.
- Right-click on the app you want to remove and select
Move to Trash/Binor drag it into theTrash/Bin.
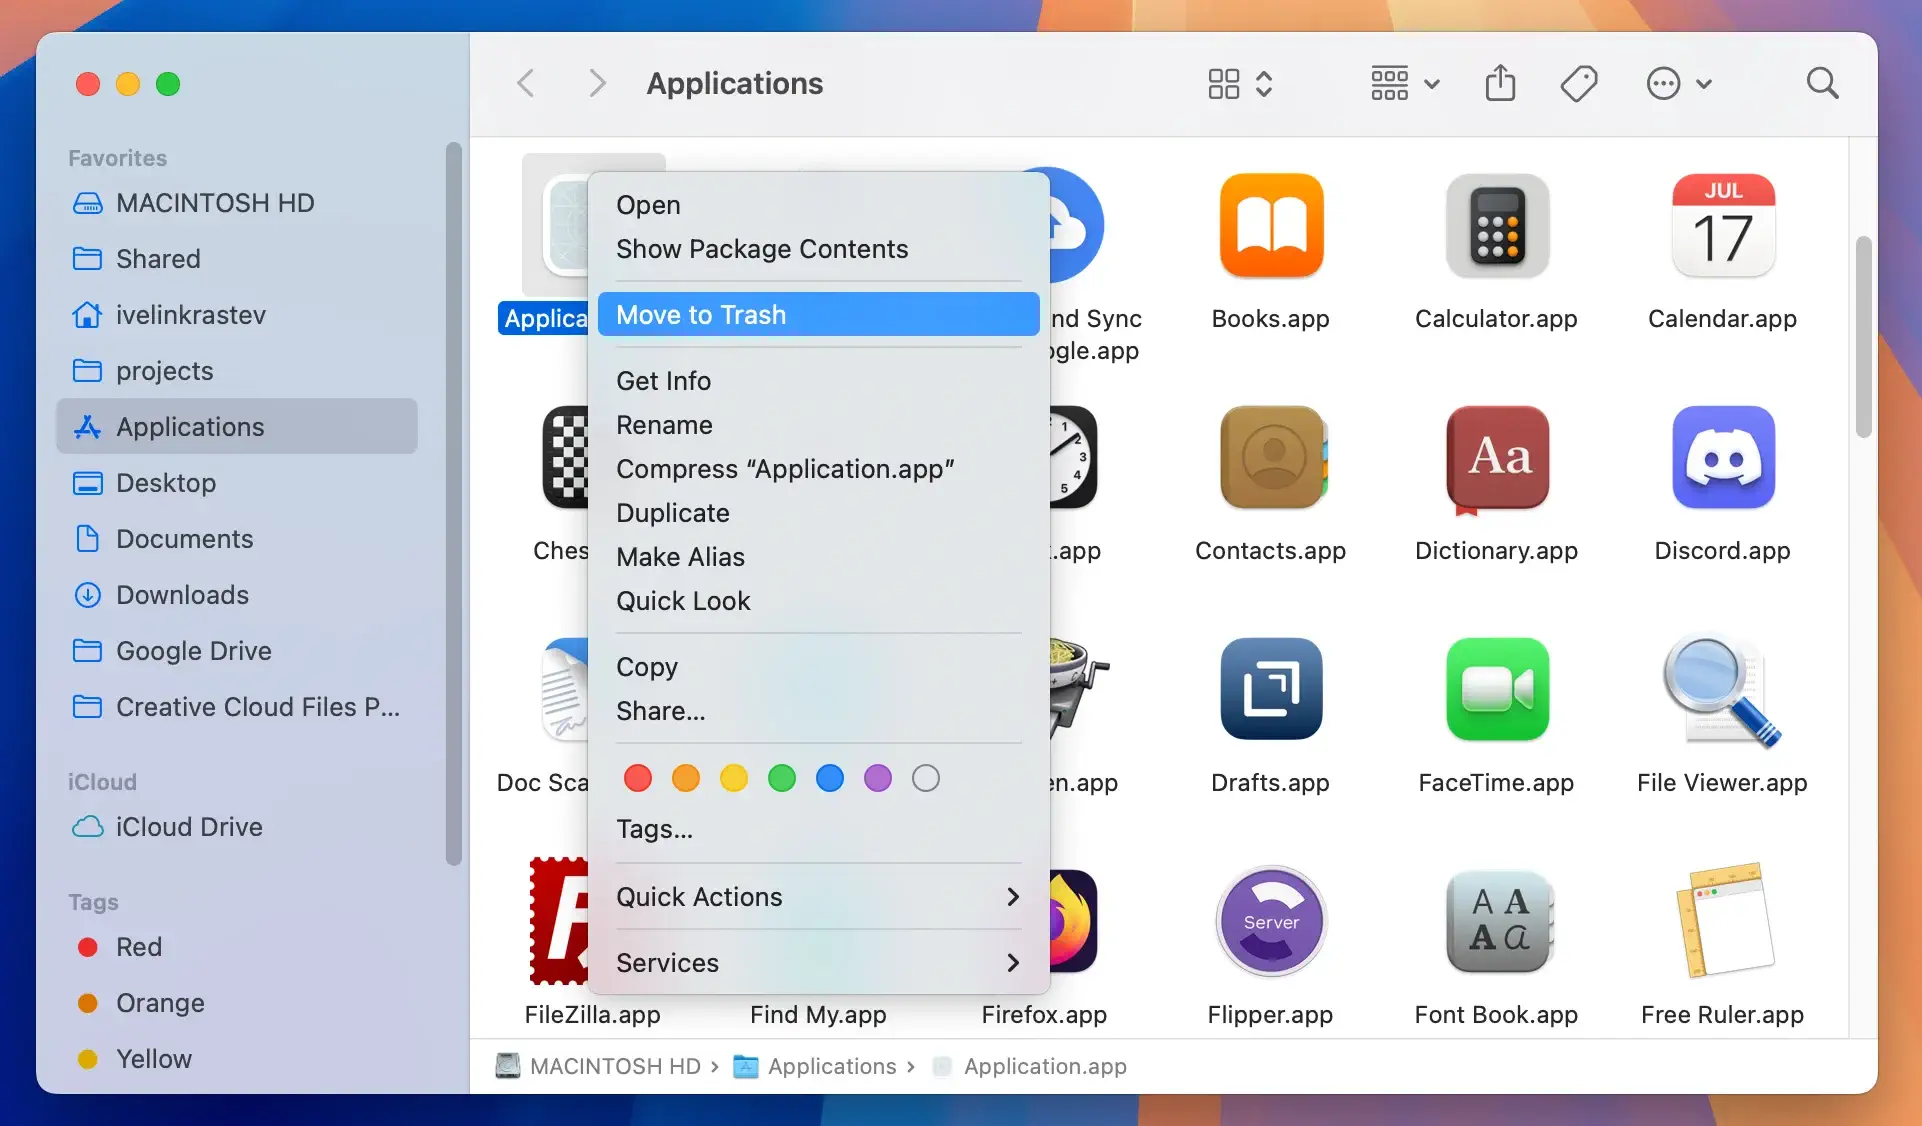
Note: Manual uninstallation via Finder may leave residual files on your Mac. Search through various Mac directories, such as ~/Library, to remove them. However, be cautious when deleting files to avoid potential issues with other apps on your device.
Remove apps using Launchpad
- Open
Launchpadand locate the application you wish to remove. - Press the
⌥ (Option)key until the app icons start shaking. - Click the
[X]icon next to the app to delete it.
Note: Similar to manual removal via Finder, Launchpad may leave behind app leftover files, necessitating a manual search for residual files.
Uninstall with confidence
For a hassle-free and comprehensive approach to app removal, consider using SpyHunter for Mac, a powerful anti-malware program that includes a high-tech app uninstaller.
Follow these simple steps:
- Download SpyHunter for free here and follow the installation instructions.
- Click on the App Uninstaller tab. This will initiate an automatic application scan.
- Select the applications you want to remove and click Remove Selected.
That’s it! With SpyHunter for Mac, you can bid farewell to manual work and reclaim valuable storage space. Enjoy seamless app management!
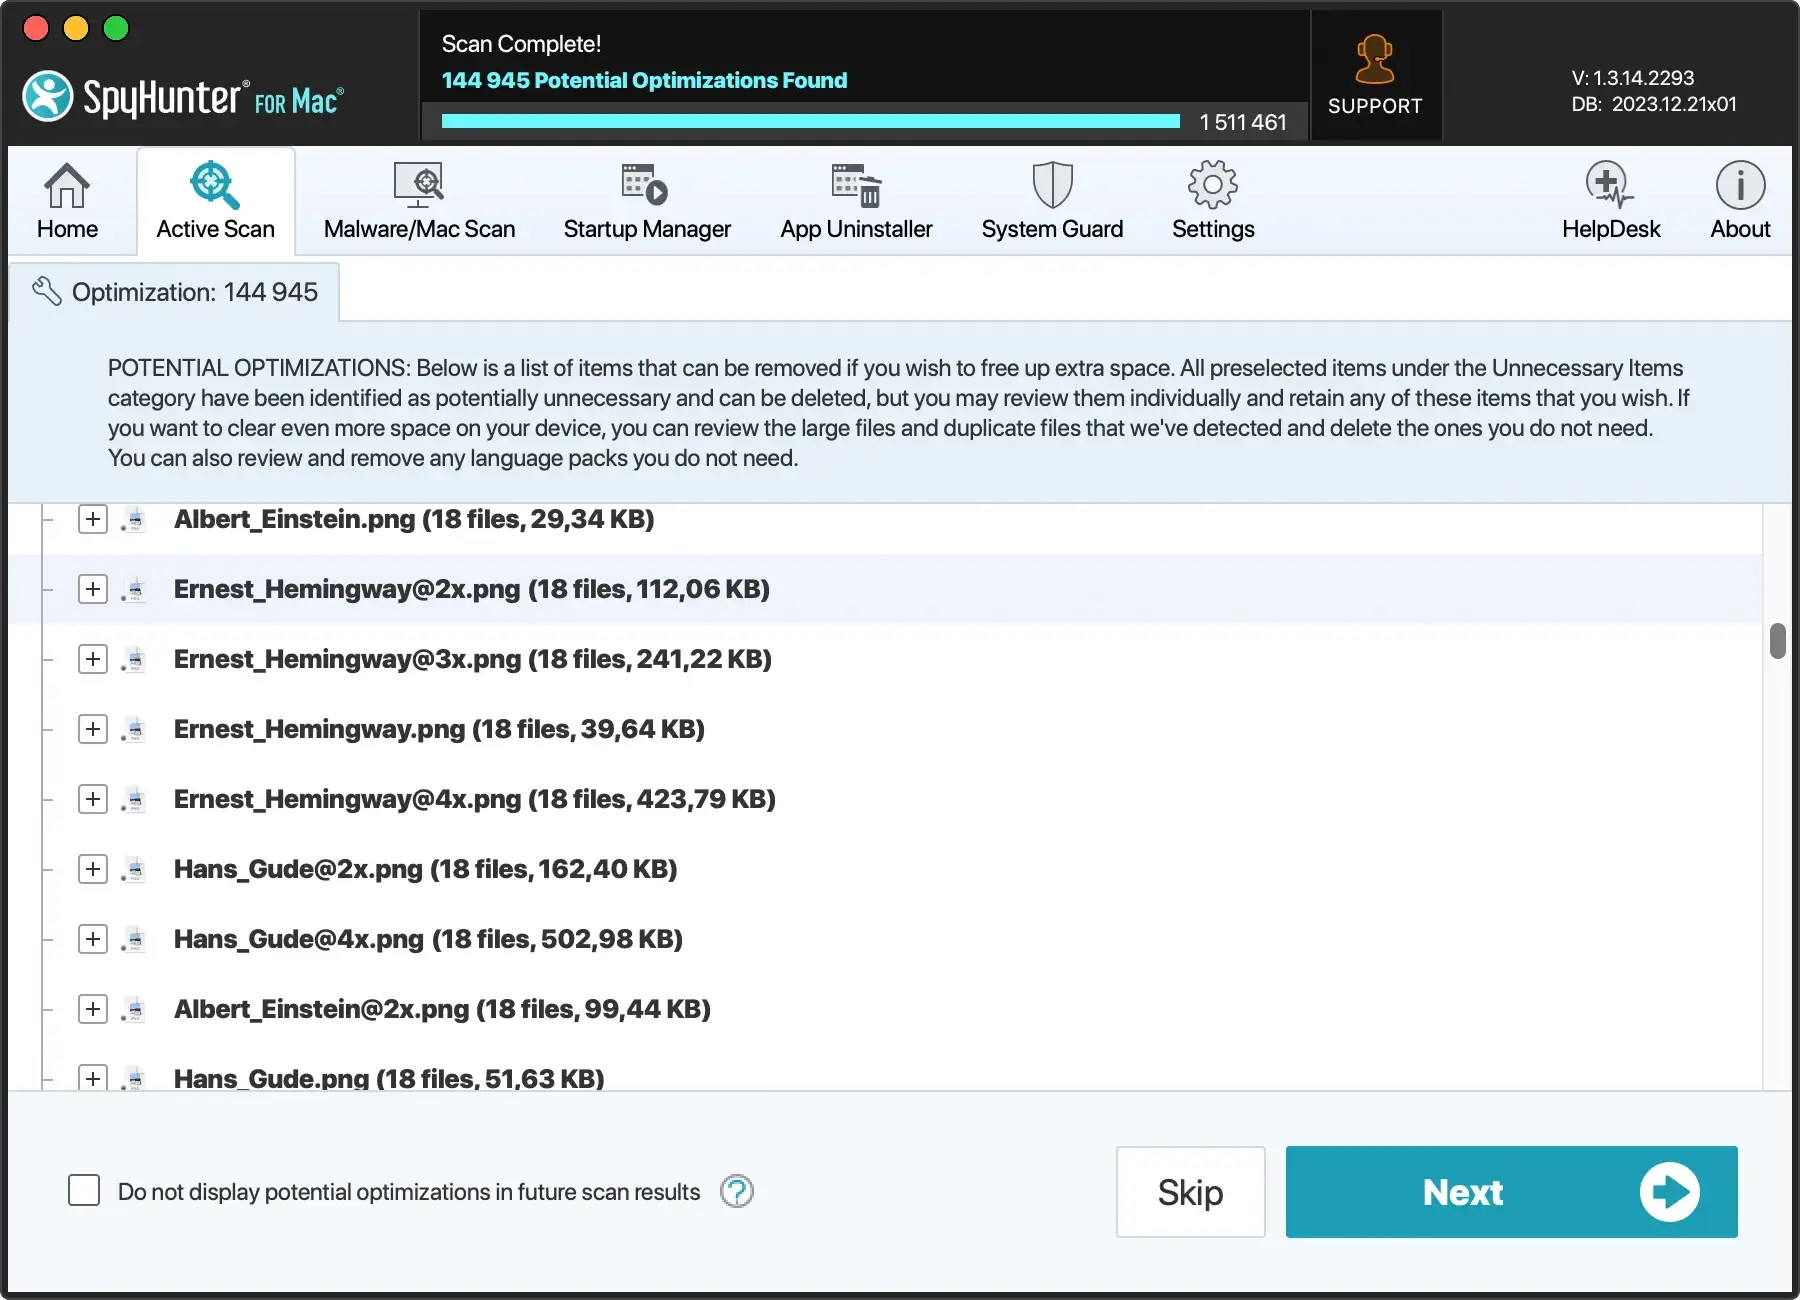
4. Eliminate duplicate files: Save space on Mac
Duplicate files can quickly accumulate on your Mac, occupying valuable disk space and causing clutter. Whether they result from accidental downloads or file duplication during organization, dealing with duplicates is crucial for maintaining a well-organized and efficient system.
Why duplicate files are a problem?
Duplicate files (identical copies of the same content) can be problematic for several reasons:
- Wasted Storage: Duplicate files needlessly consume storage space, reducing the capacity for essential files and applications.
- Reduced Organization: Sorting through files becomes challenging when duplicates clutter your folders, potentially leading to confusion and inefficiency.
- Performance Impact: An excess of duplicate files can slow down your Mac’s performance, affecting its responsiveness.
Instructions to delete duplicate files
Cleaning up duplicate files can be a daunting task if done manually. Here are a few options to choose from:
- Using Finder: Manually identifying and deleting duplicate files in Finder can be time-consuming. Here’s how to do it:
- Open Finder and navigate to the folder where you suspect duplicate files.
- To search for duplicates, combine file names, sizes, and types.
- Manually select and delete files that are duplicated. Remember to empty the Trash/Bin to free hard drive space.
- Using Terminal Commands (Advanced Users): If you have more experience and are comfortable with terminal commands, you can use specialized instructions to find and remove duplicate files. While effective, this method will be time-consuming as you cannot delete the duplicates directly. You will have to sift through the files manually, separating the duplicates from the original, and it can take hours if there are a lot of copies. Here’s how to find duplicate files using a Mac Terminal:
- Open Terminal, navigate to the directory you want to check, e.g.,
cd ~/Desktop, and press Enter. - Type in the following command:
find ./ -type f -exec md5 {} \; | awk -F '=' '{print $2 "\t" $1}' | sort | tee duplicates.txtand press Enter. - Go to the specified location (in our case, ~/Desktop) and open the newly generated file named duplicates.txt.
- Review the list of duplicates and decide which files to delete. Remember to empty the Trash/Bin to free disk space.
- Open Terminal, navigate to the directory you want to check, e.g.,
- Try SpyHunter for Mac’s Duplicate Scanner: For a hassle-free and efficient solution, we recommend using SpyHunter for Mac’s integrated Duplicate File scanner. It will save you a lot of time and frustration. You can Download SpyHunter and try its convenient duplicate scanner.
5. Empty the Trash: Permanently free space
Last but certainly not least is the simple act of emptying the Trash/Bin. Many users overlook that sending files and folders to the Trash/Bin doesn’t eliminate them; it merely relocates them within your system.
To free up space, right-click the Trash/Bin icon in your Dock and select Empty Trash/Bin. Then, confirm your choice by clicking Empty Trash/Bin in the pop-up window.
If you prefer a more automated approach to managing the Trash/Bin, we’ve covered you. Open the Finder and select Settings in the upper menu bar. Then navigate to the Advanced tab and check the following: Remove items from the Trash/Bin after 30 days.
With these steps, you can maintain a clean Trash/Bin and ensure that items are automatically removed after 30 days, freeing up space without manual intervention.
Regularly emptying the Trash/Bin is a simple yet crucial step in maintaining a clutter-free system and ensuring that you’re freeing up disk space.
6. Find unused large files: Free up Mac storage
Are you ready to tackle the disk space hoggers on your Mac? One of the most effective ways to free up valuable storage is by bidding farewell to those hefty, unneeded files. Follow these steps to pinpoint and delete them:
- Open Finder: Launch Finder on your Mac.
- Search This Mac: Click “This Mac” in the top bar to search your entire system.
- Choose File Size: From the dropdown menu, select “Other…” and check “File Size” from the list.
- Set Minimum Size: Now, select “File Size” and specify the minimum size you want Finder to look for.
With these simple steps, you can manually identify and select large files you no longer need and then send them to the Trash/Bin. But remember, your mission isn’t complete until you’ve emptied the Trash/Bin to regain the full benefit of the recovered space.
Bonus tip
If hunting down oversized files individually seems daunting, consider trying SpyHunter for Mac’s Large Files scanner. This remarkable tool takes the hard work out of your hands.
- Download SpyHunter for free here and install it.
- Once installed, run a large file scan.
- After the scan has been completed, review the details of each file and decide which ones to remove.
- Follow the prompts to clear up substantial disk space efficiently.

7. Unitize Mac Storage Manager: Optimize storage
Apple’s macOS provides several built-in features aimed at helping Mac users manage and free up space on their devices efficiently.
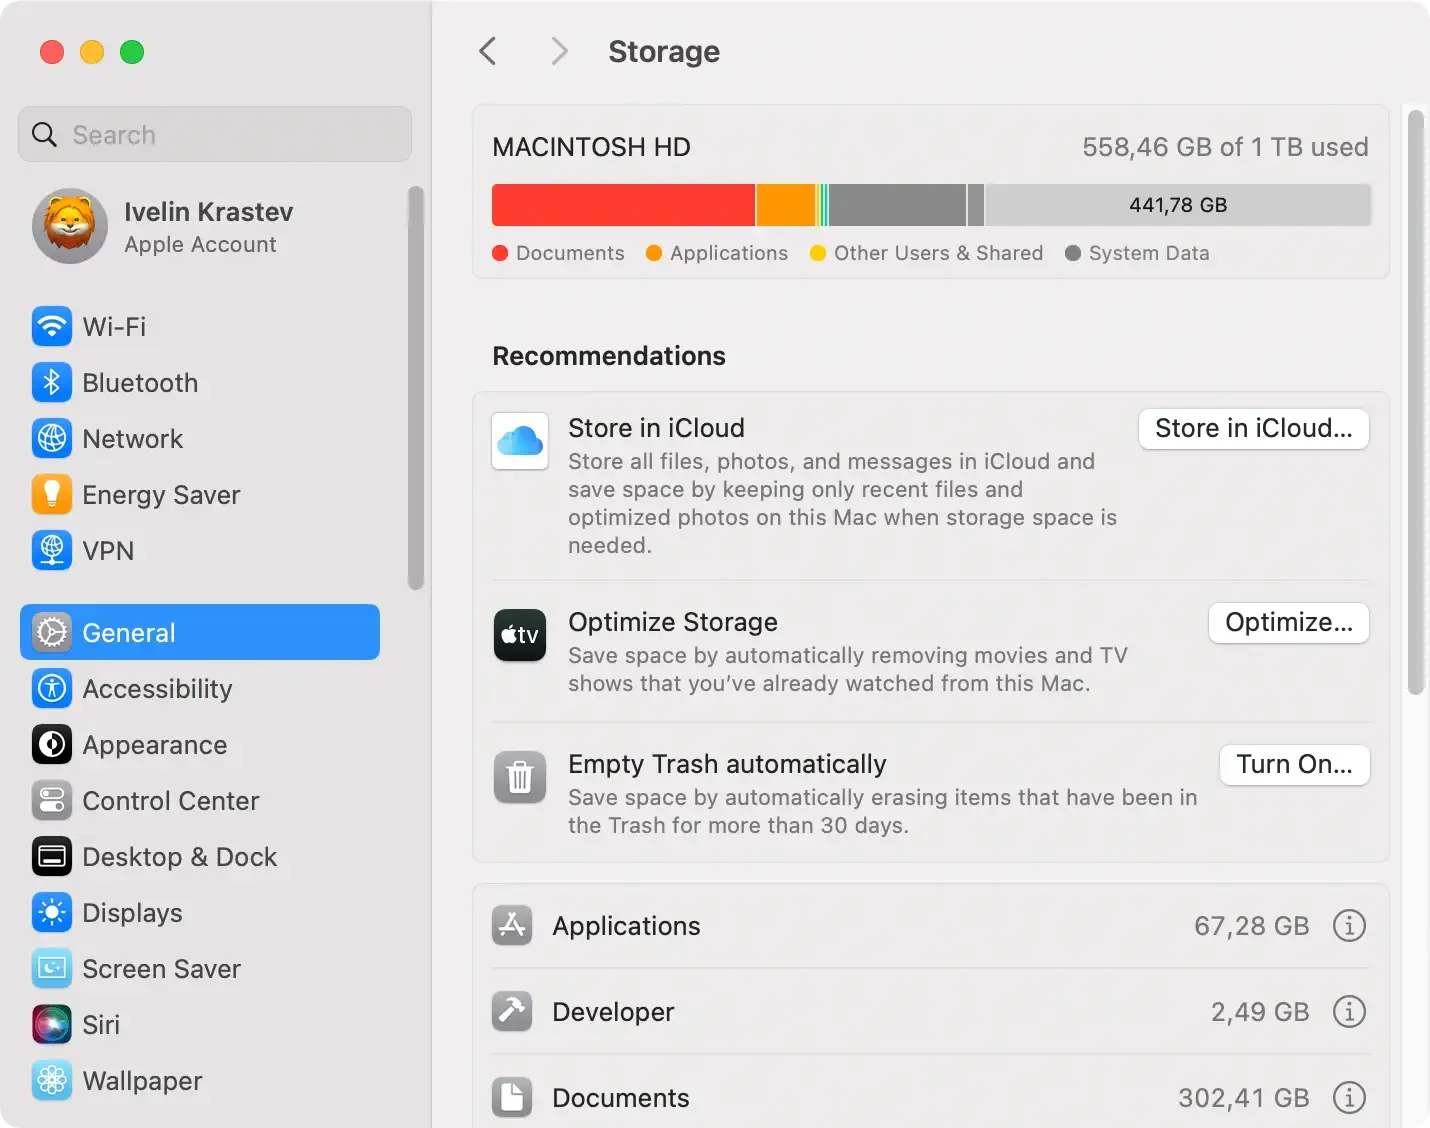
To access these options, navigate through the Apple menu to System Settings, select General, and then click on the Storage tab. Here, you’ll find a suite of options designed to optimize storage on your Mac:
- Store in iCloud: This option saves you considerable space by shifting documents, photos, and messages to iCloud. It’s a seamless way to manage storage while keeping your important files accessible.
- Optimize Storage: An intelligent feature that cleans up after you by automatically deleting movies and TV shows you’ve already watched. This ensures that only the content you need remains on your device, freeing up disk space on your Mac.
- Empty Trash Automatically: Activating this feature means any files you’ve moved to the Trash/Bin will be permanently deleted after 30 days. It’s an effortless method to ensure you’re not holding onto unneeded files and to free up space on Mac.
Leveraging these tools can significantly enhance your Mac’s efficiency by optimizing its storage. Nevertheless, it’s wise to consider the potential limitations or costs associated with extensive iCloud usage.
Incorporating these automated features into your regular maintenance routine can help maintain enough Mac storage space, ensuring it runs smoothly and remains responsive to your needs.
Whether through managing downloads, decluttering cache files, or utilizing external storage options, these strategies form a comprehensive approach to keeping your Mac’s performance at its peak.
Final thoughts
The correlation between your Mac’s operational efficiency and available free space cannot be overstated. These seven strategies will help free up disk space and significantly enhance your Mac’s performance.

With more space on your Mac, you’ll witness improved speed and responsiveness, making every task more seamless.
Embracing these methods means taking a proactive step towards optimizing storage and ensuring your device runs smoothly.
Remember, an optimized Mac translates to a more productive you. As you embark on this journey to clear disk space and manage storage more effectively, consider SpyHunter for Mac a vital tool in achieving your goals.
Download SpyHunter to discover how easy it is to maintain an optimized, clutter-free environment on your Mac.
Whether removing old app updates, managing downloaded files, or clearing out useless files, SpyHunter for Mac stands ready to enhance your device’s performance.
By keeping an eye on how much free space you have and utilizing external storage options when necessary, you’ll maintain a Mac that feels as good as new.
Take this moment to act. Free up disk space on your Mac, explore external storage solutions and dive into optimizing your photo library and mail app to save space.
Frequently asked questions
What is “Other Storage,” and how can I clean it up?
“Other Storage” encompasses a variety of files on your Mac that don’t neatly fit into conventional categories, such as Documents, Apps, or Photos.
This includes but isn’t limited to, system and user cache files, disk images (DMG files), archives (like zip files), and various miscellaneous documents.
While not inherently detrimental, these can consume significant disk space on your Mac, potentially hindering its performance.
What steps can I take to free up space on Mac?
Embarking on freeing up space on your Mac involves eliminating redundant or unneeded files, such as outdated cache files, unused applications, and lingering items in your Downloads folder.
A strategy to delete duplicate files can also contribute significantly to reclaiming disk space.
Leveraging SpyHunter for Mac offers a seamless approach to detecting and purging these files, optimizing your Mac’s storage and performance.
Why is it crucial to clear my Mac’s cache and temporary files?
Cache and temporary files optimize application performance and speed up software operations. Nonetheless, when they accumulate, they can clutter your system and slow down your Mac.
Periodic removal of these files is a crucial maintenance step, ensuring your Mac remains efficient and storage-optimized.
SpyHunter for Mac facilitates this process, allowing for easy cleanup of cache and temporary files, thereby maintaining your Mac’s peak performance.
Why does my Mac’s speed decrease over time?
Over the lifespan of your Mac, it accumulates files intended to improve efficiency and speed, such as system cache and temporary files. However, an overload of these files can eventually drag down performance.
Moreover, your Mac’s hardware might struggle to keep up with each software update and add more demanding apps.
SpyHunter for Mac’s optimization features can help address these slowdowns by decluttering unnecessary files and streamlining system performance, ensuring your Mac continues to run smoothly.