How To Uninstall Creative Cloud On Mac (Ultimate Guide)
Before we dive in
Trying to uninstall an app completely? SpyHunter for Mac includes an App Uninstaller that removes unwanted apps and their leftover files in just a few clicks.
Avoid clutter and save time — download SpyHunter right here and follow the steps to clean up your system.
Adobe Creative Cloud is a suite of apps loved by creatives for its powerful tools and versatility.
However, there might come a time when you need to remove Creative Cloud from your Mac—perhaps to free up disk space, resolve software conflicts, or simply because you no longer need the suite.
Uninstalling Adobe CC can seem daunting due to its integration with multiple programs and services, but this guide will walk you through the process step-by-step.
Follow along to ensure the complete and efficient removal of Adobe Creative Cloud from your Mac, leaving no residual files.
Reasons to delete Adobe Creative Cloud from Mac
You might uninstall the Creative Cloud desktop app from your Mac for several reasons.
Understanding these reasons can help you determine whether removing the suite is the right decision for your needs:
- Freeing Up Disk Space: Creative Cloud and its associated apps can take up a significant amount of disk space on your Mac. Removing the suite can help you reclaim valuable storage for other important files and applications.
- Resolving App Conflicts: Adobe Creative Cloud may sometimes conflict with other installed programs, causing crashes or performance issues. Removing it can help restore system stability and improve overall performance.
- Reducing System Resource Usage: The Creative Cloud apps can consume considerable system resources, such as CPU and memory. Removing the suite can free up these resources, making your Mac run more efficiently, especially if you have limited hardware capabilities.
- No Longer Needed: If you no longer require Adobe Creative Cloud for your projects, deleting it can help streamline your applications and reduce clutter on your Mac.

Consider these common reasons for deleting Creative Cloud. Then, you can decide whether to remove its suite from your Mac and proceed with the uninstallation process.
Completely uninstall the Creative Cloud suite with SpyHunter
SpyHunter offers an effective solution for removing Adobe Creative Cloud and all associated applications from your Mac.
Follow these steps to ensure that Creative Cloud and all its applications are entirely uninstalled:
- Download SpyHunter from here and follow the installation instructions to set up the program on your Mac.
- Open SpyHunter from your
Applicationsfolder and go to theApp Uninstallerfeature, designed to scan your system for all installed applications. - SpyHunter will automatically detect Creative Cloud and all associated Adobe apps installed on your Mac.
- After the scan is complete, find Creative Cloud in the list of applications along with all the Adobe programs you have installed (such as Photoshop, Illustrator, Premiere Pro, etc.).
- Ensure that all relevant checkboxes are selected to remove the entire suite and its components.
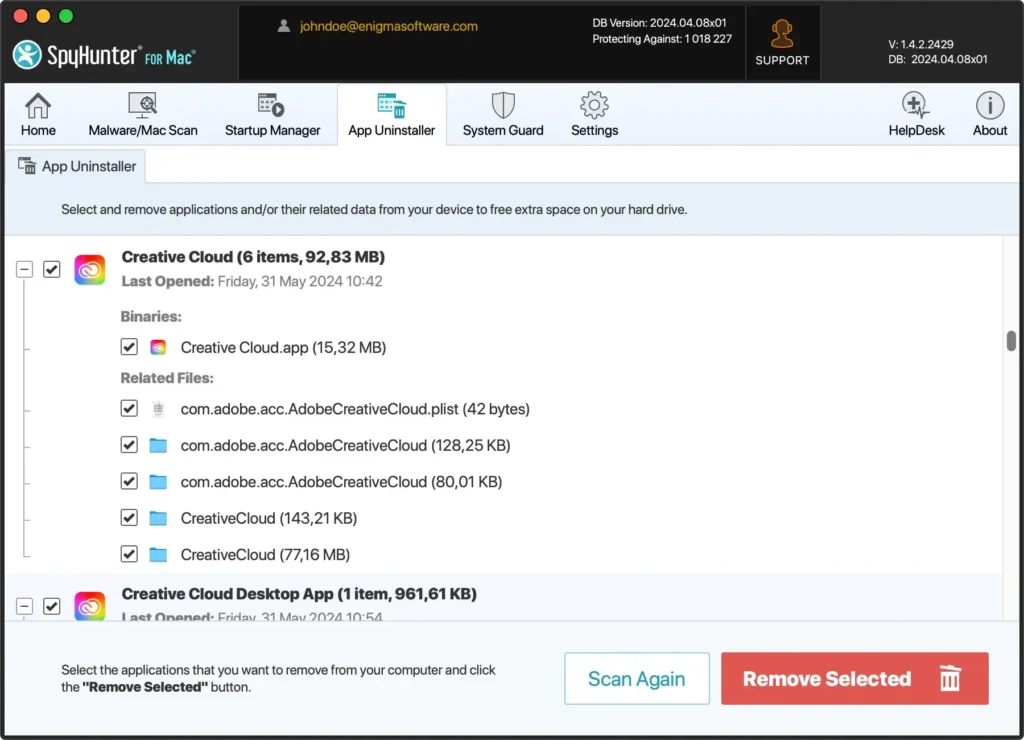
- Click the
Remove Selectedbutton with all Creative Cloud components and the related apps selected. SpyHunter will handle the deletion process, removing all files from your system.
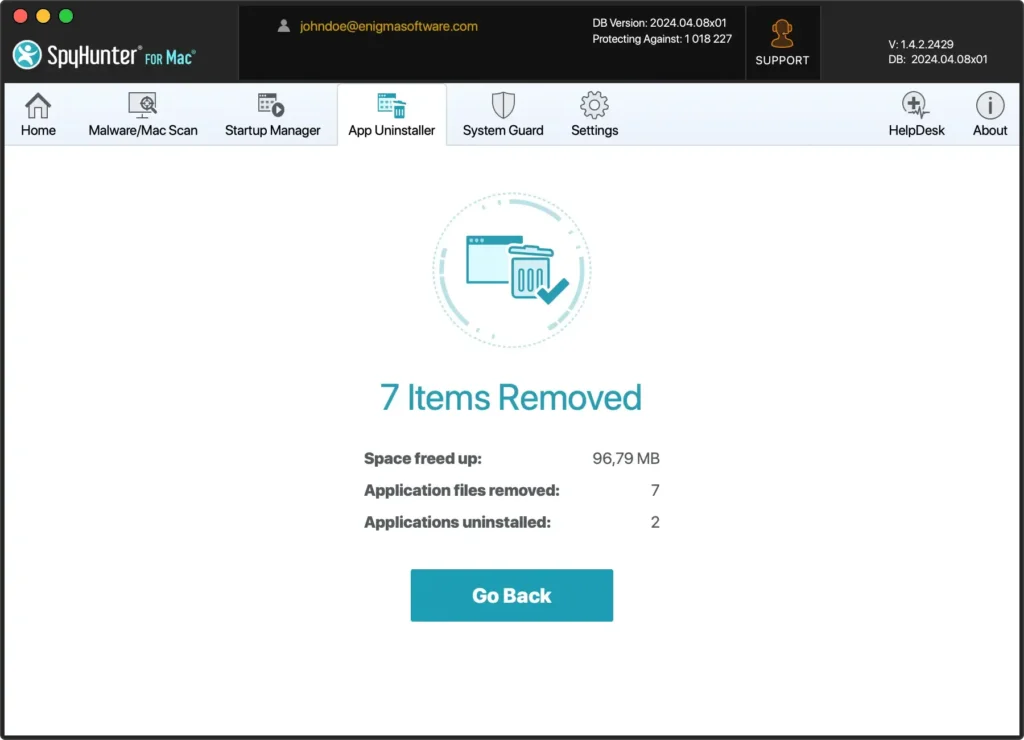
- After the uninstallation is complete, restart your computer to finalize the removal. Restarting ensures that all temporary files are cleared and security settings are updated.
Using SpyHunter to delete Creative Cloud simplifies the process and ensures no residual files are left behind.
This comprehensive cleanup helps maintain your Mac’s performance and prevents potential software conflicts.
How to manually uninstall Adobe Creative Cloud on Mac
Manually removing Creative Cloud from your Mac involves a few critical steps to ensure that all related applications and files are removed.
Follow these instructions carefully to remove Adobe Creative Cloud completely:
Step 1: Uninstall Adobe apps
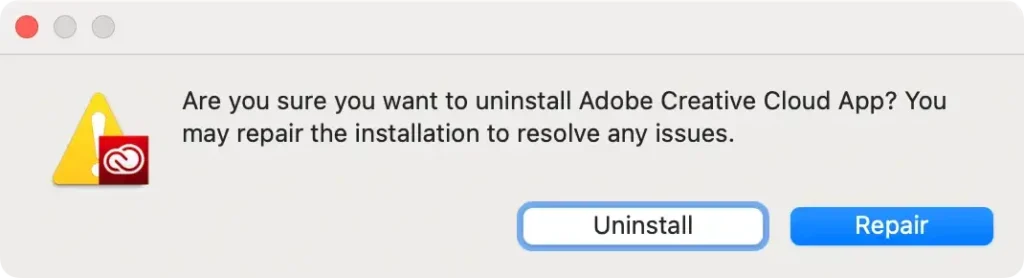
Before uninstalling the Creative Cloud app, you must remove all the individual Adobe applications you have installed.
Otherwise, you will see a warning like this:

Follow these steps:
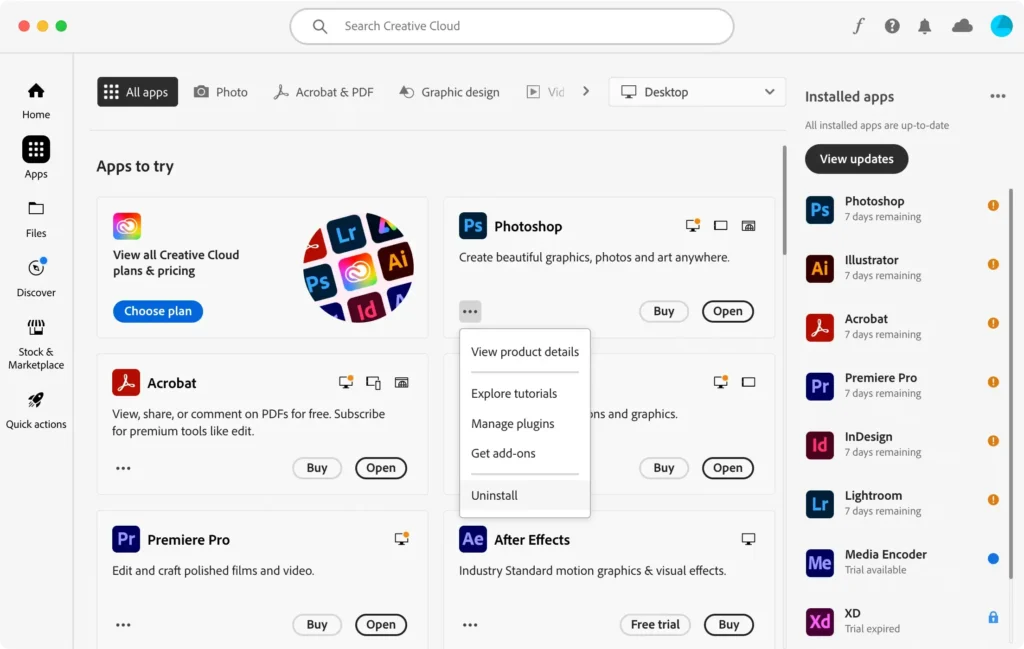
- Launch the Adobe Creative Cloud app from your
Applicationsfolder. - Click on the
All Appstab at the top of the Creative Cloud interface. - Find each Adobe program (such as Photoshop, Illustrator, Lightroom, etc.) in the list, click on the
More actionsbutton (three dots) next to each app, and selectUninstallfrom the drop-down menu. - Follow the prompts to complete the uninstallation for each app.
Step 2: Quit the Adobe CC app
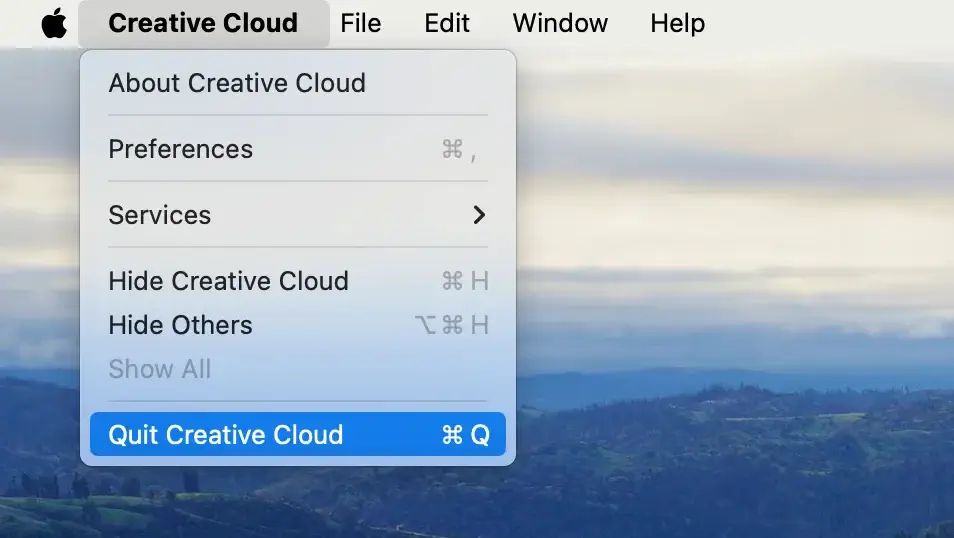
After removing all Adobe applications, ensure the Creative Cloud desktop app is not running.
Menu Bar Option: Click on the Creative Cloud item in the menu bar at the top of your screen and select Quit Creative Cloud from the drop-down menu.
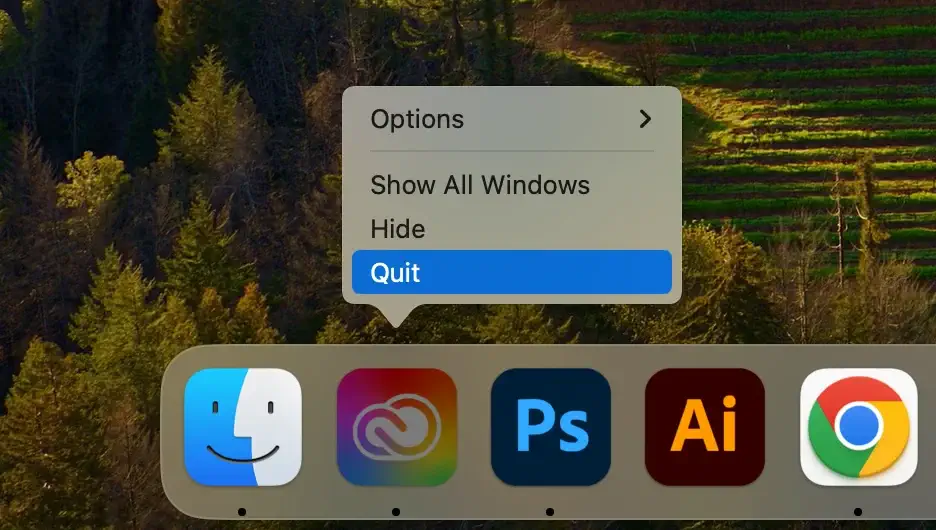
Dock Option: Alternatively, if Creative Cloud is in your Dock, right-click (or Control-click) the app icon and choose Quit from the context menu.
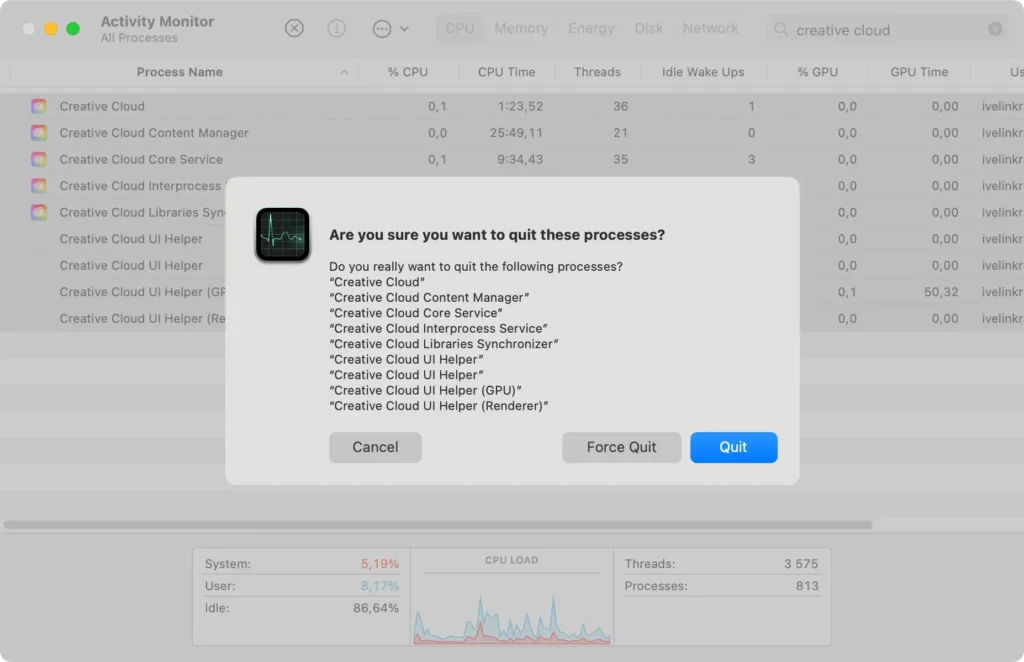
Force Quit via Activity Monitor: If the Creative Cloud desktop app is not responding, open Activity Monitor and search for Creative Cloud-related processes.
Select the pinpointed processes and click the [X] button to force quit the application.
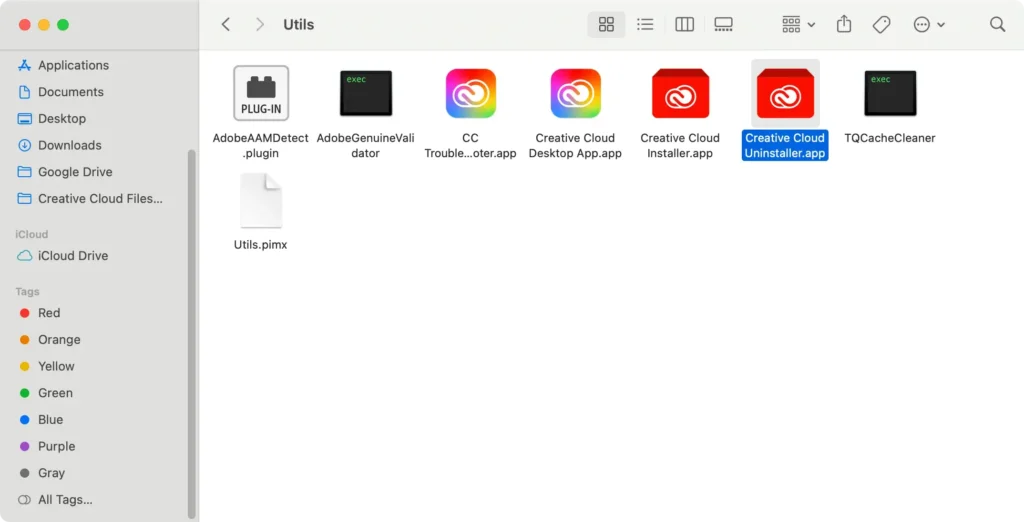
Step 3: Locate the Creative Cloud Uninstaller
To completely uninstall the Creative Cloud desktop app, you must use the dedicated uninstaller provided by Adobe.
- Launch
Finderon your Mac. - Navigate to the
Applicationsfolder from the sidebar. - Open the
Creative Cloudfolder that contains the native uninstaller.
Step 4: Use the Creative Cloud native uninstaller
Using the uninstaller ensures that all Creative Cloud desktop app components are removed from your system.
- Open the
Creative Cloud Uninstallerapp. - Enter your admin password when prompted.

- Hit the
Uninstallbutton and follow the on-screen instructions to complete the uninstallation.
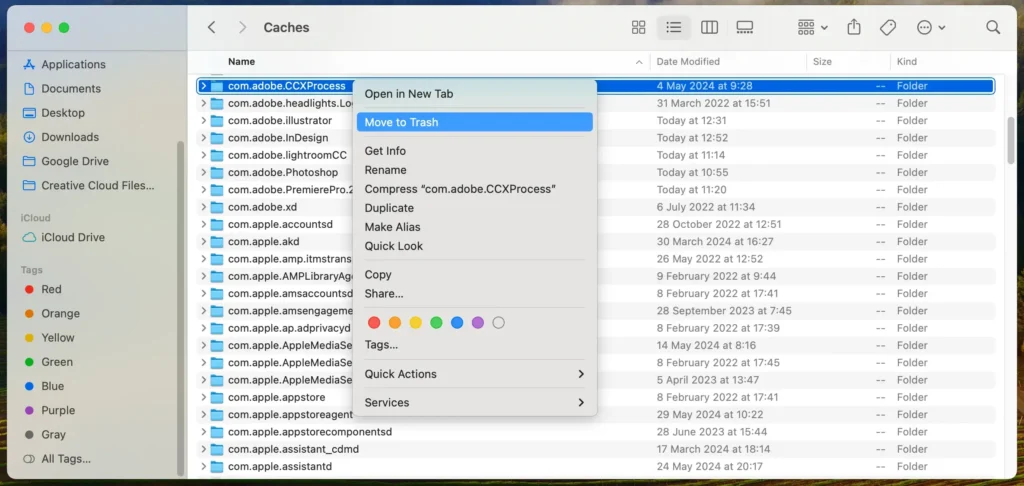
Step 5: Remove Adobe Creative Cloud-related files and folders
After using the uninstaller, residual files may still be left on your system.
Follow these steps to remove any remaining files and folders related to the Creative Cloud desktop app:
- Launch
Finderon your Mac. - In the
Findermenu at the top of the screen, click theGomenu and thenGo to Folder…to access the search bar. - Enter the following paths into the search box one by one to locate and remove Creative Cloud’s associated files.
~/Library/Application Support/~/Library/Preferences/~/Library/Caches/~/Library/Logs//Library/Application Support/
- After moving all related files and folders to the Trash, right-click on the Trash can and select
Empty Trashto permanently delete them.
Following these steps, you can manually uninstall the Creative Cloud desktop app and all its associated files from your Mac, ensuring a clean removal of all related files and settings.
Conclusion
Successfully uninstalling Adobe Creative Cloud from your Mac requires following the right steps to ensure the complete removal of all associated files and applications.
Whether you choose to use SpyHunter for a comprehensive cleanup or prefer the manual approach, knowing the right way to uninstall apps is crucial for maintaining your system’s performance and organization.
Properly managing your applications by removing those you no longer need helps keep your Mac running smoothly. If you need detailed instructions on how to uninstall specific Adobe apps, our blog offers step-by-step guides on how to uninstall Photoshop and uninstall Illustrator.
Additionally, we have a comprehensive article on how to uninstall a Mac app, providing all the information you need to manage your software effectively.
Following the guidance, you can ensure that Creative Cloud and all its components are thoroughly removed from your system, leaving your Mac clean and optimized for future use.