How To Delete Adobe Acrobat From Mac (Full Guide)
Before we dive in
Trying to uninstall an app completely? SpyHunter for Mac includes an App Uninstaller that removes unwanted apps and their leftover files in just a few clicks.
Avoid clutter and save time — download SpyHunter right here and follow the steps to clean up your system.

Is Adobe Acrobat Reader still the best PDF solution for your Mac? It’s a question many users find themselves asking as they navigate the demands of modern workflows and computer performance.
This article explores why you might consider uninstalling Acrobat Reader and how to do it properly to enhance your productivity and computer health.
What is Adobe Acrobat?
Adobe Acrobat is a versatile software developed by Adobe that allows users to create, edit, and manage PDF files.
On the other hand, Adobe Acrobat Reader, often referred to as Acrobat Reader, is a free application designed for viewing, printing, and commenting on PDF documents.
While Adobe Acrobat is a powerful tool for working with PDFs, there are several reasons you might consider uninstalling it from your Mac.
Why uninstall Acrobat Reader from your Mac?
Firstly, uninstalling Acrobat Reader can free up valuable disk space, especially if you have limited storage.
Additionally, if you encounter conflicts with other applications or find that Adobe Acrobat is outdated, removing it can help resolve these issues.
Moreover, if you only use Acrobat Reader occasionally to view PDF files, you can rely on the built-in Preview app on your Mac. The Preview app in macOS can do most of what Acrobat Reader does, including rearranging pages and annotating PDFs.

By uninstalling Acrobat Reader, you can streamline your system, reduce clutter, and ensure your Mac operates at peak performance.
How to delete Acrobat Reader from Mac manually?
You can manually uninstall Adobe Acrobat Reader by removing its executable file and all related service files.
Follow the steps below:
Step 1: Close Adobe Acrobat DC
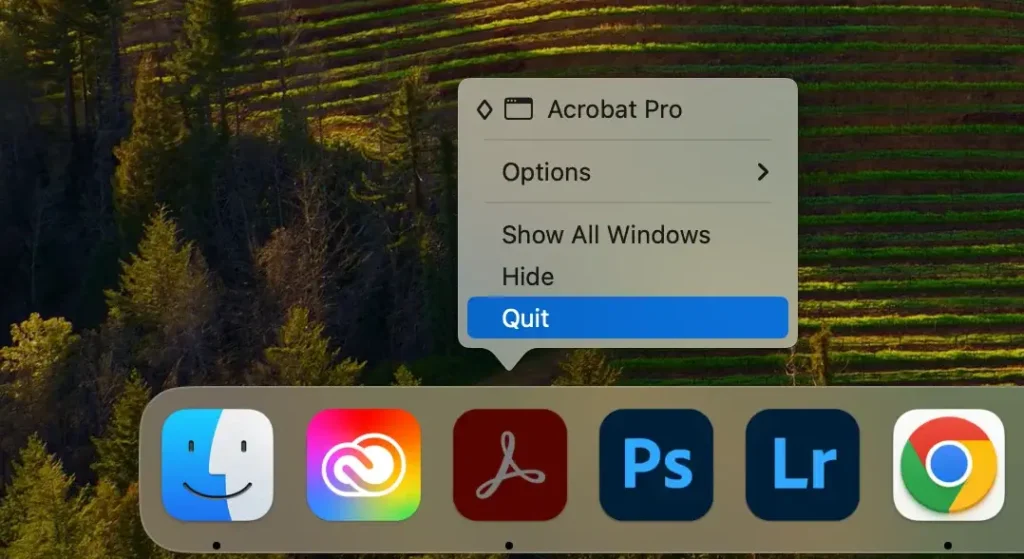
To avoid any issues during the uninstall of Acrobat Reader, make sure the application is completely closed.
Right-click the Acrobat DC icon in the Dock and select Quit.
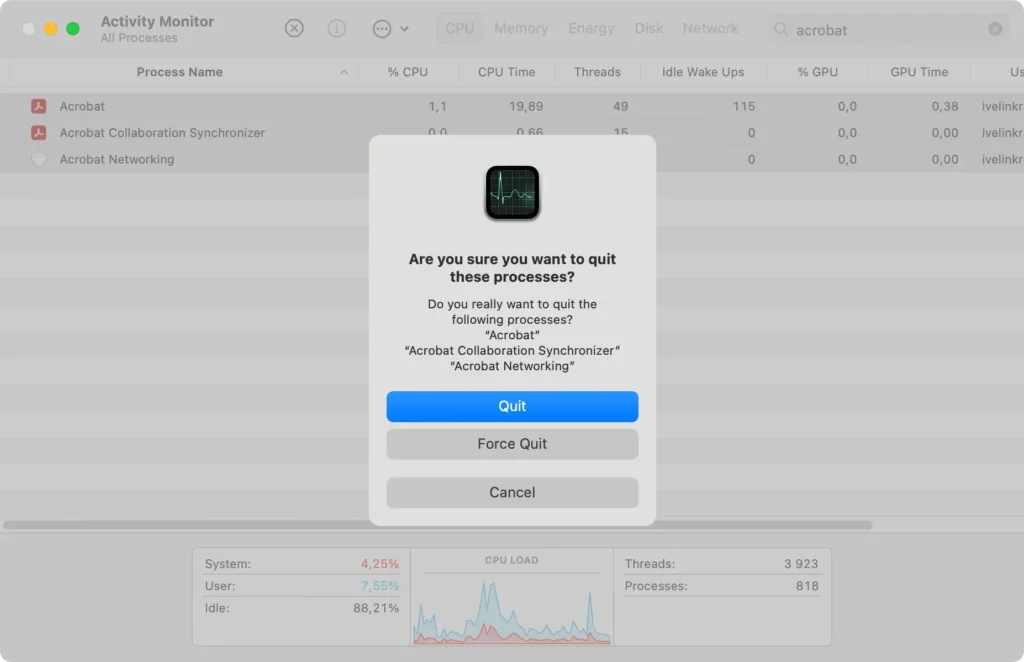
If Acrobat DC is not responding, you can force quit it. Open Activity Monitor on your Mac, locate all processes with “Acrobat” in their names, select each of them and click the [X] button to force quit.
Step 2: Remove Adobe Acrobat DC from Applications
Next, you need to remove Adobe Acrobat Pro DC from the Applications folder. Follow these steps:
- Open
Finderon your Mac. - Navigate to the
Applicationstab in theFindersidebar. - Find Adobe Acrobat DC in the list of applications, right-click it, and select
Move to Trashor drag it to theTrashicon. - Empty the
Trashto permanently delete the app.
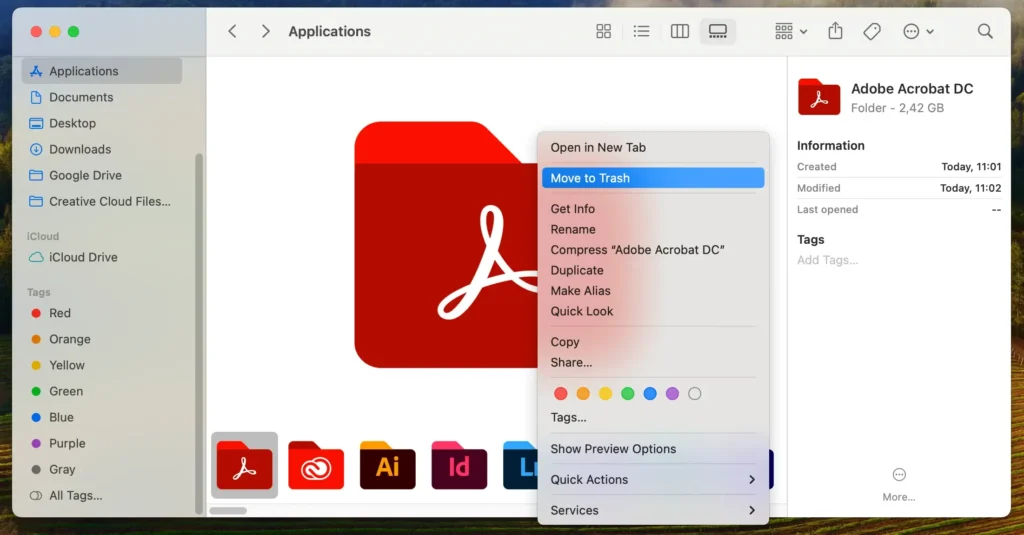
This step removes the core components of Adobe Acrobat Pro DC, but additional steps are required to eliminate leftover files.
Step 3: Erase Adobe Reader residual files
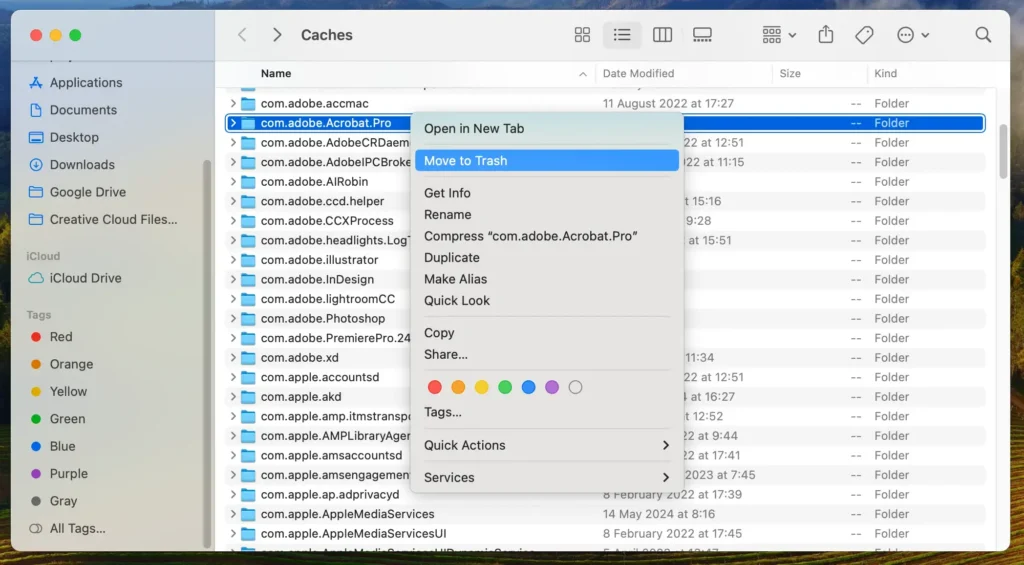
To completely uninstall Adobe Acrobat Reader, you need to remove residual files located in various directories.
- Open a new
Finderwindow, click onGoin the menu, then selectGo to Folderto bring up the dialog box. - In the prompt, type or paste the following paths one by one:
~/Library/Application Support~/Library/Caches~/Library/Saved Application State~/Library/Preferences~/Library/Logs
- Locate and delete any Adobe Acrobat Reader leftover files found in these directories by dragging them to the
Trash.
- Empty the
Trashto finalize the removal.
Be cautious not to delete files if you are unsure of their purpose, as this could impact other applications or your system’s stability. By following these steps, you ensure that all traces of Adobe Acrobat Reader DC are removed from your Mac, helping it run more efficiently.
How to completely uninstall Acrobat Reader with SpyHunter
For a seamless and thorough removal of Acrobat Reader and all associated files, consider using SpyHunter’s App Uninstaller. This tool automates the uninstallation process, eliminating the need to manually find and remove leftover files.
Here’s how to use SpyHunter to completely uninstall Adobe Reader:
- Download SpyHunter and follow the provided instructions on your screen.
- After installation, open SpyHunter and navigate to the
App Uninstallersection. The tool will scan your Mac and display a list of all installed app and all their related files. - Locate Adobe Acrobat Reader in the list. SpyHunter will highlight all associated files. Select Adobe Acrobat and all related files to ensure comprehensive removal.
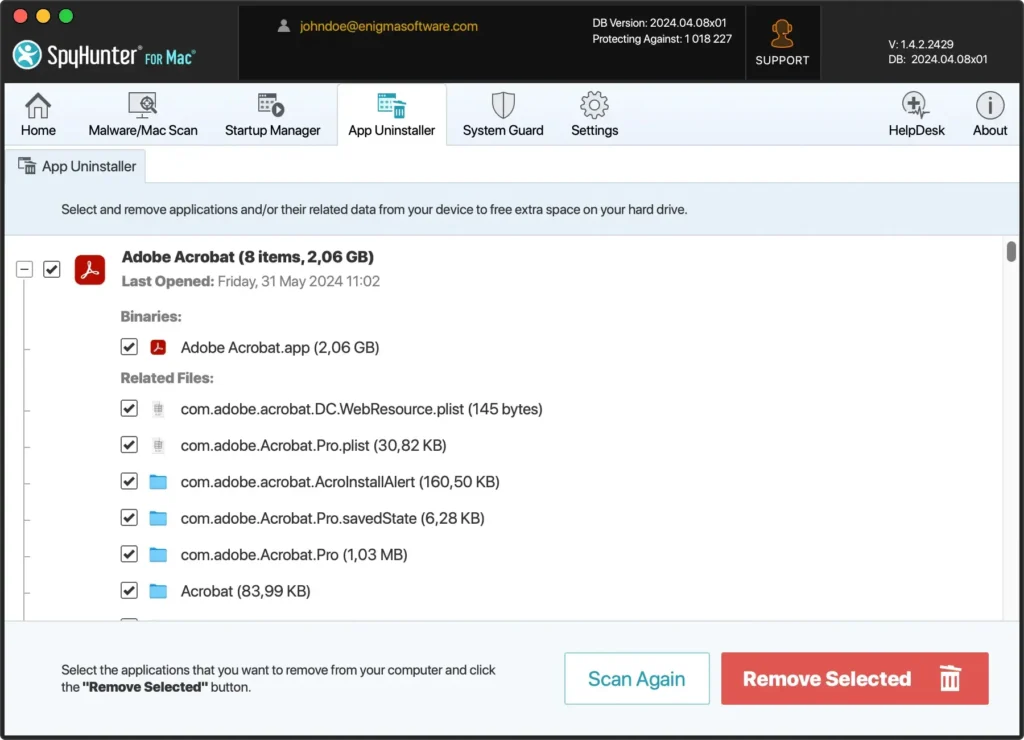
- Click the
Remove Selectedbutton to delete Acrobat Reader and its associated files.
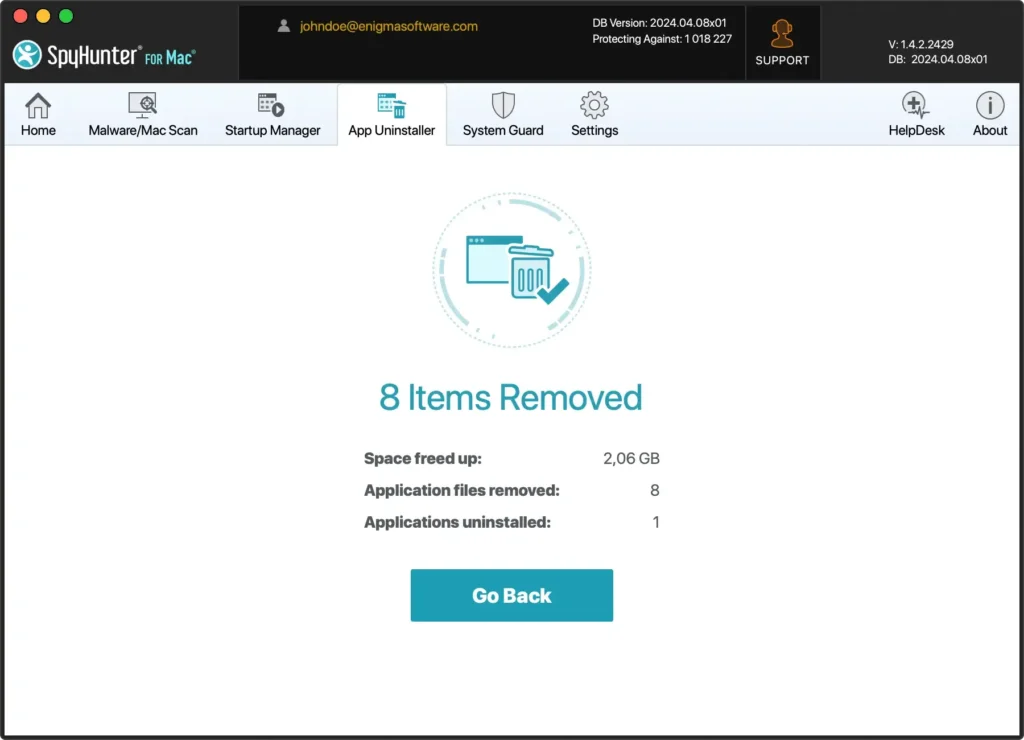
- Once the uninstallation process is complete, restart your Mac to finalize the cleanup.
By using SpyHunter, you simplify the uninstallation process, ensuring no residual files are left behind, which helps maintain your Mac’s performance at its peak and frees up disk space.
Remove Adobe Reader using the Adobe Creative Cloud application
As an alternative solution, you can also use the Adobe Creative Cloud uninstaller to remove Adobe Reader.
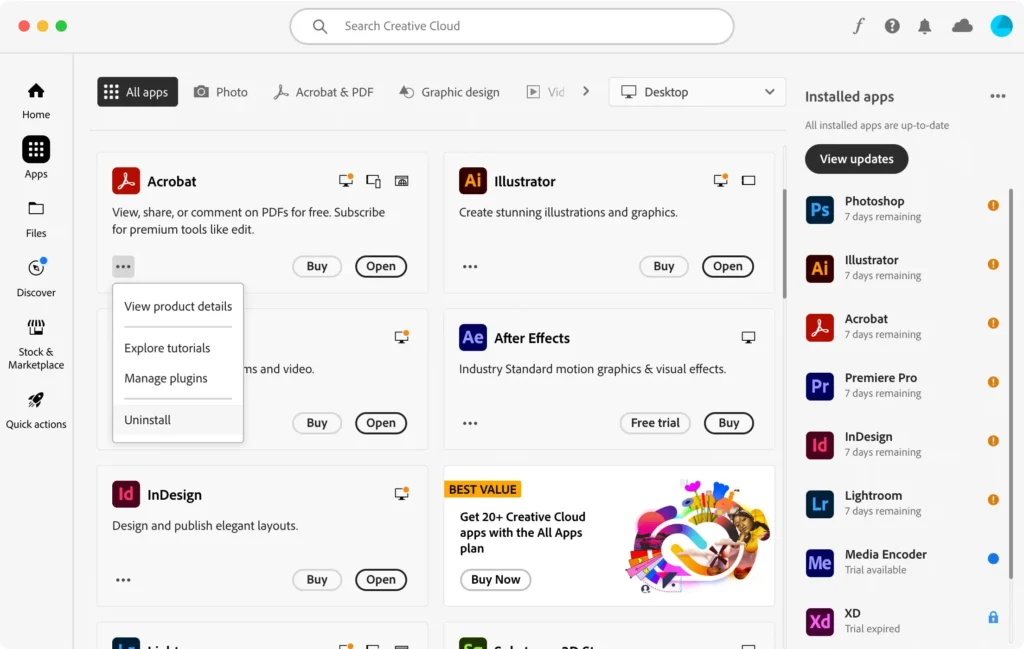
Simply open the Creative Cloud app and find the Adobe Reader icon in the App Apps view. Click the three dots menu button corresponding to Acrobat Reader, then click Uninstall in the menu that appears.
Conclusion
Uninstalling Adobe Reader from your Mac can be an easy process if you have the right tool for the job or follow the proper steps.
Regardless of the method you choose, a thorough cleanup of all leftover files following the removal of any application is essential for keeping your Mac operating at its best.
In case you need information on how to uninstall Adobe Creative Cloud itself – the parent frontend app that is used for launching all Adobe apps, we also have that covered on our blog.
You can also look at our comprehensive guide on how to uninstall any app from your Mac for general tips and a look at the typical flow of the uninstall process, including removal of residual files.