How to Uninstall Adobe InDesign on Mac (Step-by-Step Guide)
Before we dive in
Trying to uninstall an app completely? SpyHunter for Mac includes an App Uninstaller that removes unwanted apps and their leftover files in just a few clicks.
Avoid clutter and save time — download SpyHunter right here and follow the steps to clean up your system.
Adobe InDesign has long been a cornerstone for professionals in the publishing and design sectors, offering great tools for creating stunning digital and print layouts. Yet, the decision to stop using this software on a Mac isn’t uncommon, driven by factors ranging from software issues to the hunt for more budget-friendly or simpler alternatives.
This article examines why uninstalling Adobe InDesign might not only be a necessary step for some but also a doorway to optimizing their workflow, exploring other software options, and enhancing overall system performance.
Reasons to uninstall Adobe InDesign from your Mac
There may be a few different reasons why you would want to uninstall Adobe InDesign from your Mac:
- Software Issues and Bugs: Like any complex software, Adobe InDesign is not immune to technical glitches. Users facing persistent crashes, slow performance, or incompatibility with their Mac OS version might find uninstalling and reinstalling or switching to an alternative a good course of action.
- Cost Considerations: Adobe InDesign’s subscription-based model can be a significant financial commitment for freelancers, small businesses, and individuals. Users often look for more cost-effective or one-time purchase alternatives that provide similar functionalities without the ongoing expense.
- Shifting Needs: The extensive features of Adobe InDesign might be more than what some users require. For those working on simpler projects, or who find the learning curve too steep, simpler software might better align with their current needs.
- Space and Resource Management: Adobe InDesign can be resource-intensive, requiring substantial disk space and system resources. Users with limited storage or working on older Macs might need to prioritize performance and uninstall heavy applications.

Considering your alternatives and understanding your specific goal when removing InDesign is the first step towards streamlining your workflow and Mac performance.
Completely uninstall Adobe InDesign from your Mac using SpyHunter
To completely remove the Adobe InDesign application from your Mac and ensure no residual files are left behind, you can use SpyHunter’s App Uninstaller for a thorough and automated uninstall process.
Follow this straightforward guide to fully uninstall Adobe InDesign from your Mac:
- Download SpyHunter and follow the on-screen instructions to install it properly on your Mac.
- Open SpyHunter and navigate to the
App Uninstallertab in the main menu. - SpyHunter will automatically begin scanning your system. This scan will identify every installed app on your Mac, along with its respective associated files.
- Locate Adobe InDesign in the list of programs once the scan finishes. Select InDesign and ensure you also select all items in the
Related Fileslist to make sure no files are left behind.
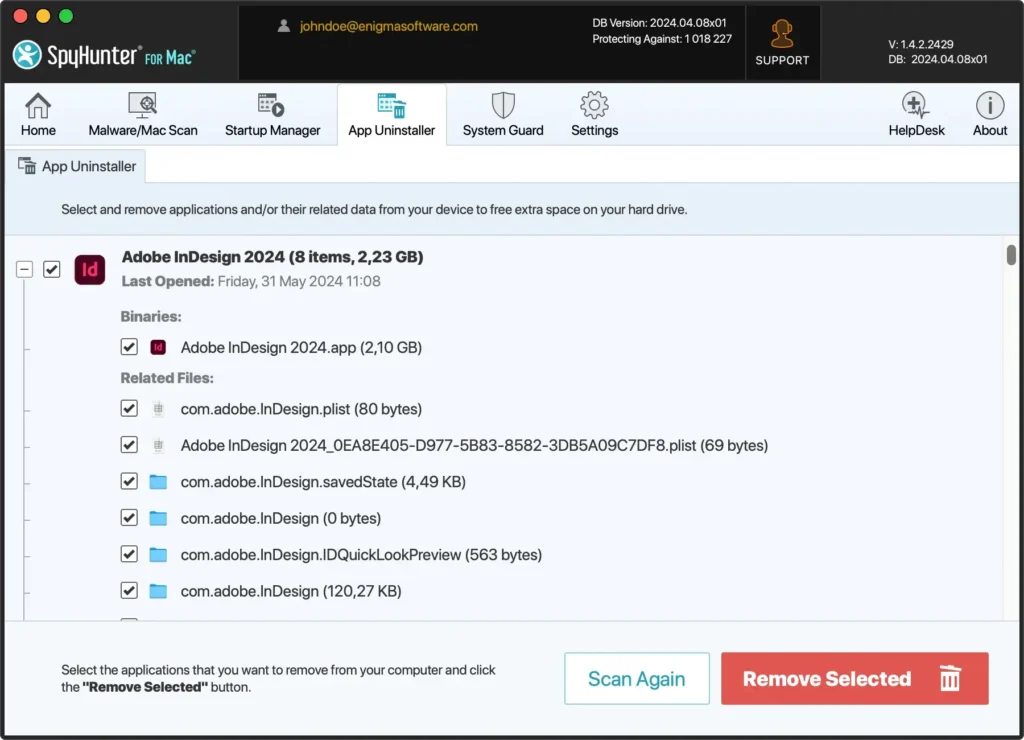
- Confirm the uninstallation process with the
Remove Selectedbutton. This will completely remove Adobe InDesign and all its associated components from your Mac.
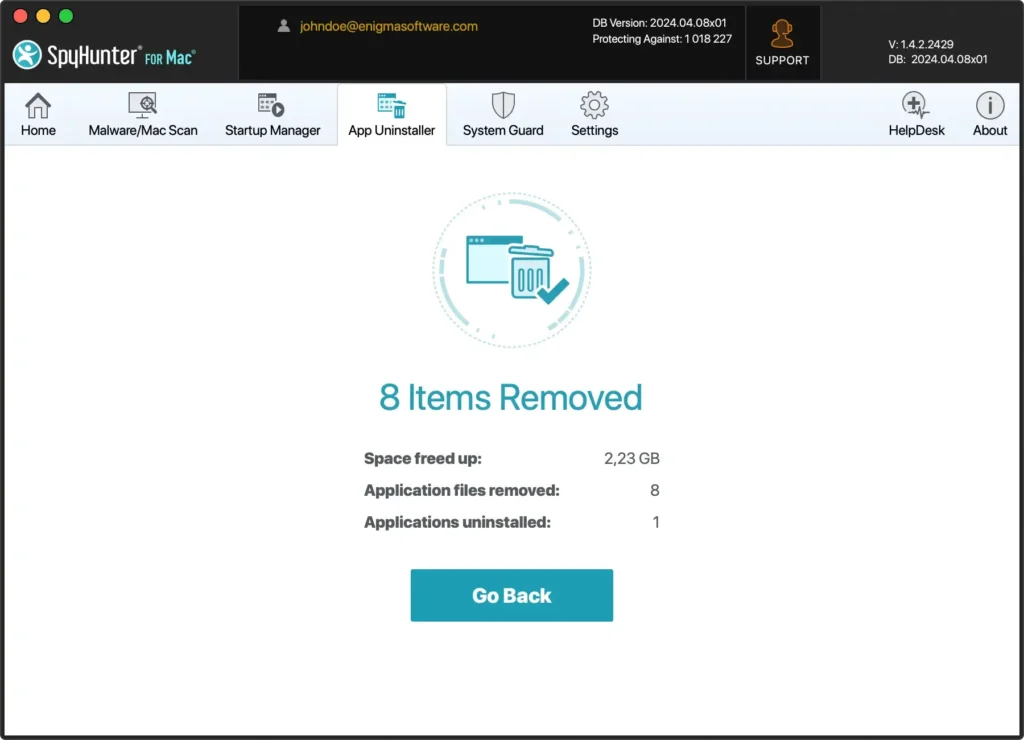
Using SpyHunter’s App Uninstaller simplifies the process of completely removing Adobe InDesign or any other application, including all dependencies and residual files. The automated approach means a safe and complete removal, helping maintain your Mac’s performance and security.
Step-by-step guide to manually uninstall Adobe InDesign on Mac
Removing Adobe InDesign from your Mac involves more than just moving the application to the Trash. This guide walks you through the manual process, offering a clean slate for your machine without any leftovers.
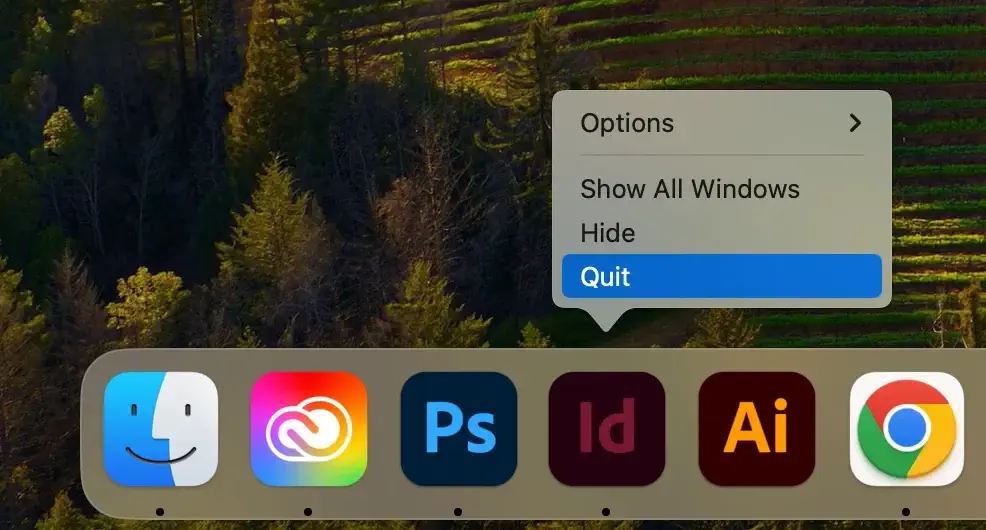
Step 1: Quit Adobe InDesign
Before uninstalling, ensure Adobe InDesign is not running. You can quit the application by right-clicking its icon in the Dock and selecting Quit.
You can also quit InDesign in your Mac’s top menu bar, then select Quit InDesign in the dropdown.

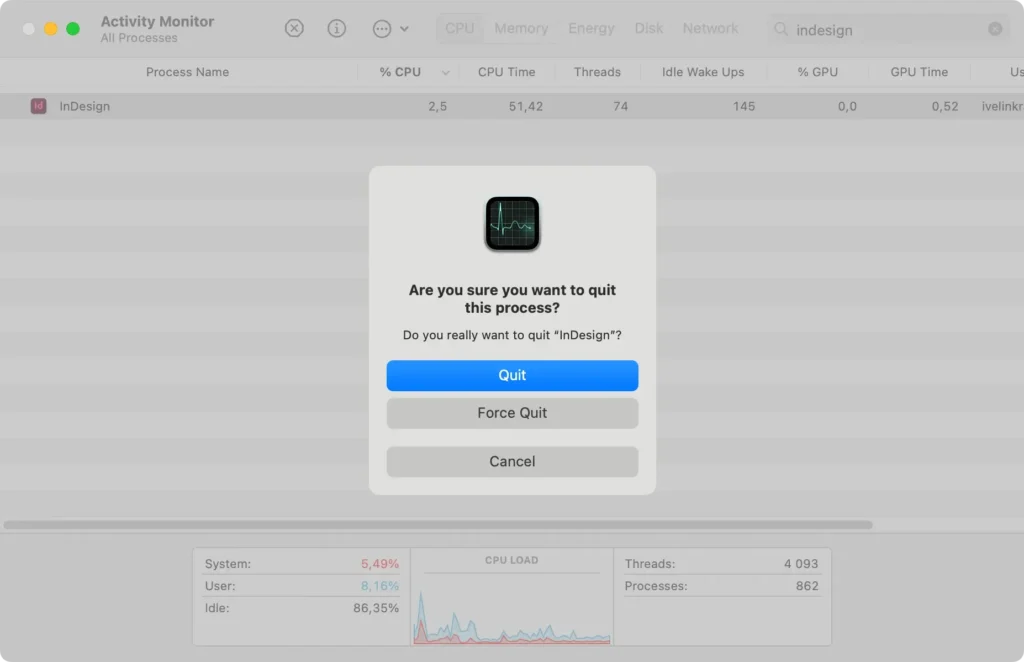
Alternatively, use the Activity Monitor app to find and close any processes related to Adobe InDesign. Select the processes, click the [X] button, and confirm with Force Quit.
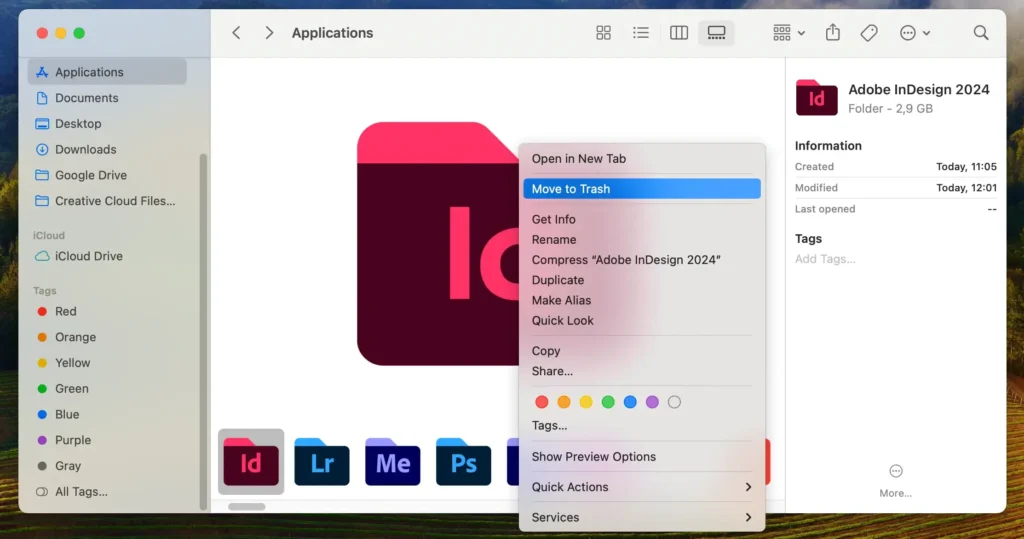
Step 2: Uninstall Adobe InDesign from the Applications folder
After quitting the app properly, open Finder and navigate to your Applications folder. Locate Adobe InDesign, then drag its icon to the Trash or right-click and select Move to Trash. Remember to empty the Trash to complete this step.
Step 3: Clean up leftover files associated with Adobe InDesign
Adobe InDesign can leave behind residual files and caches. To completely remove these, open Finder and press Shift + Command + G to open the Go to Folder window.
Enter the following directory paths one by one, typing them out or copy-pasting them from this guide:
~/Library/Application Support/~/Library/Caches/~/Library/Preferences
In these locations, look for files and folders related to Adobe InDesign and move them to the Trash, then empty the Trash.
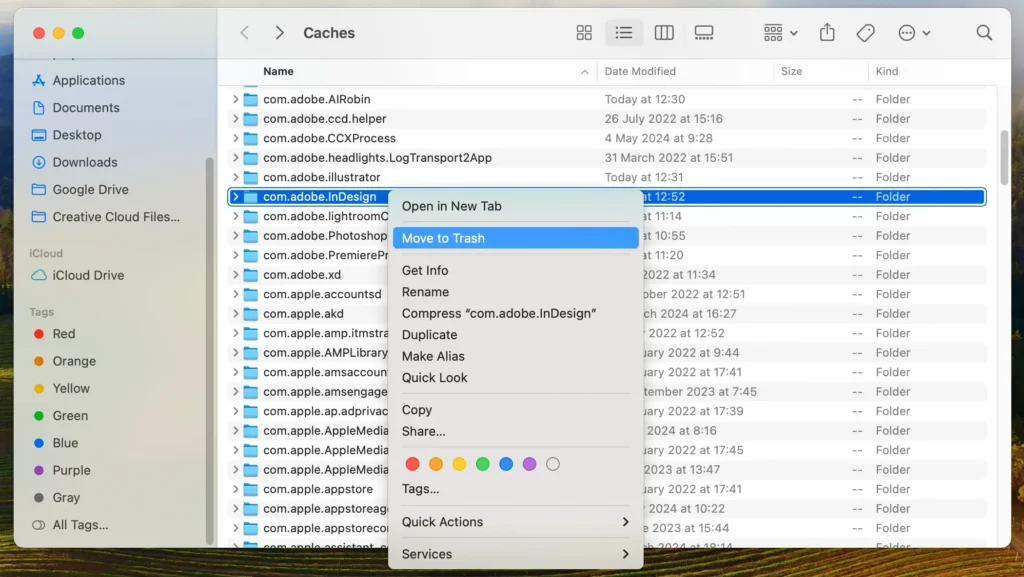
By following these steps, you will ensure that all residual files linked to Adobe InDesign have been removed from your Mac, reclaiming hard drive space and maintaining optimal system performance.
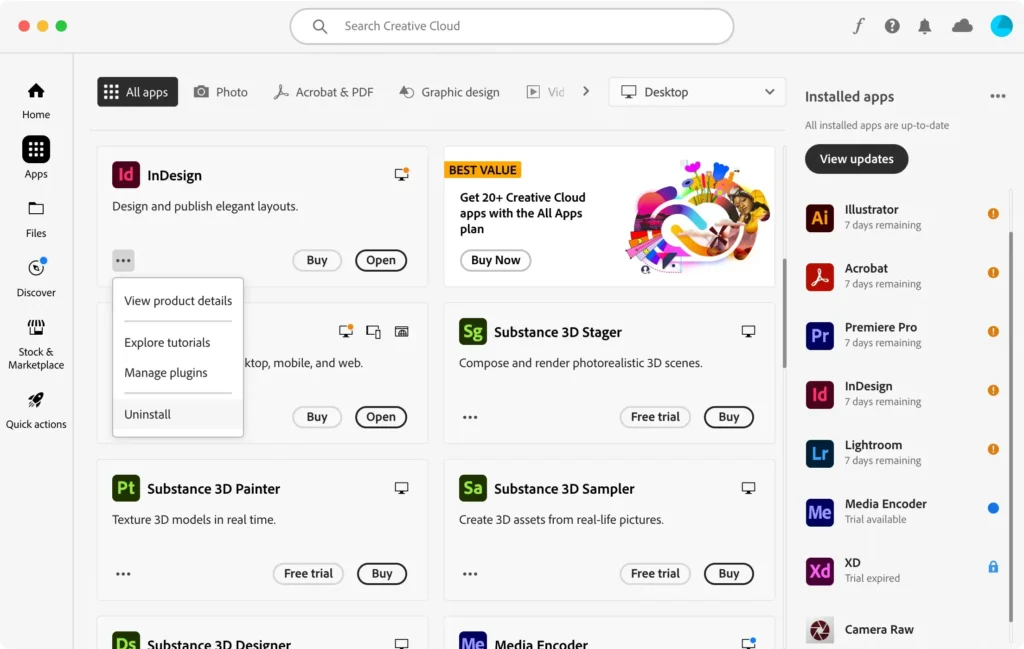
Uninstall Adobe InDesign through the Adobe Creative Cloud app
Another available option is uninstalling InDesign using the interface of the Adobe Creative Cloud application. Creative Cloud serves as a front end for all Adobe products and it also offers a simple uninstall option.
Open Creative Cloud and make sure you are looking at the Apps view from the menu on the left. Locate InDesign in the list of apps on the right and click the three dots button under it, then click Uninstall. This will remove the app using Adobe’s own uninstall process.
Alternatives to Adobe InDesign After Uninstallation
Here are some popular alternative applications you can research and consider if you have made the decision to shift away from InDesign:
- QuarkXPress: QuarkXPress is a powerful application that many professionals use for high-end page layout and design. It’s particularly suitable for publishing projects requiring intricate layouts and typography.
- Scribus: For those seeking a free and open-source alternative, Scribus offers many features comparable to InDesign. It’s well-suited for creating magazines, brochures, and PDF presentations.
- Affinity Publisher: As part of the Affinity suite of design tools, Affinity Publisher offers advanced layout design capabilities at a competitive price. It’s designed for creating everything from brochures to books, with precise control over typography and styles.
Final Thoughts
Following this guide, you have successfully uninstalled Adobe InDesign from your Mac and can enjoy a system that runs smoothly, without any wasted drive space or leftover clutter.
For information on the clean removal of additional Adobe apps, check out our article detailing how to uninstall Adobe Creative Cloud from your Mac.
We also have a guide with useful tips on how to uninstall any app from your Mac that you can use as reference.