How To Uninstall Lightroom On Mac (Full Guide)
Before we dive in
Trying to uninstall an app completely? SpyHunter for Mac includes an App Uninstaller that removes unwanted apps and their leftover files in just a few clicks.
Avoid clutter and save time — download SpyHunter right here and follow the steps to clean up your system.
Thinking about deleting Adobe Lightroom from your Mac but don’t know how? This guide will help you uninstall Lightroom.
If you’re looking to free up disk space or switch to different photo editing software, follow these steps to completely remove Adobe Lightroom from your Mac.
Reasons to uninstall Adobe Lightroom from your Mac
There are several potential reasons to uninstall Adobe Lightroom:
- Subscription cost: Adobe Lightroom subscription costs may not align with your needs, despite the cloud storage that comes with a subscription.
- Storage space: Lightroom and its files can take up a lot of space, especially considering the functionality it offers. If you’re running low on storage, removing it can help.
- Switching software: You might want to try different photo editing tools. Uninstalling Lightroom frees up space for new alternatives.
- Fresh reinstall: Even if you intend to stick with Lightroom, a fresh install might help with sorting out issues you may have with the app.

The steps outlined below will help you remove Adobe Lightroom completely and ensure a clean system, whether the end result is freeing up space or preparing your Mac for a fresh install.
Using SpyHunter to uninstall Adobe Lightroom
To ensure all Adobe Lightroom files are removed, you can use SpyHunter’s App Uninstaller. Here’s how you can do this:
- Download SpyHunter and finish installing it by following the instructions on your screen.
- Open SpyHunter and go to the
App Uninstallertab. - Wait for the scan to finish. This will bring up a list of installed applications, including Lightroom.
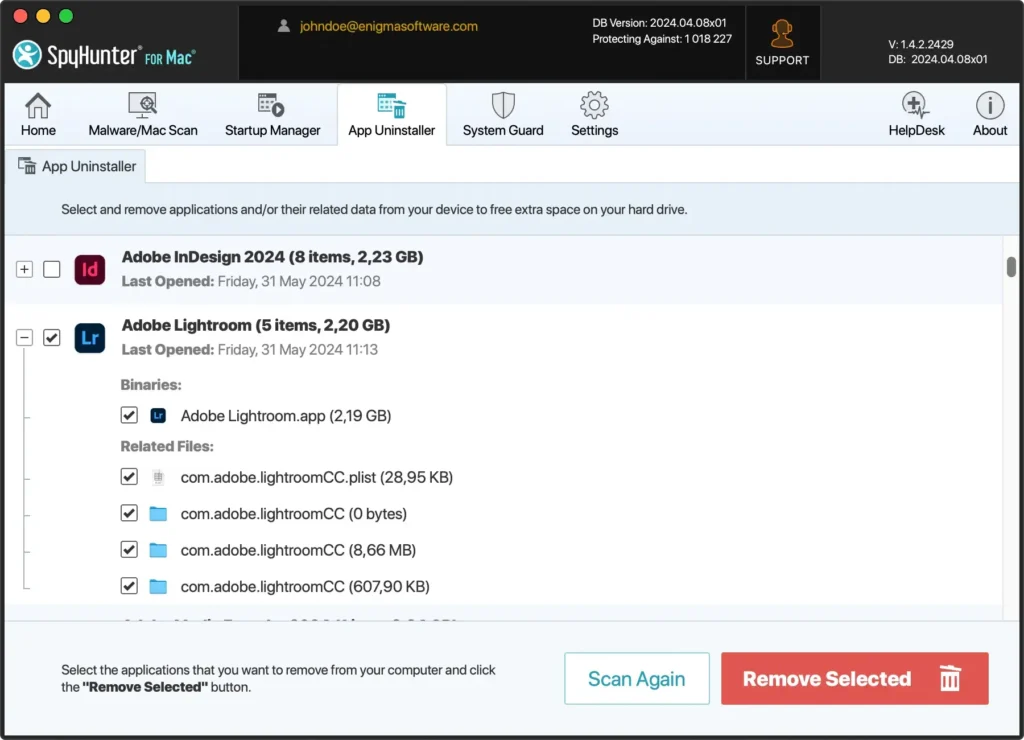
- Scroll down and find Adobe Lightroom, select it and make sure related files below are also selected.
- Confirm and proceed with the uninstallation. SpyHunter will remove Lightroom and all its associated files.
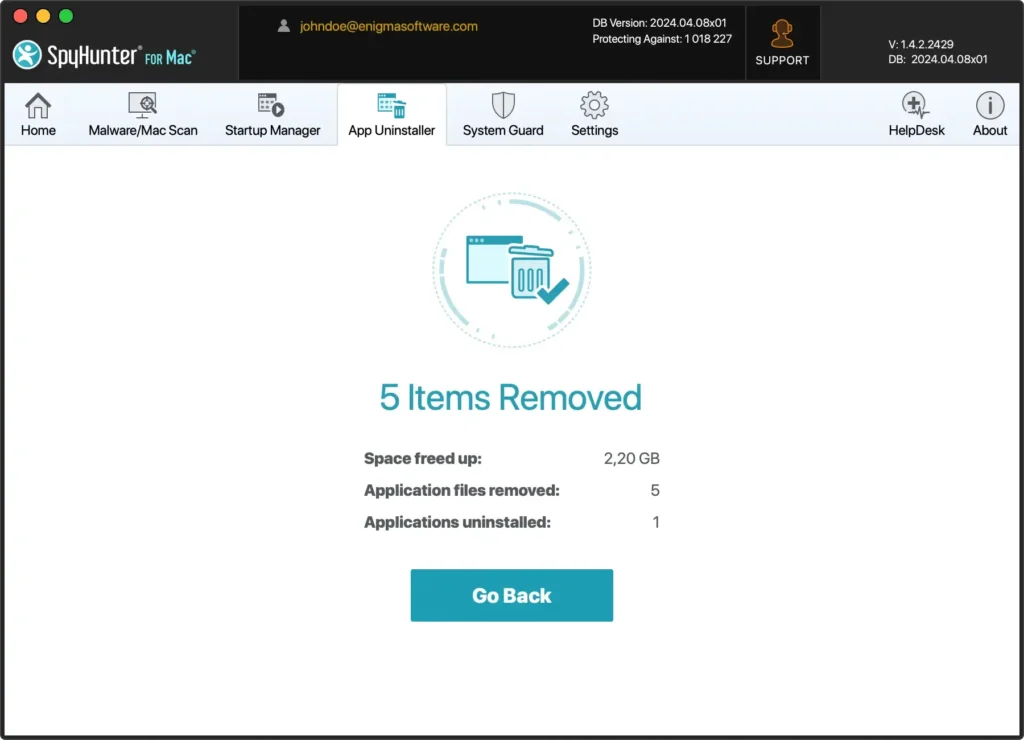
Using SpyHunter to uninstall Adobe Lightroom makes the process easier and ensures all leftover files are removed. This complete cleanup helps keep your Mac running smoothly and prevents software issues.
Manual uninstallation of Adobe Lightroom
Follow these steps to manually uninstall Adobe Lightroom. This brief guide includes the removal of residual files remaining after the regular uninstall.
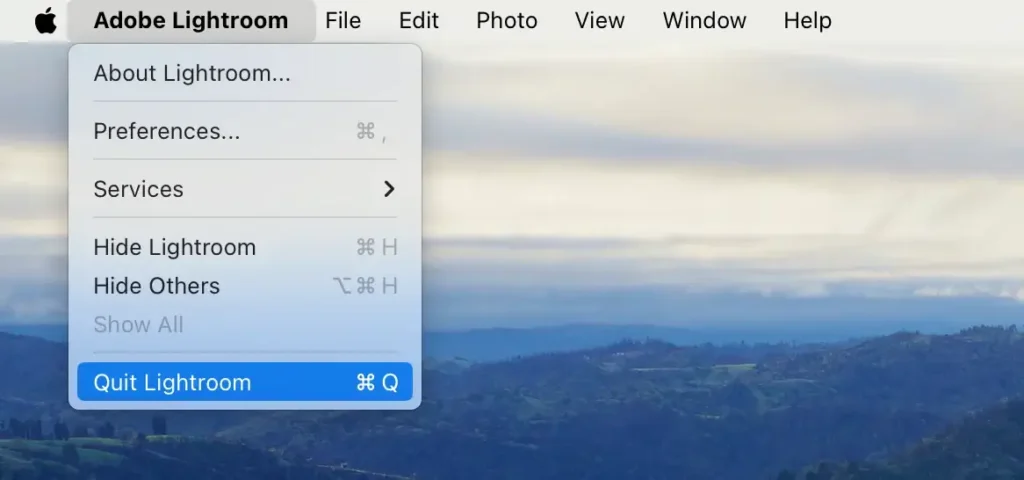
Step 1: Quit Adobe Lightroom
Click Adobe Lightroom in the top menu bar and select Quit Lightroom.
Another option you can use is right-clicking the Adobe Lightroom icon in the Dock and selecting Quit.
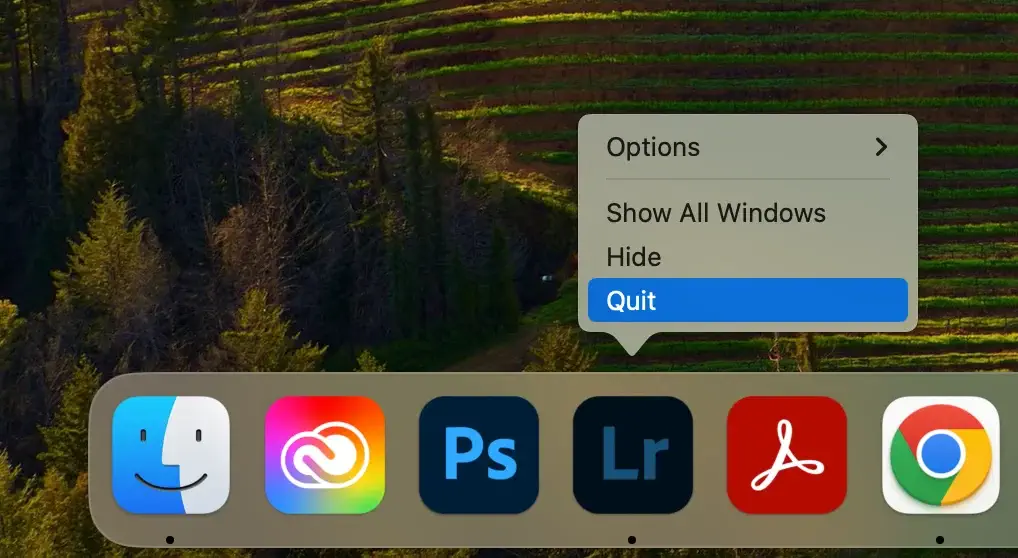
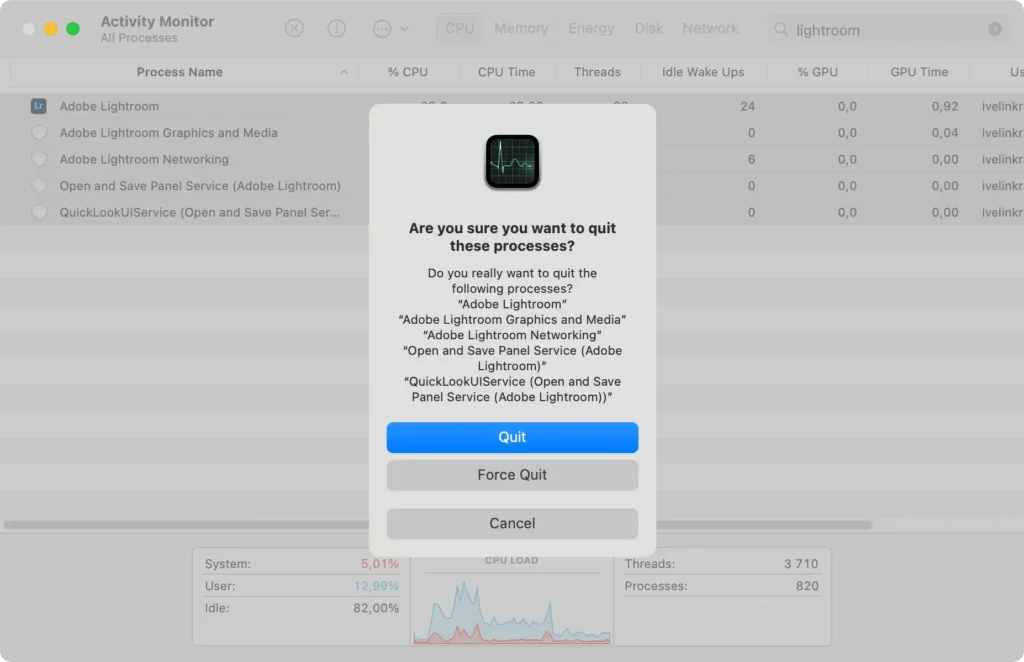
If Lightroom is unresponsive and you cannot use the previous two methods, open Activity Monitor and find processes with “Adobe Lightroom” in their name. Select and force quit those processes using the [X] button.
Step 2: Uninstall Adobe Lightroom from the Applications folder
Open Finder and go to your Applications folder. Find Adobe Lightroom, right-click it, and select Move to Trash or just drag it onto the Trash.
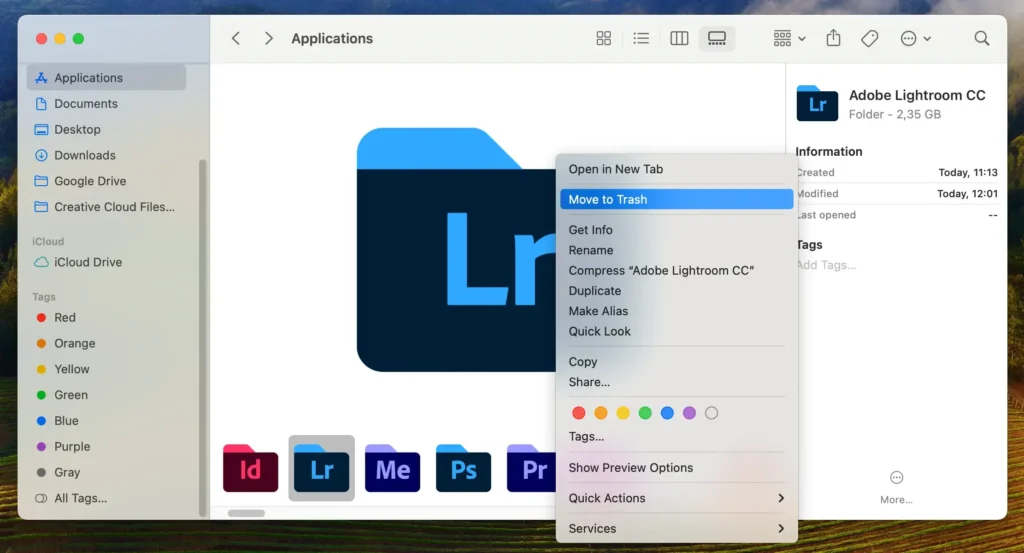
Empty the Trash to complete this main uninstall step.
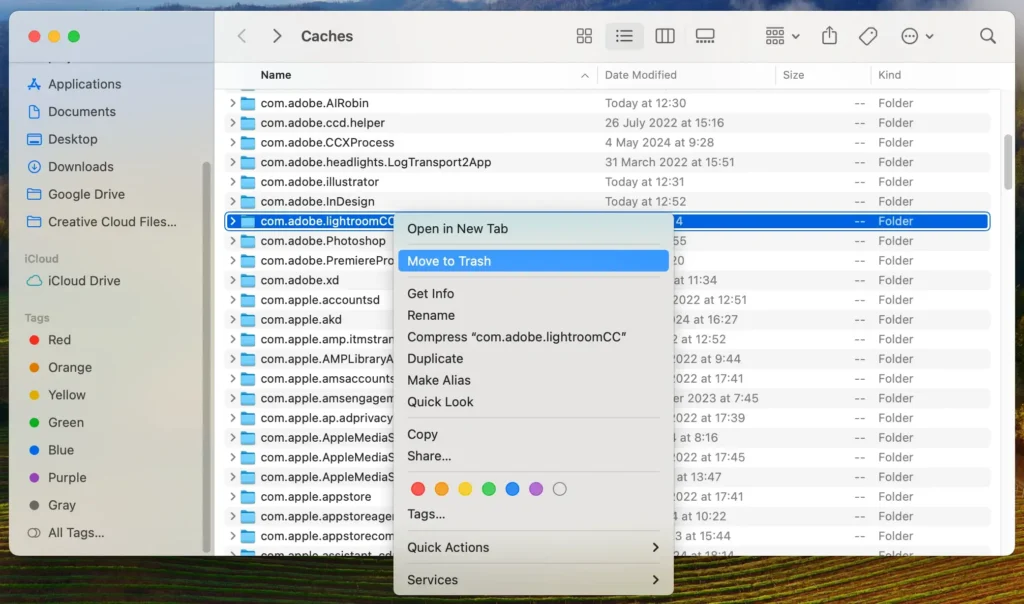
Step 3: Remove Adobe Lightroom leftovers
The final stage of a manual uninstall includes the removal of residual files. You should always make sure you remove leftovers, as they can clutter your system and take up a lot of space over time.
Open Finder, press Command + Shift + G or use Go > Go to Folder from the Finder menu and type in the following paths one by one:
~/Library/Preferences/~/Library/Application Support/Adobe/Lightroom/~/Pictures/Lightroom/Lightroom Catalog.lrcat~/Pictures/Lightroom/Lightroom Catalog Previews.lrdata~/Pictures/Lightroom/Lightroom Catalog Smart Previews.lrdata~/Pictures/Lightroom/Lightroom Catalog.lrcat.lock~/Pictures/Lightroom/Lightroom Catalog.lrcat-journal
Those files include saved preferences file and catalog file leftovers. Delete files associated with Adobe Lightroom in these locations by dragging them to the Trash. Empty the Trash to finalize the cleanup.
This last step is important in ensuring complete removal, leaving no trace files behind and reclaiming disk space, making for a better-performing Mac.
Uninstall Adobe Lightroom with Adobe Creative Cloud
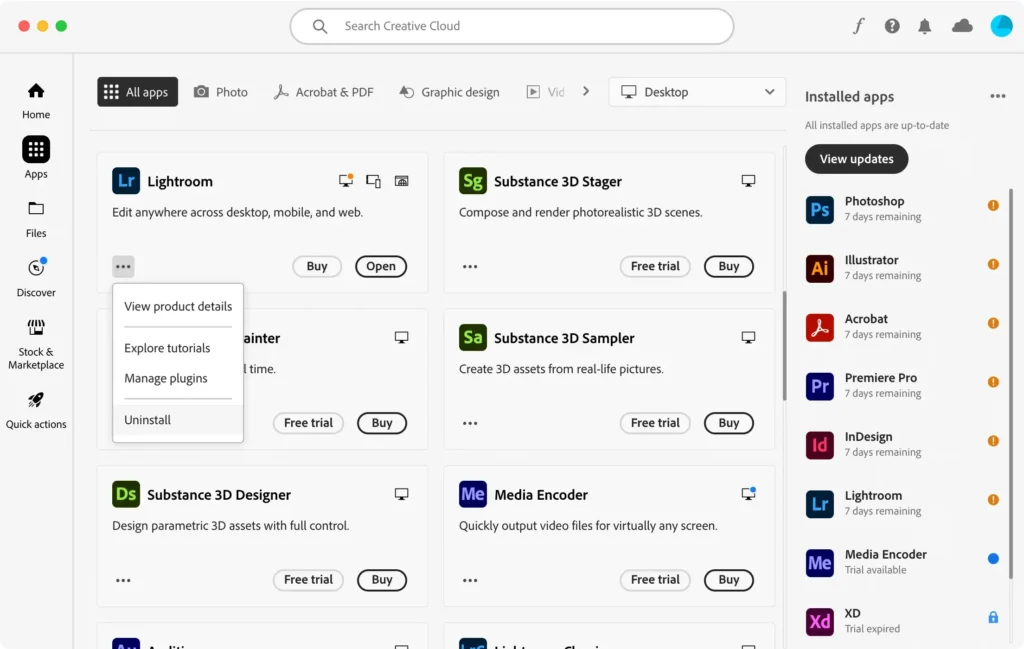
If you are using Adobe Lightroom as a module inside the Adobe Creative Cloud desktop app, you can also use the native uninstaller prodived:
- Open Creative Cloud and go to the
Appstab in the meni on the left. - Find Adobe Lightroom, click the three dots next to it, and click
Uninstall. - In the dialog box that comes up, confirm the uninstall by clicking
Remove.
Using Adobe’s own uninstaller in Creative Cloud is a good way to ensure that no files are left behind in the process.
Conclusion
Thoroughly uninstalling Adobe Lightroom from your Mac is essential for keeping your system clutter-free and running at peak performance.
Removing all associated files and directories enhances your Mac’s performance and stability. Regularly removing leftover files when you uninstall any app frees up space and ensures your system runs smoothly and efficiently.
In case you are also looking on information on how to uninstall Creative Cloud as well, we have that topic covered in another extensive guide.
For general advice on uninstalling any app from your Mac, refer to our guide on the topic.