How To Uninstall Parallels On Mac (Complete Guide)
Before we dive in
Trying to uninstall an app completely? SpyHunter for Mac includes an App Uninstaller that removes unwanted apps and their leftover files in just a few clicks.
Avoid clutter and save time — download SpyHunter right here and follow the steps to clean up your system.
Have you ever how to uninstall Parallels on Mac the right way? You are in the right place!
While Parallels Desktop is a great tool to run Windows and other operating systems on Mac, it can eat up a lot of system resources.
In this post, I’ll cover the reasons to uninstall the Parallels Desktop app, how to prepare your Mac for clean removal, and how to remove any leftovers.
Let’s get started!
Why uninstall Parallels on Mac?
- Hard Drive Space: Parallels Desktop and the virtual machines it creates take up a lot of space. For users with limited hard drive space, this can be a problem.
- RAM: Running virtual machines eats up a lot of RAM, which can affect other applications and overall computer responsiveness.
- Slower Mac: And finally, all the above can add up to slower MacBook performance. Removing Parallels Desktop can be a step to speed up your Mac.

Tip: Consider backing up your VMs before uninstalling Parallels Desktop so you can easily restore your virtual environment later. To do this, export your VMs by going to Parallels Desktop Control Center, right-clicking on the VM, and selecting "Save to a file." Store the backup file securely, and for added protection, upload it to a cloud service like iCloud, Dropbox, or Google Drive.
Completely uninstall Parallels Desktop with SpyHunter
To completely remove Parallels from your Mac and ensure no leftover files stick around, you can use SpyHunter’s App Uninstaller for a thorough, assisted removal process.
Here’s a straightforward guide to help you fully uninstall Parallels from your Mac using SpyHunter:
- Download SpyHunter and follow the detailed instructions on your screen to install it on your Mac.
- Launch SpyHunter and select the
App Uninstallertab from the main menu of the app. - SpyHunter will automatically start a scan of your system when you do this, identifying all installed apps and files and directories associated with those apps.
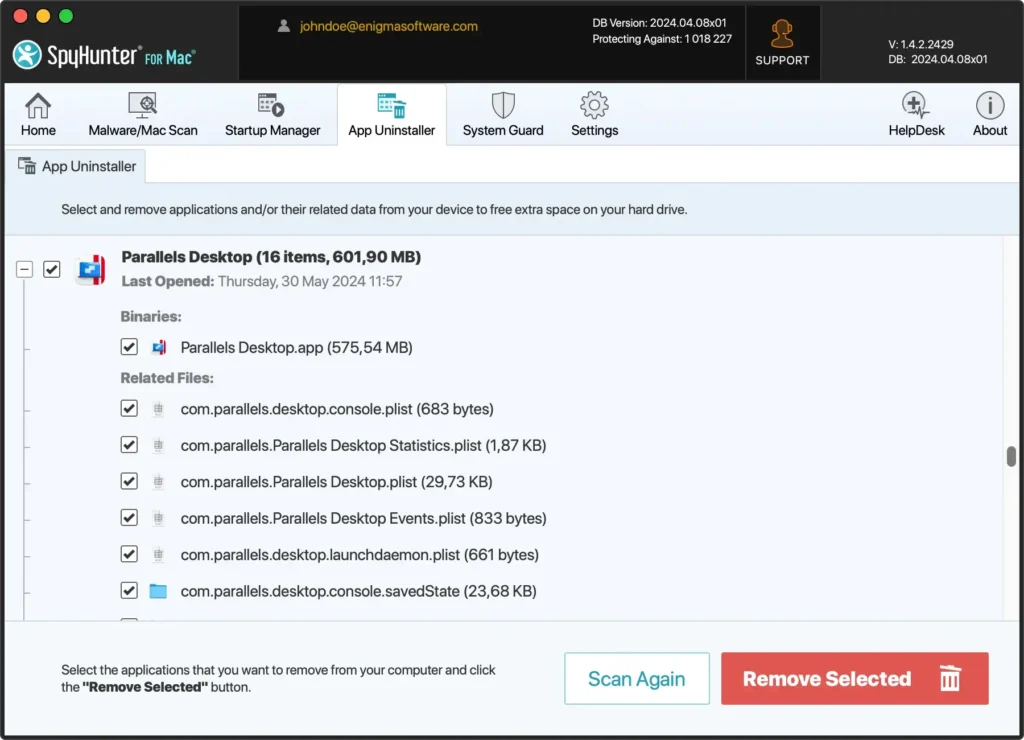
- Locate the Parallels Desktop applications in the list.
- Select it and all its related files.
- Confirm the uninstallation within the SpyHunter app.
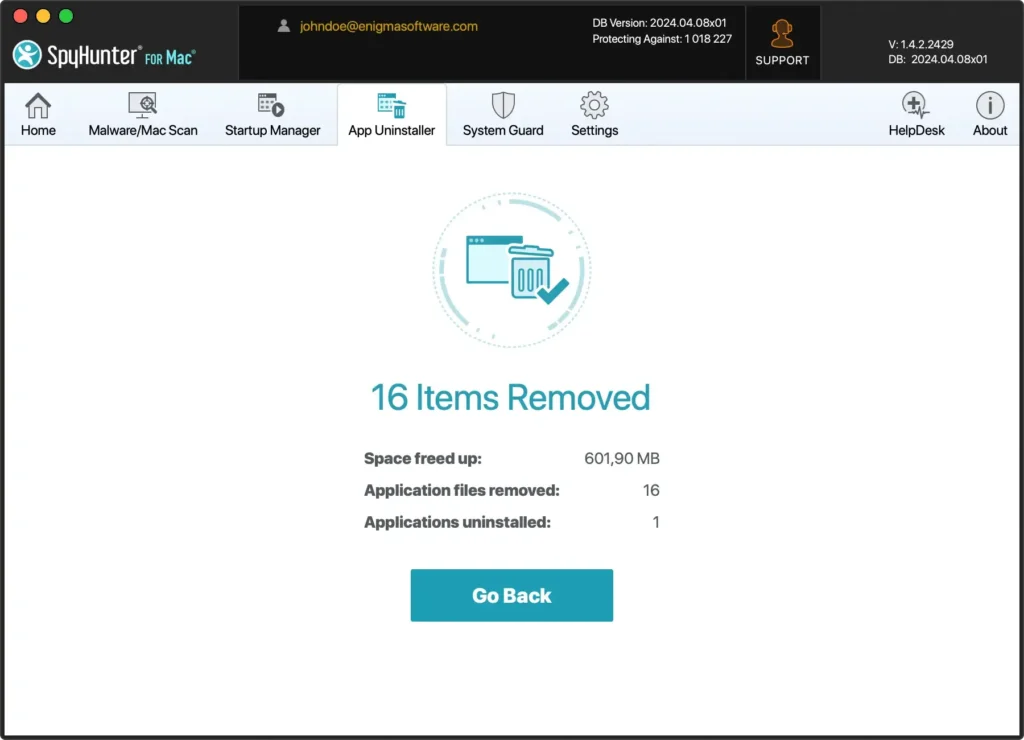
Using SpyHunter’s App Uninstaller simplifies the complete removal of Parallels or any other app, including all dependencies and residual files.
How to manually uninstall Parallels on Mac
Like with most macOS apps, the manual uninstall of Parallels involves a couple of extra steps, in addition to simply dragging the app onto the Trash.
Follow this simple guide to completely remove Parallels Desktop for Mac:
Step 1: Quit Parallels Desktop
Before uninstalling Parallels, ensure it’s not active in the background. There are a couple of ways to close the application properly.
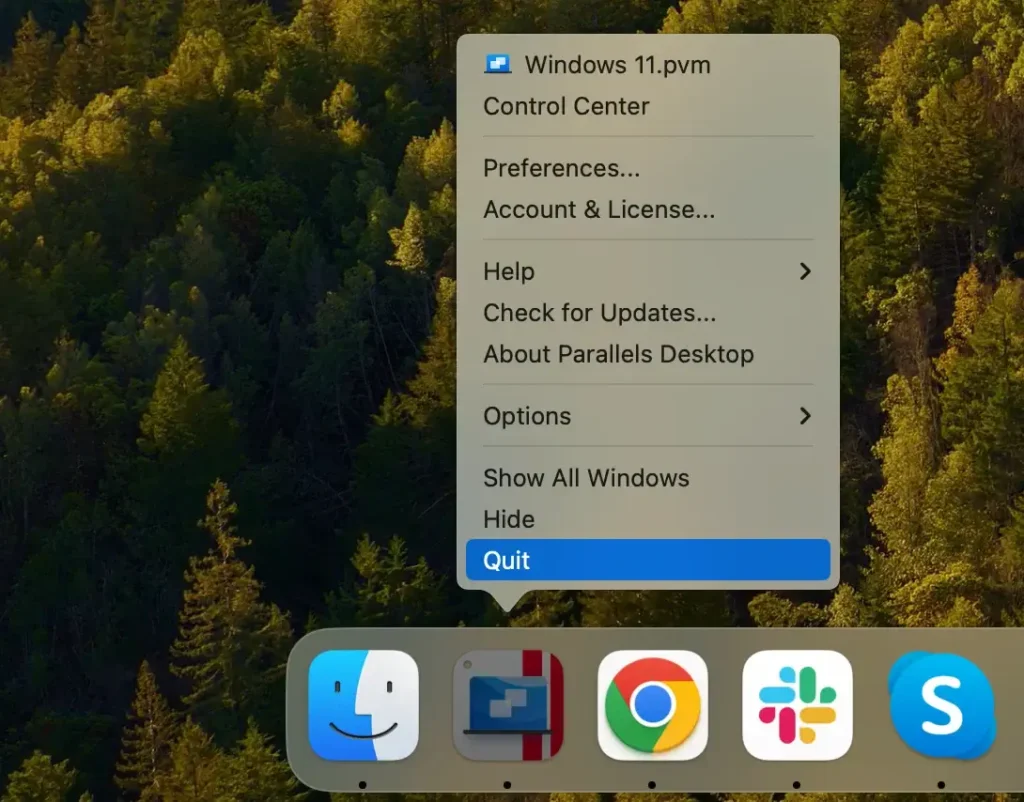
First, you can right-click the Parallels Desktop icon in the Dock and choose Quit from the context menu.
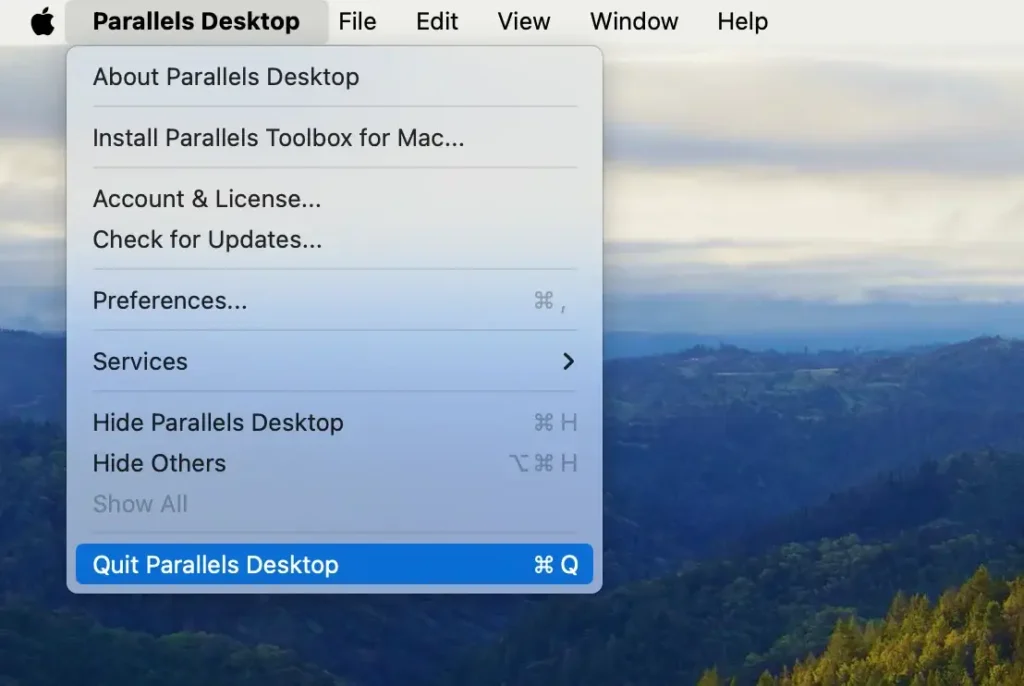
You can also use the application’s own menu, clicking Parallels Desktop in your Mac’s top menu bar and then selecting Quit Parallels Desktop in the dropdown.
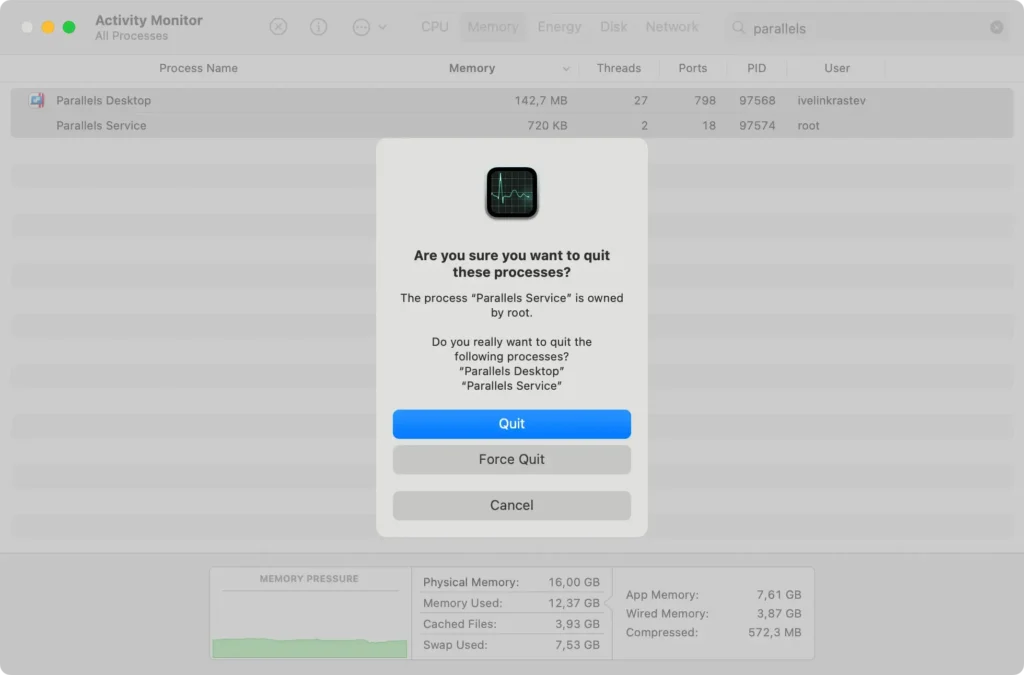
If Parallels is not responding properly, you can launch Activity Monitor from your Utilities section inside Finder. Search the Activity Monitor window for any processes containing “Parallels” in their names.
If any are found, select them and click the [X] button above the process list to close them. In the confirmation dialog that appears, click Force Quit to finalize your action.
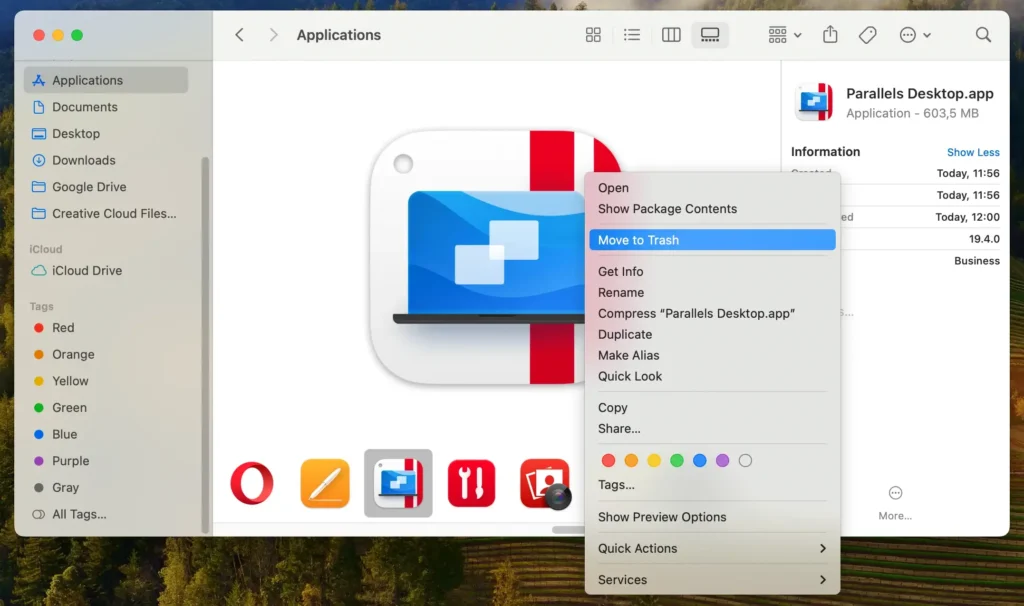
Step 2: Delete Parallels Desktop from the Applications folder
Next, you have to remove Parallels from your Applications folder. Use Finder to navigate to it and locate Parallels Desktop inside it.
Drag the icon onto your Trash, or alternatively right-click the Parallels icon and then select Move to Trash in the pop-up menu. The final stage of this step is emptying your Trash.
You should repeat this step for the Parallels Toolbox app as well, which will also be located in your Applications folder. Make sure you quit Parallels Toolbox properly before you attempt to remove it.
This will remove the main application, but some supporting files remain on your system.
Step 3: Remove leftover files related to Parallels Desktop
After deleting the application, remove its supporting files from your system to prevent unnecessary clutter and free up space. Follow these steps to locate and delete these files:
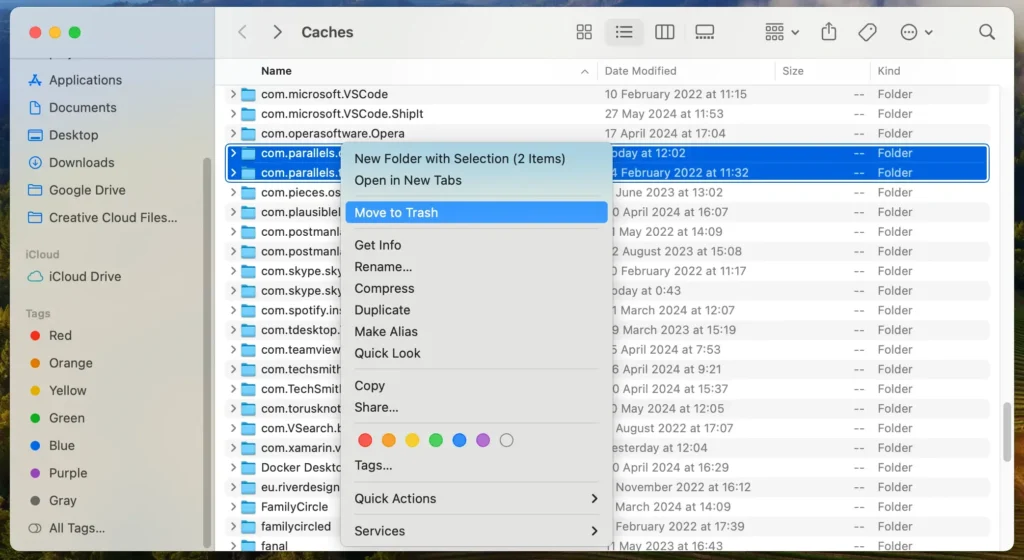
- Press
Command + Shift + Gon your keyboard or click onGo > Go to Folderfrom the menu bar. - Type in
~/Library/in the search bar and hitReturn. This will take you to theLibraryfolder, where most support files are stored. - Look for folders and files related to Parallels Desktop in the following directories:
~/Library/Application Support/Parallels/~/Library/Caches/Parallels/~/Library/Containers/~/Library/GroupContainers/~/Library/Preferences/com.parallels.*
- For all files or folders you find, right-click and select
Move to Trash.
After you move all related files to the Trash, don’t forget to empty your Trash. This will remove them permanently from your Mac and complete the removal.
Final thoughts
Uninstalling Parallels Desktop or any other macOS app is easy if you have the right tools and know how.
One last thing to remember is that your Parallels subscription is still active and not tied to the app being installed.
If you do not intend to use Parallels in the near future, consider canceling your subscription to avoid any unnecessary costs.
We have a useful guide on how to uninstall apps on Mac that you can also find useful.