How To Fully Uninstall Eclipse on Mac (Ultimate Guide)
Before we dive in
Trying to uninstall an app completely? SpyHunter for Mac includes an App Uninstaller that removes unwanted apps and their leftover files in just a few clicks.
Avoid clutter and save time — download SpyHunter right here and follow the steps to clean up your system.
Are you ready to delete Eclipse from your Mac but unsure how to start? Whether you’re freeing up space or simply moving to a different IDE, uninstalling Eclipse can help you streamline your system.
This guide will walk you through the steps to uninstall Eclipse and all associated data from your Mac, ensuring a clean and efficient workspace.
Let’s dive into the process and free up some valuable space on your computer.
Reasons to uninstall Eclipse IDE from your Mac
There are several compelling reasons why you might consider uninstalling the Eclipse application from your Mac:
- Freeing Up System Resources: Eclipse can be quite demanding on system resources, including disk space and memory.
- Switching Development Environments: With the ever-evolving development tools available, you might find that another IDE or editor better suits your current programming needs.
- Resolving Performance Issues: Eclipse can sometimes run into performance issues or stability problems that persist despite attempts at troubleshooting.
- Simplifying Your Toolset: If you’re not using Eclipse regularly and just sitting idle on your system, uninstalling it can simplify your development setup and reduce clutter on your Mac.
- Security Concerns: Installing unused software can pose security risks, especially if the programs aren’t regularly updated.

Deciding to uninstall Eclipse can help streamline your development process, better use system resources, and maintain a cleaner and more secure Mac environment.
Completely uninstall Eclipse using SpyHunter
To completely uninstall Eclipse IDE from your Mac and ensure no leftover files remain, you can utilize SpyHunter’s App Uninstaller feature for a thorough removal.
Here’s a straightforward guide on how to do this:
- Download SpyHunter for free here and follow the installation prompts to ensure it is correctly set up on your computer.
- Open SpyHunter and navigate to the
App Uninstallertab at the top. - Upon accessing the tab, SpyHunter will automatically initiate a scan of your system. This scan detects all applications installed on your Mac and their related directories.
- From the list of programs displayed after the scan, locate Eclipse and select it. Ensure you choose all associated files listed with it for removal to avoid any leftovers.
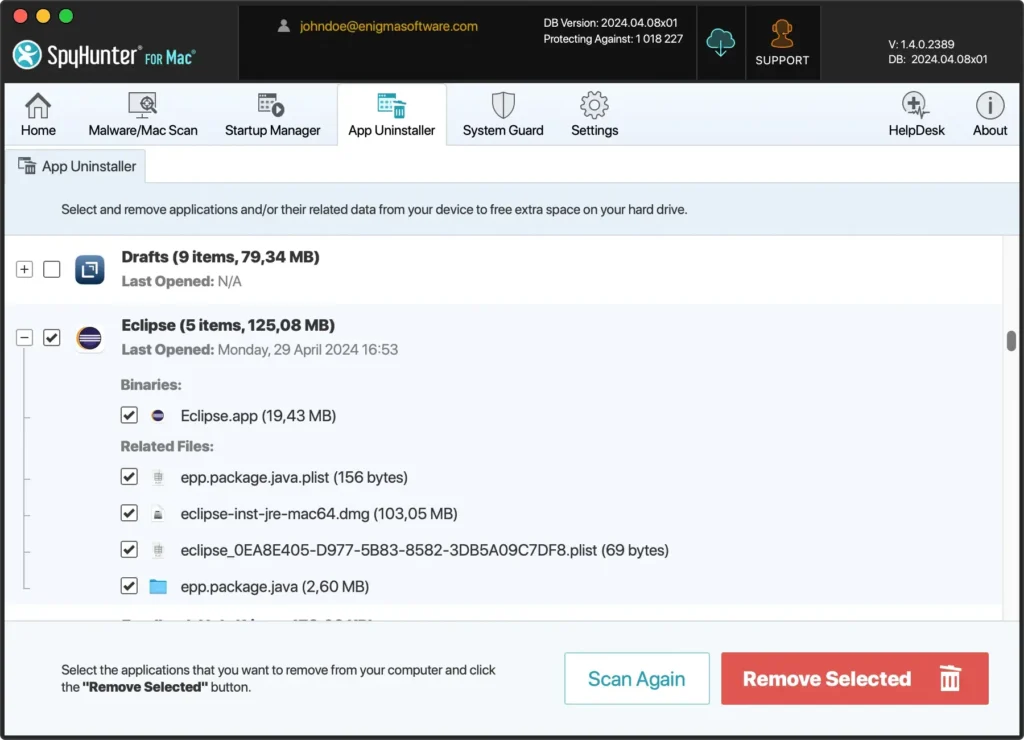
- Confirm the uninstallation process within SpyHunter, which will delete Eclipse and all its components from your Mac.
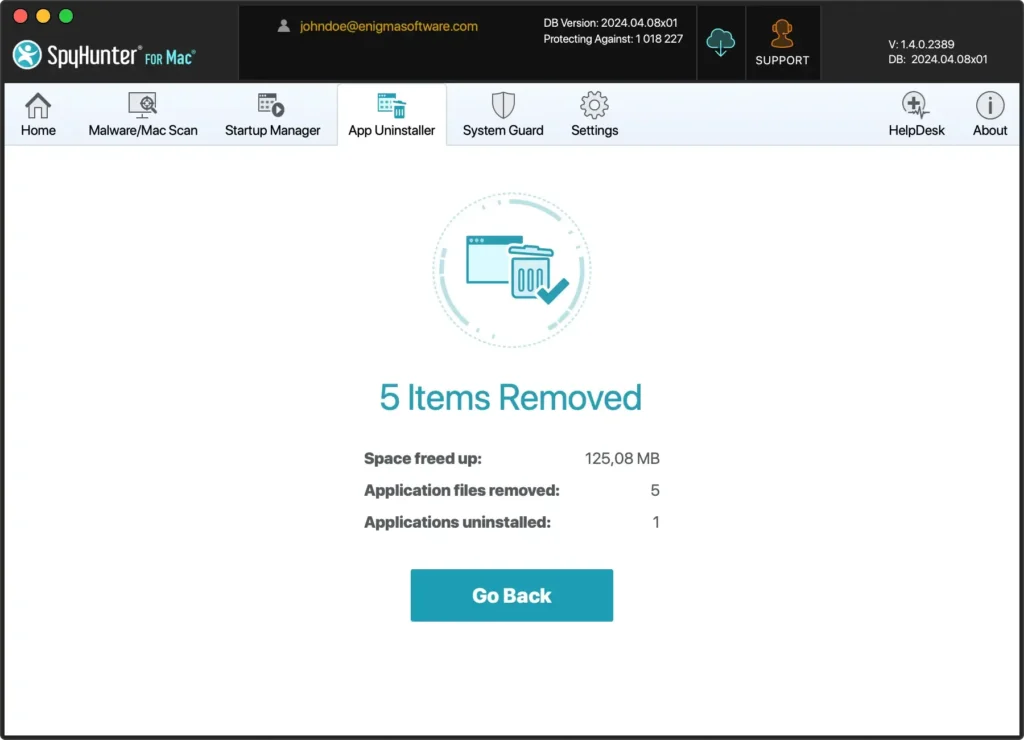
Using SpyHunter’s App Uninstaller simplifies removing Eclipse and ensures the application is completely eradicated from your system, including all its dependencies and residual files.
This method guarantees a clean and efficient uninstallation, helping to maintain your Mac’s performance and security.
Manually delete Eclipse from your Mac
If you’re ready to declutter your Mac or switch to a different integrated development environment, manually uninstalling Eclipse is straightforward.
This guide will take you through each step to ensure that Eclipse and all its related files are completely removed from your system, leaving no residue and freeing up valuable disk space.
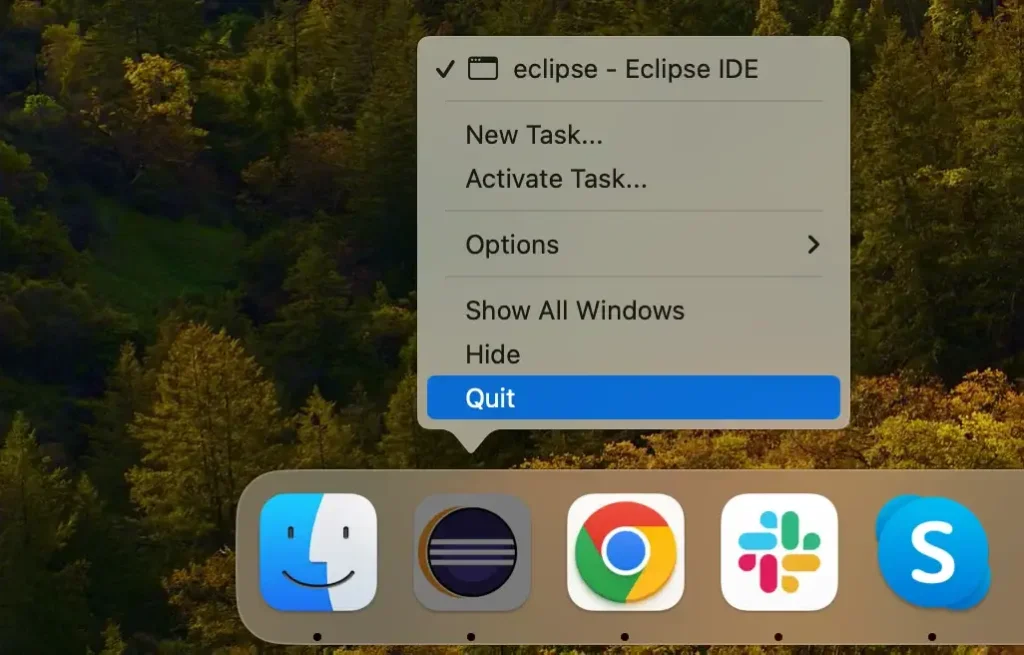
Step 1: Quit the Eclipse application
Before uninstalling any application, ensuring it’s not running is essential. An active Mac application might have locked files that can prevent a complete uninstallation.
Right-click the Eclipse icon in the Dock, and select Quit from the contextual menu to close the application.
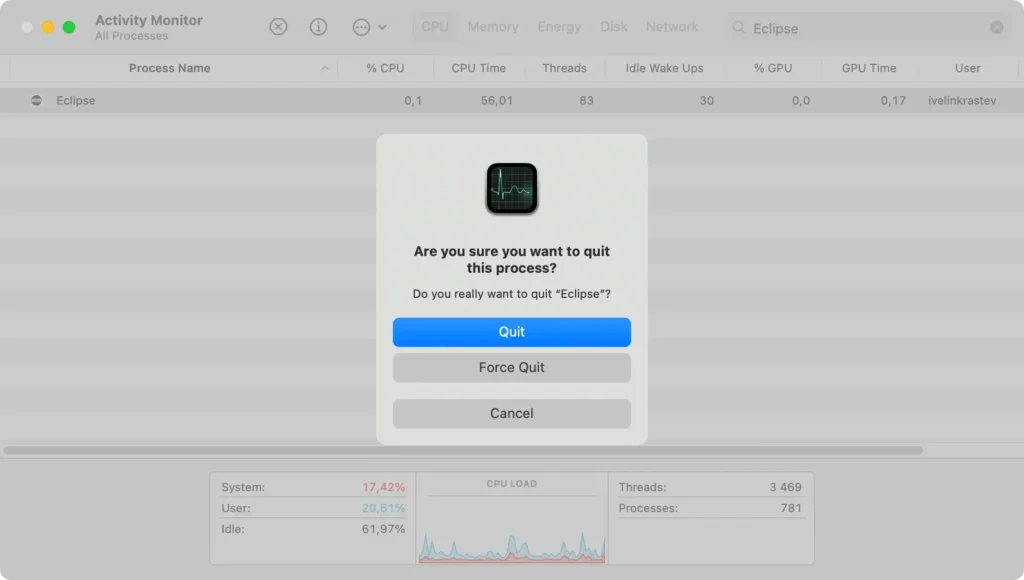
If Eclipse is unresponsive or won’t quit normally, you must force it to close. Open Activity Monitor and search for any processes related to the Eclipse IDE. Select them and click the [X] button at the top of the window to force quit the application.
Step 2: Delete Eclipse IDE from the Applications folder
After ensuring that Eclipse is no longer running, the next step is removing the program. This step will delete the main Eclipse application file but not the associated data and settings.
- Open Finder and navigate to the
Applicationsdirectory to access all your installed applications. - Scroll through the list or use the Finder’s search function to find Eclipse.
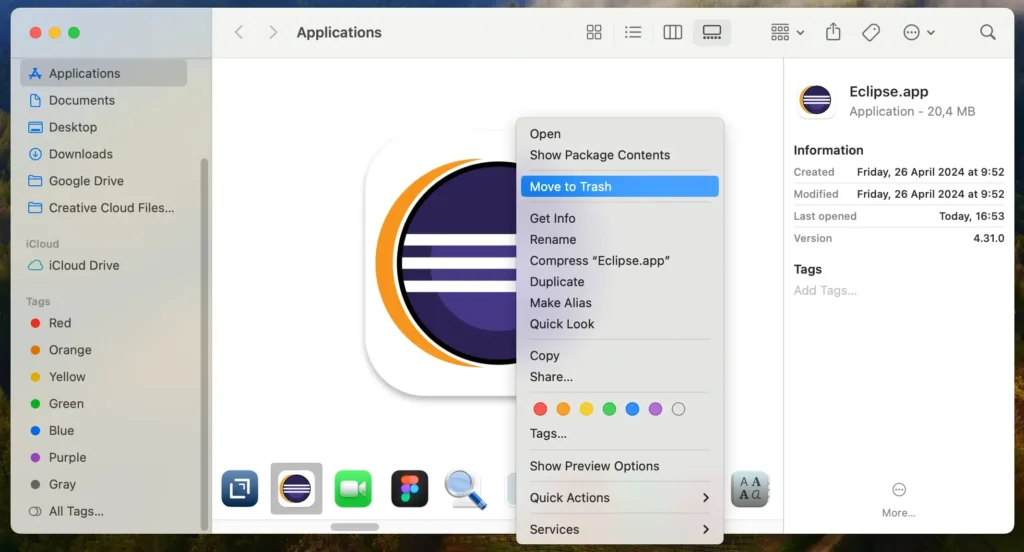
- Click and drag the Eclipse icon to the Trash, or right-click and choose
Move to Trashfrom the context menu to initiate the uninstallation. - Empty the Trash to delete the app from your computer permanently.
Step 3: Remove Eclipse-related files and folders
Simply dragging the application to the Trash doesn’t delete the configuration files, plugins, and other data that Eclipse may have created.
These files can take up significant space and cause conflicts if you reinstall Eclipse later.
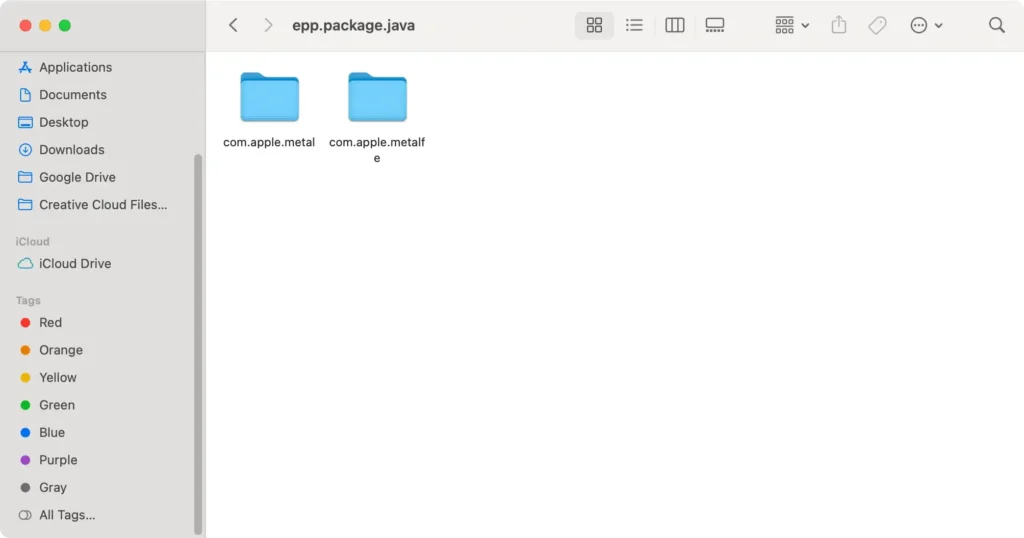
- Open Finder, click the
Gomenu at the top menu bar, then selectGo to Folderfrom the dropdown. - Enter the following paths one at a time, look for any directories or files related to Eclipse, and move them to the Trash:
~/Library/Application Support/Eclipse/~/Library/Preferences/epp.package.java.plist~/Library/Caches/epp.package.java/
- To complete the uninstallation process, empty the Trash bin. This action will permanently delete all Eclipse files from your Mac, ensuring a clean slate.
Following these detailed steps, you have manually uninstalled Eclipse from your Mac. This action frees up space and helps maintain a tidy system free from unused and unnecessary files.
If you plan to continue software development on your Mac, consider evaluating other IDEs that may better suit your current needs.
Exploring alternatives to Eclipse
After removing Eclipse from your computer, you may consider what other development environments or editors are available to match or exceed Eclipse’s functionality.
Whether you’re looking for something lighter, more intuitive, or with different features, here are a few alternatives that are popular among developers:
- Visual Studio Code: Highly versatile and lighter than Eclipse. It offers powerful coding support and a vast library of extensions for almost any programming language. This makes it a strong alternative for Mac and Windows users.
- IntelliJ IDEA: Known for its robust performance and comprehensive feature set. IntelliJ IDEA is an excellent choice for developers looking for a sophisticated environment to manage complex software projects.
- Sublime Text: If you prefer speed and efficiency over integrated development environments, Sublime Text is a sleek, fast, and feature-rich code editor. It supports many programming languages.
Summary
Congratulations, you have successfully uninstalled Eclipse from your device!
By carefully following the steps, you’ve cleared up valuable space on your Mac and streamlined your development environment by removing this comprehensive but resource-intensive app.
As you transition away from Eclipse, consider exploring other programs that may better suit your development needs on both Mac and Windows.
This shift could significantly enhance your efficiency and adaptability in managing diverse software projects across different platforms.
Happy coding, and may your new development environment empower you to build great things!