How to Uninstall Little Snitch on Mac (Complete Guide)
Before we dive in
Trying to uninstall an app completely? SpyHunter for Mac includes an App Uninstaller that removes unwanted apps and their leftover files in just a few clicks.
Avoid clutter and save time — download SpyHunter right here and follow the steps to clean up your system.
Are you considering removing Little Snitch from your Mac but unsure if it’s the right move? This comprehensive guide dives into why users might opt to uninstall Little Snitch, weighing the pros and cons of this decision.
From addressing the complexity and constant alerts to exploring built-in macOS alternatives and comprehensive security software options like SpyHunter, we’ll help you understand the best course of action for your system’s safety and performance.
Why consider uninstalling Little Snitch from your Mac?
The decision to stop using Little Snitch on your Mac could stem from various reasons.
For some users, the level of alerts and the need for constant decision-making about incoming or outgoing connections can become overwhelming. For others, the complexity of managing its many features might not fit with a desire for a simpler, more straightforward firewall experience.
Additionally, some users find that the built-in macOS firewall offers sufficient protection, making an additional layer seem unnecessary.
Whatever your reason, understanding both the benefits and drawbacks of Little Snitch is important for making an informed decision about its place on your Mac.
Pros and cons of using Little Snitch
The decision to use or uninstall Little Snitch should be balanced against its pros and cons, most of which we have listed below.
- Pros:
- Detailed network traffic monitoring.
- Customizable rules to allow or block outgoing connections.
- Alerts for new connection attempts, offering immediate control.
- Cons:
- Complexity in setup and daily use can be daunting for average users.
- Constant alerts may become intrusive for some users.
- Potential overlap with built-in macOS firewall capabilities.
Choosing to keep or remove Little Snitch depends largely on your specific needs and tech proficiency.
While its detailed data on network connection can be valuable for tech-savvy users looking to bolster their Mac’s security, the learning curve and management could outweigh the benefits for others. If you find that the cons resonate more with your user experience, seeking an alternative or relying on the built-in firewall might better serve your needs.
Uninstalling Little Snitch from your Mac using SpyHunter
For a thorough and safe uninstall of Little Snitch from your system, you can depend on SpyHunter and its App Uninstaller to automate the manual removal process for you.
Here is a brief step-by-step guide on how you can use SpyHunter to completely uninstall Little Snitch:
- Download SpyHunter and follow the on-screen visual steps to complete the installation.
- Launch SpyHunter and select the
App Uninstallertab in its main interface. Clicking it will start an automated listing process, which will display every app you have installed on your Mac and the apps’ associated directories and files. - Go over the list of apps and find Little Snitch. Select it and make sure all items under
Related Filesare also selected.
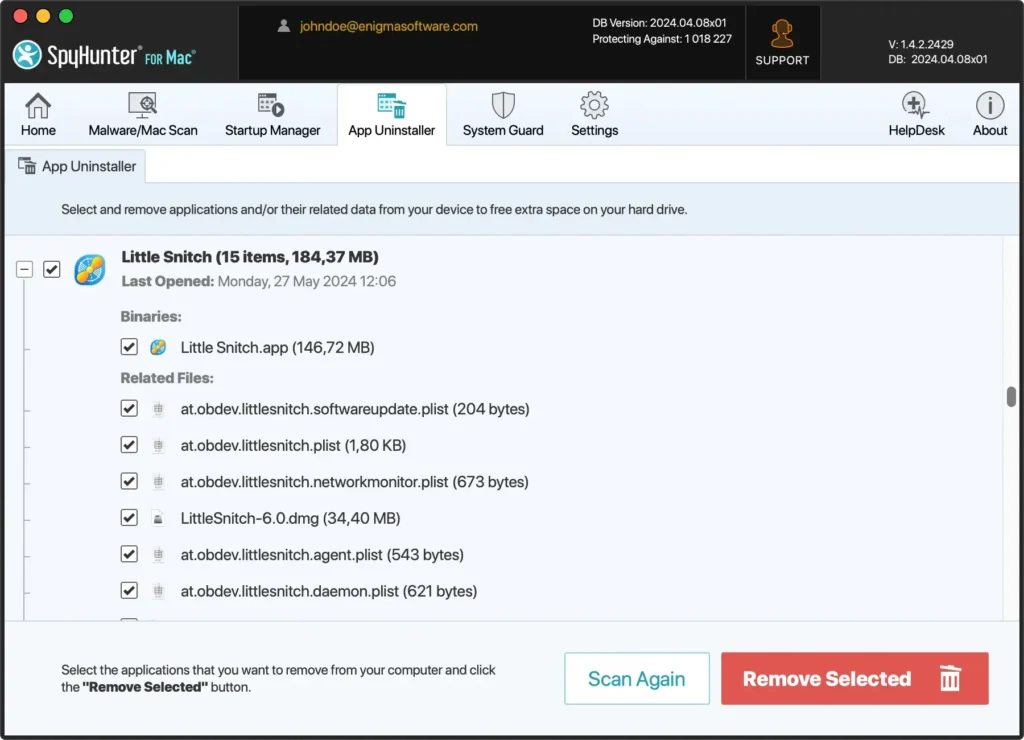
- Continue the uninstall process using the
Remove Selectedbutton in the bottom right of the SpyHunter window. - Once SpyHunter has removed Little Snitch and all files associated with the app, restart your Mac to finalize the uninstall process.
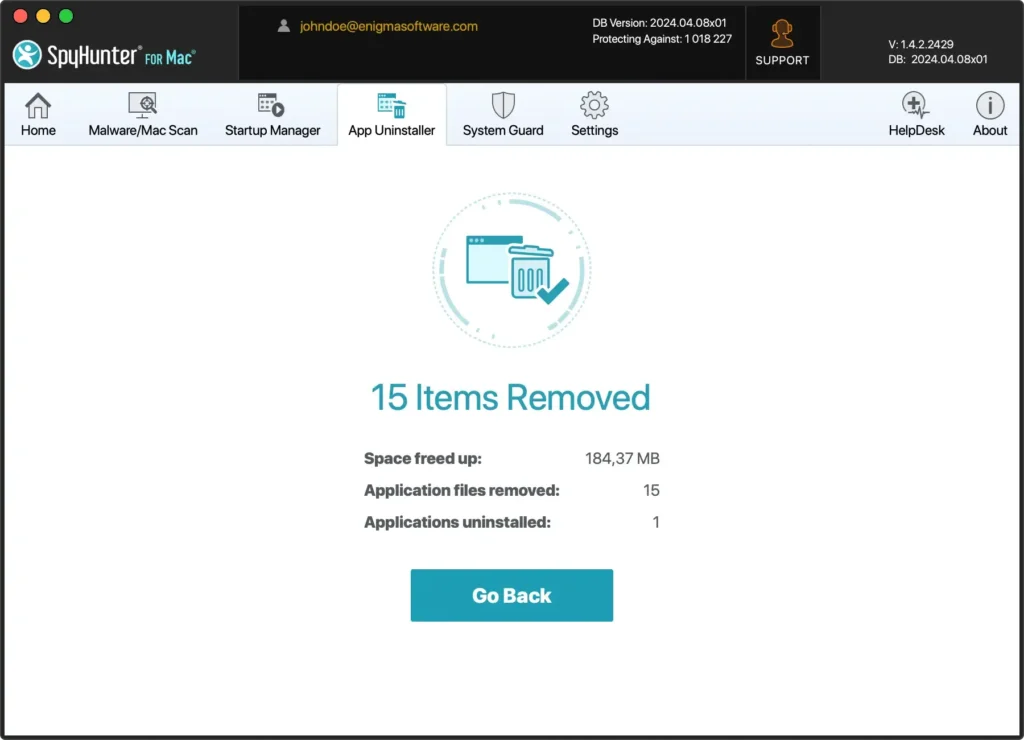
Using SpyHunter’s App Uninstaller saves you time by automating the removal process and handling all leftover files automatically. You don’t have to worry about manually finding those directories and files and can simply enjoy a clean and smooth user experience.
Manual uninstallation of Little Snitch on Mac
Uninstalling Little Snitch from your Mac can seem complicated, but a step-by-step approach can ensure the application and all its service files are completely and safely removed from your system.
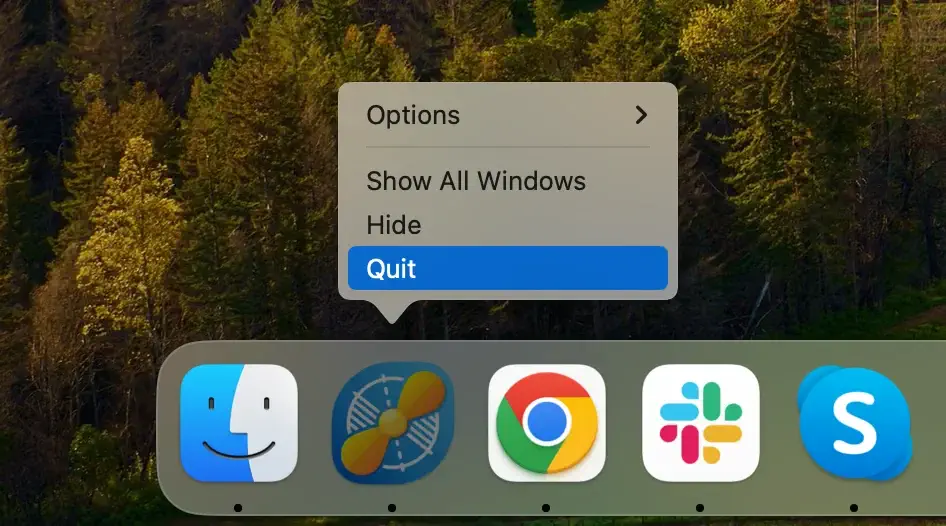
Step 1: Quit Little Snitch
Before you proceed with manual removal, make sure the Little Snitch application is not active and running. Right-click the Little Snitch icon in your Dock and then click Quit in the pop-up menu.
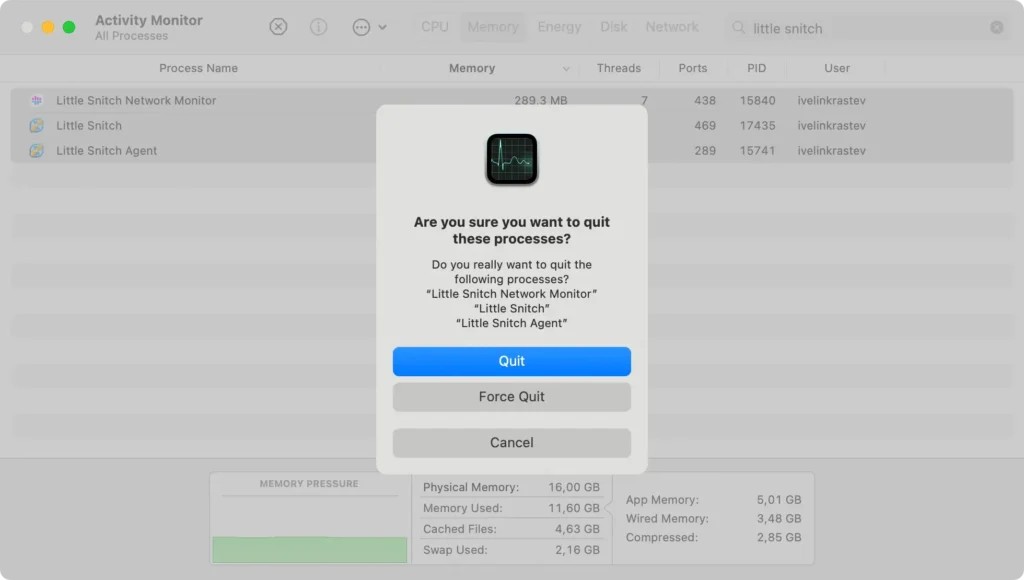
If the application is not responding, you can use your Mac’s Activity Monitor to quit the process. Open Activity Monitor and select all processes inside it that have Little Snitch in their name, then use the [X] button above to terminate those processes, confirming your selection by choosing Force Quit in the pop-up window.
Step 2: Remove Little Snitch from the Applications folder
The next step involves deleting Little Snitch from your Applications.
- Open
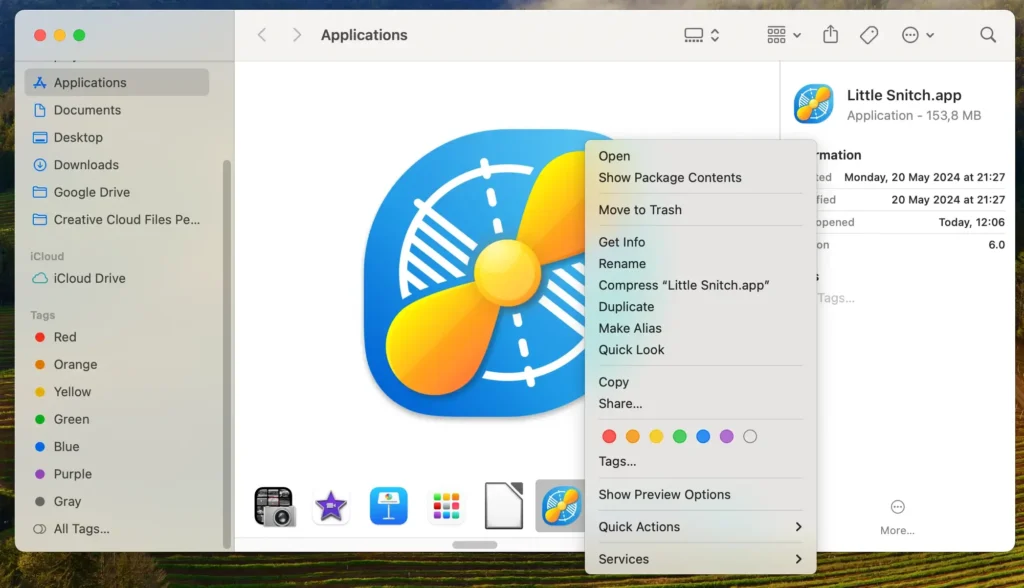
Finderand navigate to yourApplications. - Locate the Little Snitch icon in the folder, or use the search field in the top right corner of the window to locate the app.
- Drag the Little Snitch app onto the
Trashor, alternatively, right-click it and selectMove to Trashin the menu. - Open or right-click the
Trashto empty it to complete this step.
Step 3: Remove Little Snitch leftover files
To finalize the manual removal process, there are a handful of configuration files you still need to remove.
- Open
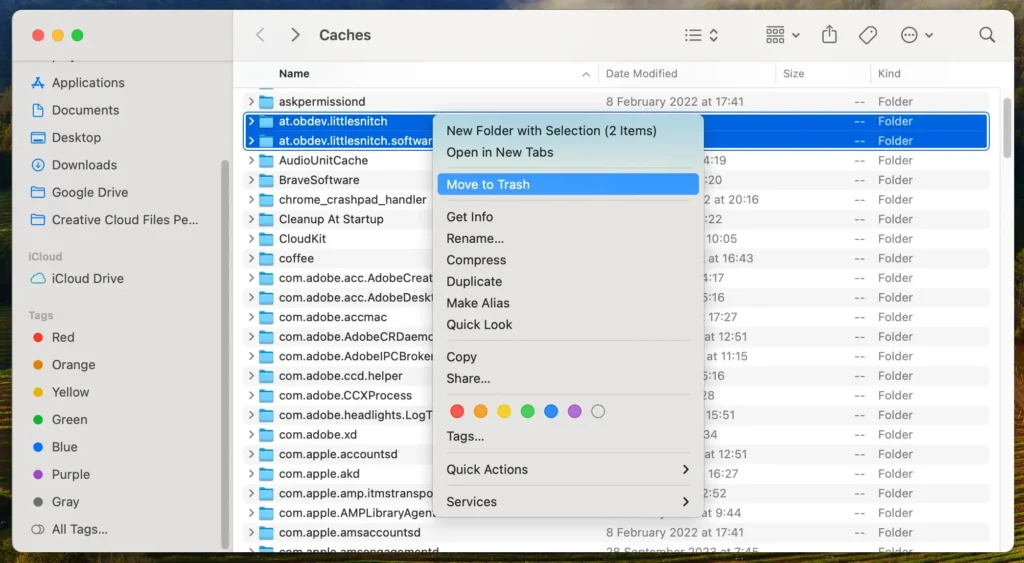
Finderand clickGoin the menu, then clickGo to Foldernext. - In the text input box, type or paste the following locations to remove the last leftover files of Little Snitch
/Library/Application Support/Objective Development/Little Snitch~/Library/Preferences/at.obdev.littlesnitch.plist~/Library/Preferences/at.obdev.littlesnitch.agent.plist~/Library/Preferences/at.obdev.littlesnitch.networkmonitor.plist~/Library/Preferences/at.obdev.littlesnitch.softwareupdate.plist
- Move files and folders from the above list to your
Trash, then empty it.
This will complete the final step in manually removing traces of files associated with Little Snitch from your system.
Utilize Little Snitch’s native uninstaller
In case you are using version 4 of the app, you can also use the Little Snitch uninstaller that comes with it.
- Locate the .dmg disk image file of the Little Snitch installer you downloaded and double-click it.
- In the window that comes up, select the option
Little Snitch Uninstaller. - Make sure the box titled
Also remove rules and settingsis checked, then click theContinuebutton. - Once the process finishes, click
Restart Nowto complete the uninstallation.
Alternatives to Little Snitch for enhancing Mac security
Finding a suitable replacement for Little Snitch means looking for an application that provides detailed control and monitoring of both incoming and outgoing network connections. Here are a few alternatives to consider:
- Radio Silence: A simple firewall that focuses on blocking applications from making network connections without the extensive monitoring features of Little Snitch.
- LuLu: An open-source firewall for macOS that protects against outgoing threats. It offers a simpler alternative to Little Snitch with enough features for users who desire control over their app’s network access.
- Hands Off!: It provides comprehensive monitoring and control similar to Little Snitch, including network and disk access management for apps.
In conclusion
Good job! You have completely removed Little Snitch from your Mac.
Whether you revert to the standard macOS firewall or opt for another third-party solution similar to Little Snitch, you have cleaned up your system from the app you no longer need.
Proper uninstallation of every app you remove ensures your Mac will be running smoothly and safely.
Feel free to reference our full guide on how to uninstall apps on Mac for further information on the topic of complete and safe uninstalls.