How to Uninstall TeamViewer On Mac (Ultimate Guide)
Before we dive in
Trying to uninstall an app completely? SpyHunter for Mac includes an App Uninstaller that removes unwanted apps and their leftover files in just a few clicks.
Avoid clutter and save time — download SpyHunter right here and follow the steps to clean up your system.
Are you looking to remove TeamViewer from your Mac?
Whether you’re streamlining your applications, addressing performance issues, or simply no longer need remote access software, this guide will walk you through the uninstallation process step-by-step.
Keep reading to discover how to remove TeamViewer from your Mac, ensuring your system stays optimized and secure.
Reasons to uninstall TeamViewer
Uninstalling TeamViewer from your Mac can be beneficial for several reasons:
- Performance Optimization: It can consume significant system resources, particularly when running in the background. Removing it can help free up these resources, enhancing your Mac’s overall performance and speed.
- Security Considerations: Although TeamViewer implements robust security measures, having remote access software on your device inherently increases security risks, especially if it’s rarely used. Deleting the program can reduce the risk of unauthorized access to your system.
- Software Redundancy: If you have transitioned to alternative solutions for remote control or collaboration that better meet your needs, keeping the app installed may be redundant. Uninstalling unnecessary apps helps keep your system clean and organized.
- Storage Space: The app and its configuration files occupy valuable disk space. Uninstalling it can free up space, which is particularly beneficial if your storage capacity is limited.
Removing TeamViewer can streamline your system operations, tighten security, and declutter your digital environment, making your Mac more efficient and less vulnerable to attacks.
Manually uninstall TeamViewer from your Mac
Removing TeamViewer manually ensures that the application and all its components are thoroughly deleted from your Mac.
Follow these steps for a complete uninstallation:
Step 1: Quit the TeamViewer app
Ensure that TeamViewer is not running before you start the uninstallation process:
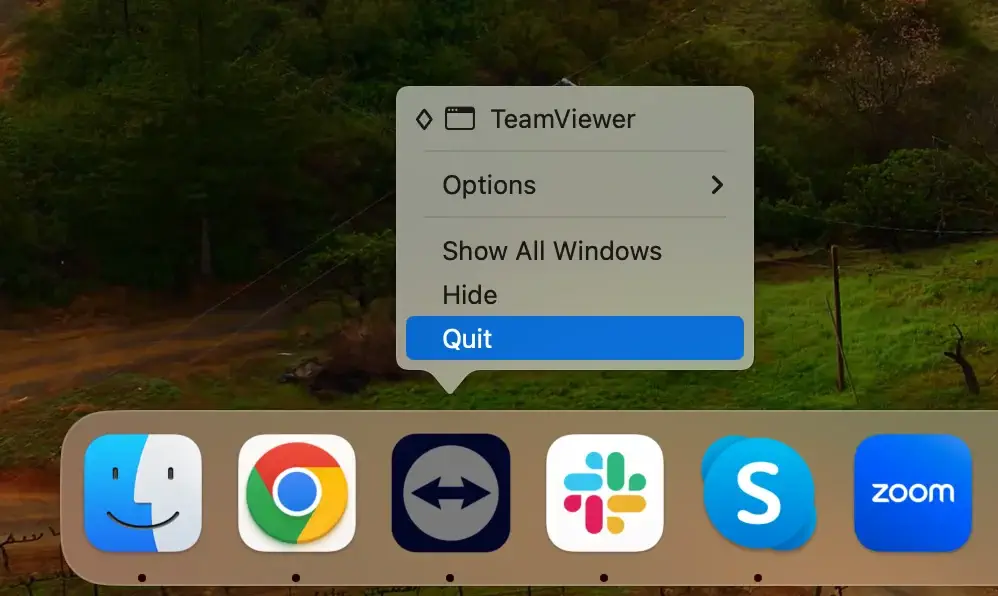
- Check if TeamViewer is active: Look for the TeamViewer icon in the Dock. If there’s a dot underneath, it indicates that the app is running.
- Quit TeamViewer: Right-click the TeamViewer icon in the Dock and select
Quitfrom the contextual menu.
You may need to force quit the app if it does not quit or is unresponsive.
Open the Activity Monitor application and find all the processes related to TeamViewer.
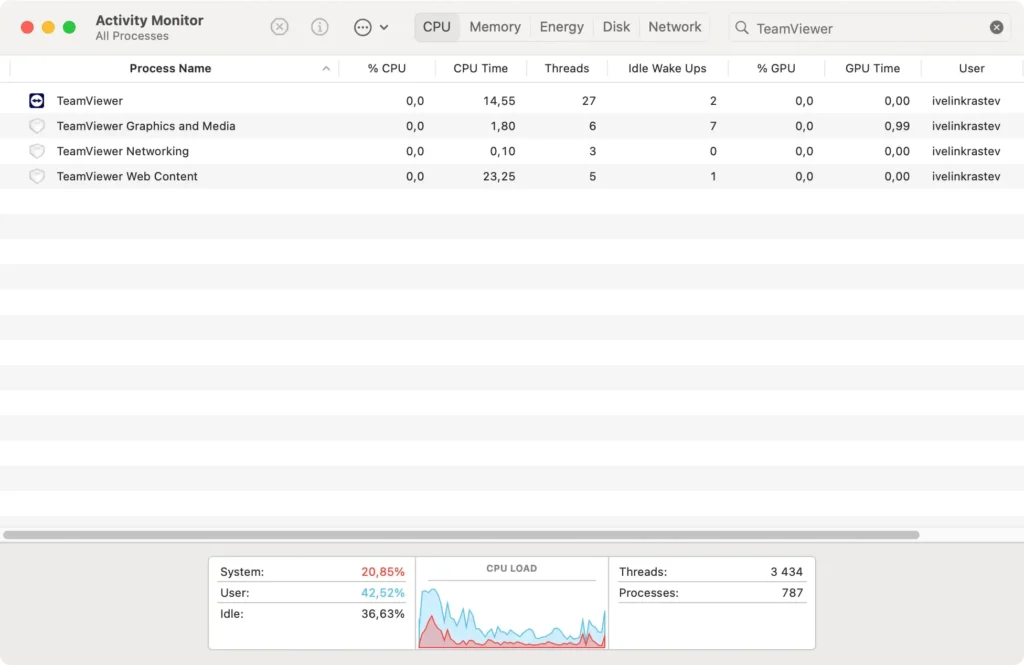
Select them, click the [X] button at the top left of the window, then close it completely.
Step 2: Remove the TeamViewer application
After ensuring that TeamViewer is not running, you can proceed to delete the application:
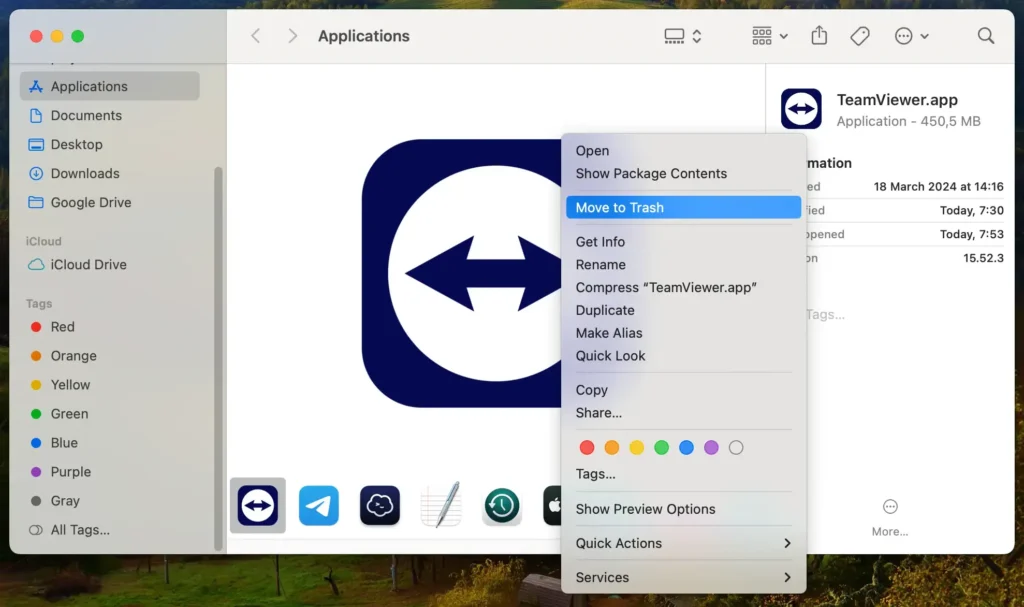
- Open
Finderand click on theApplicationsfolder. - Scroll through the list of applications to find TeamViewer.
- Drag the TeamViewer icon to the Trash bin, or right-click on the icon and select
Move to Trashfrom the dropdown menu. - Empty the Trash to remove TeamViewer from your Mac permanently.
Step 3: Delete TeamViewer configuration files
TeamViewer stores configuration files that do not automatically delete when you remove the app. To completely clean your system:
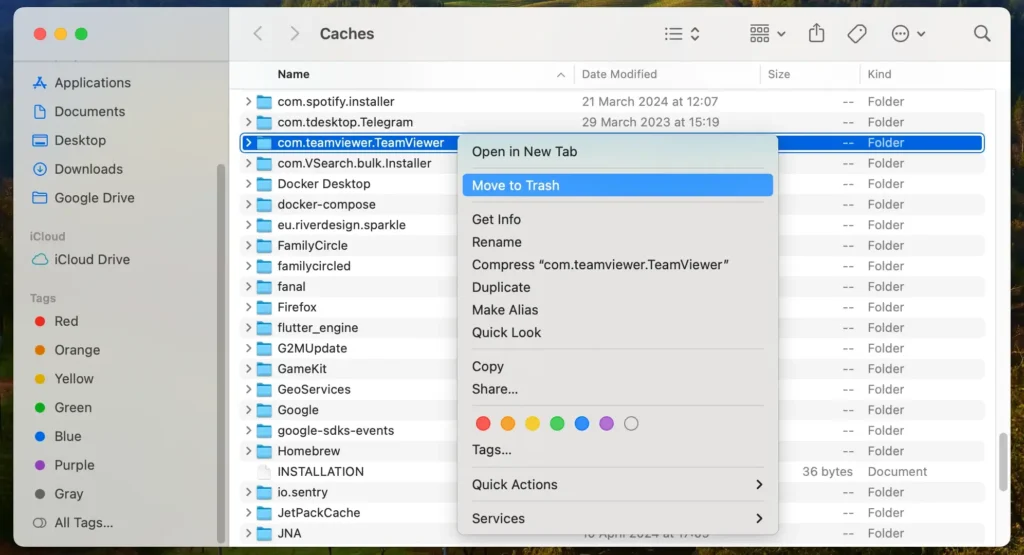
- Open
Finderand selectGo > Go to Folderfrom the menu bar. - Type in each of the following paths and press Enter:
~/Library/Preferences/~/Library/Application Support/~/Library/Logs/~/Library/Caches/
- Search for files or folders that begin with “com.teamviewer.” and move them to the Trash.
- Empty the Trash again to ensure all files are permanently deleted.
By following these steps, you can manually remove TeamViewer and all associated files from your Mac, freeing up system resources and ensuring that no unnecessary data remains on your computer.
Use SpyHunter to uninstall TeamViewer completely
For a thorough and efficient removal of TeamViewer from your Mac, it is highly recommended to utilize SpyHunter with its dedicated App Uninstaller feature.
SpyHunter is a robust security tool designed to protect against malware and help easily remove unwanted applications and their residues.
- Download SpyHunter and follow the on-screen instructions to complete the installation. You may need to enter your admin password during this process.
- Open SpyHunter and navigate to the App Uninstaller tab. This will initiate a scan of your system, identifying all installed applications and their related files.
- Allow the application scan to complete. SpyHunter will list all applications it has detected, including TeamViewer.
- Locate TeamViewer in the scan results. This list will also show any associated files linked to the application.
- Select TeamViewer and any related files from the list by checking the boxes next to each item.
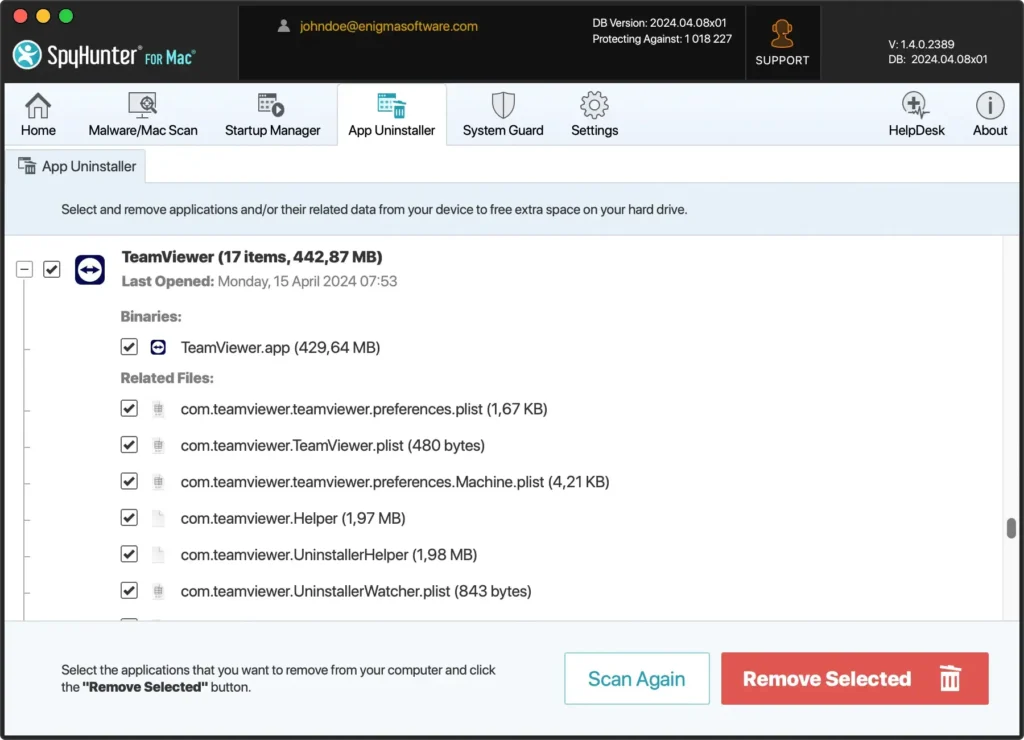
- Click the ‘Remove’ button in the App Uninstaller tab to begin uninstallation. SpyHunter will then efficiently remove TeamViewer and all its components from your Mac.
- Completing the uninstallation may require a restart of your Mac to ensure that all changes take effect.

Using SpyHunter’s App Uninstaller provides a simple and effective solution to thoroughly remove unwanted apps like TeamViewer.
This feature ensures that no leftover files or directories remain, optimizing your Mac’s performance and security.
Utilize TeamViewer’s built-in uninstaller on Mac
TeamViewer provides an easy way to uninstall itself from your Mac, ensuring the process is straightforward and user-friendly.
This built-in uninstaller is designed to remove the application and its configuration files from your system, offering a clean method to get the job done.
The approach is recommended for those who prefer a quick and effortless removal process without requiring manual searches and deletions.
- Open TeamViewer.
- From the TeamViewer menu, select
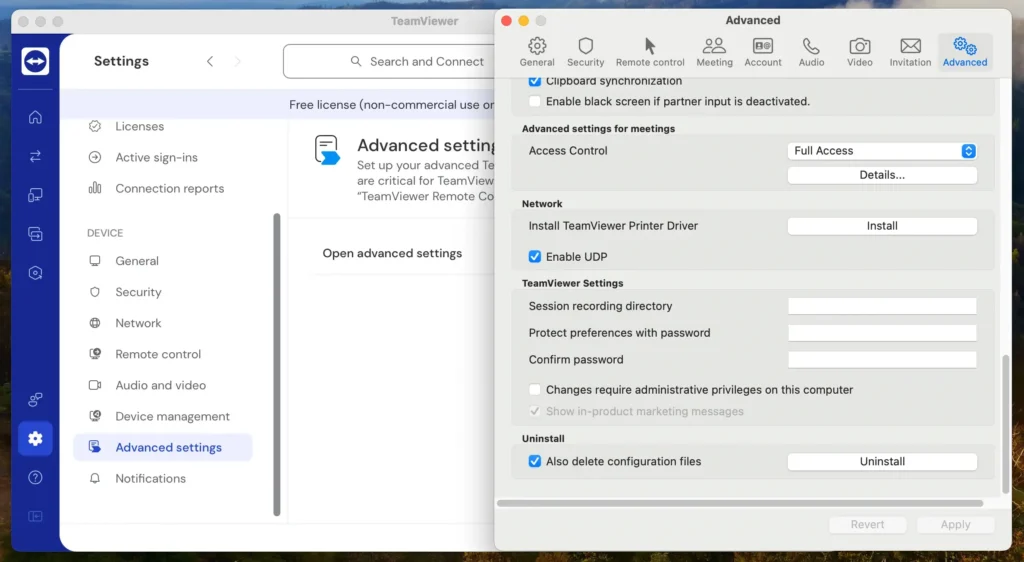
Preferences(orSettings, depending on the TeamViewer version). - Click
Open advanced settingsto open the TeamViewer preferences on theAdvancedtab. - Look for the
Uninstalloption. Opt to remove configuration files. - Click
Uninstallbutton to proceed. - TeamViewer will now be uninstalled from your computer.
This process does an excellent job of removing the application, but a manual cleanup might still be necessary to ensure your Mac is completely free of any residual files.
This is especially true for long-term TeamViewer users, as files and data may accumulate over time.
Uninstall TeamViewer using the Terminal
For those who prefer using command-line tools for software management, the Terminal offers a direct and effective way to uninstall TeamViewer from your Mac.
This method appeals to users who are comfortable with macOS commands, providing precise control over uninstallation.
- Open a new Terminal window. You can find the app in the
Applications > Utilitiesfolder or quickly access it using Spotlight search. - Execute each of the following commands one by one:
killall TeamViewer
sudo rm -rf /Applications/TeamViewer.app
rm -rf ~/Library/Preferences/com.teamviewer.TeamViewer.plist
rm -rf ~/Library/Preferences/com.teamviewer.teamviewer.preferences.Machine.plist
rm -rf ~/Library/Caches/com.teamviewer.TeamViewer
rm -rf ~/Library/Logs/TeamViewer
rm -rf ~/Library/Application\ Support/TeamViewer
Using the Terminal to uninstall TeamViewer gives you a cleaner and more controlled removal process, ensuring the application and its traces are entirely erased from your device.
This method benefits users who want to avoid graphical interfaces or need to script the uninstallation as part of a more extensive automation process.
TeamViewer alternatives
If you’ve decided to move away from TeamViewer, several alternatives offer comparable functionality with their unique features.
Here’s a look at some widespread remote access and support tools that you might consider as replacements:
AnyDesk: Known for its lightweight design and speed, AnyDesk provides a fast, secure, and versatile remote desktop solution. It’s particularly praised for its smooth operation, even on bandwidth-limited connections, making it ideal for supporting remote teams.
Zoom: While primarily a video conferencing tool, Zoom also offers robust remote support features, making it suitable for virtual meetings where screen sharing and remote control are needed.
Microsoft Remote Desktop: For those deeply embedded in the Windows ecosystem, Microsoft Remote Desktop is a reliable choice. It allows users to connect to a remote Windows PC from their Mac, offering seamless access to files, folders, and network resources.
Choosing the suitable alternative depends on your specific needs, such as the level of security required, the type of access needed, and your budget.
Each tool provides unique advantages, so consider what fits best with your workflow and security requirements.
Conclusion
Congratulations, you have completely uninstalled TeamViewer from your Mac!
Whether you manually remove the application, use TeamViewer’s built-in uninstaller, or employ SpyHunter’s App Uninstaller for a thorough cleanup, your computer is now free from the software.
This frees up valuable system resources and enhances your Mac’s security and performance.
Remember, staying vigilant about what you install and periodically reviewing installed applications can help maintain your Mac’s efficiency and security.