How To Uninstall Zoom on Mac (Complete Removal Guide)
Are you looking to uninstall Zoom from your Mac?
Whether experiencing technical issues, considering privacy concerns, or simply cleaning up unused apps, this guide will walk you through removing Zoom effectively.
Read on to learn how to free up valuable system resources and ensure your Mac runs smoother by uninstalling Zoom properly.
Reasons to uninstall Zoom from your Mac
Removing Zoom from your Mac can be motivated by several factors, each contributing to the decision to remove the software:
- Performance Issues: The app can be resource-intensive, especially during lengthy meetings with multiple participants.
- Privacy Concerns: Despite improvements, Zoom has faced scrutiny over privacy and security issues.
- Reduced Usage: If your meeting frequency has decreased or you’ve switched to alternative communication tools that better meet your needs, Zoom may no longer be necessary.
- Software Conflicts: Sometimes, the program might conflict with other applications on your Mac. This can lead to operational glitches or crashes.

These reasons reflect common scenarios where uninstalling Zoom might enhance your Mac’s functionality and security, addressing specific needs or concerns related to the software.
Manually uninstall Zoom from your Mac
If you’ve decided to remove Zoom manually from your system, following these steps will ensure that the application and all its components are thoroughly deleted from your Mac.
This approach clears space and helps maintain your device’s performance.
Step 1: Quit Zoom
Before uninstalling, make sure that Zoom is not running:
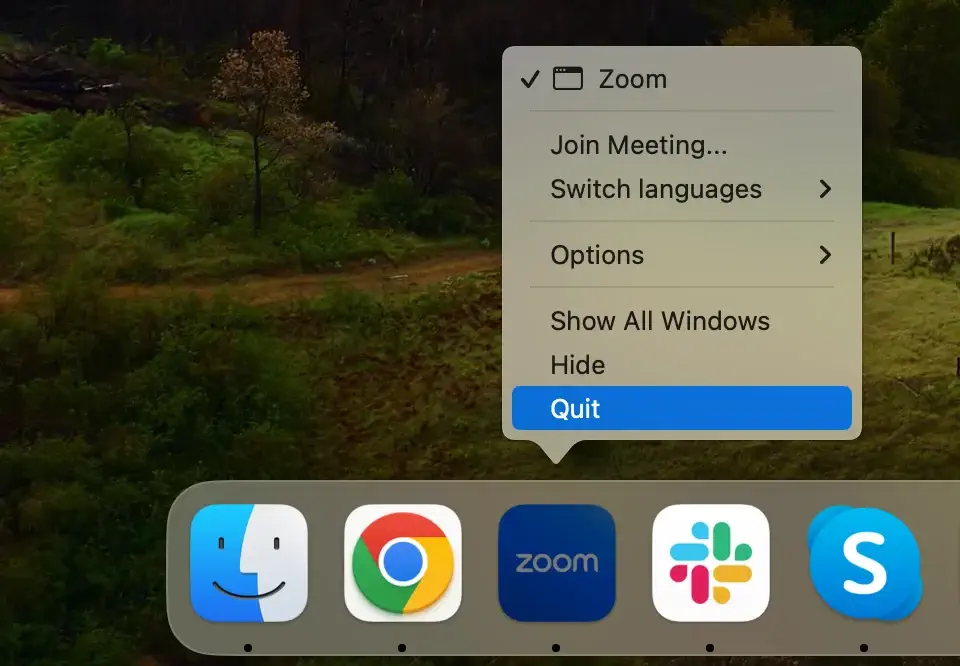
- Check if Zoom is active: Look for the app icon in the Dock. If there’s a dot underneath, it indicates that the app is running.
- Quit Zoom: Right-click the Zoom icon in the Dock and select
Quitfrom the contextual menu.
You may need to force quit if the app does not quit or is unresponsive. Open the Activity Monitor program. Use the search bar in the upper-right corner to find all Zoom-related processes.
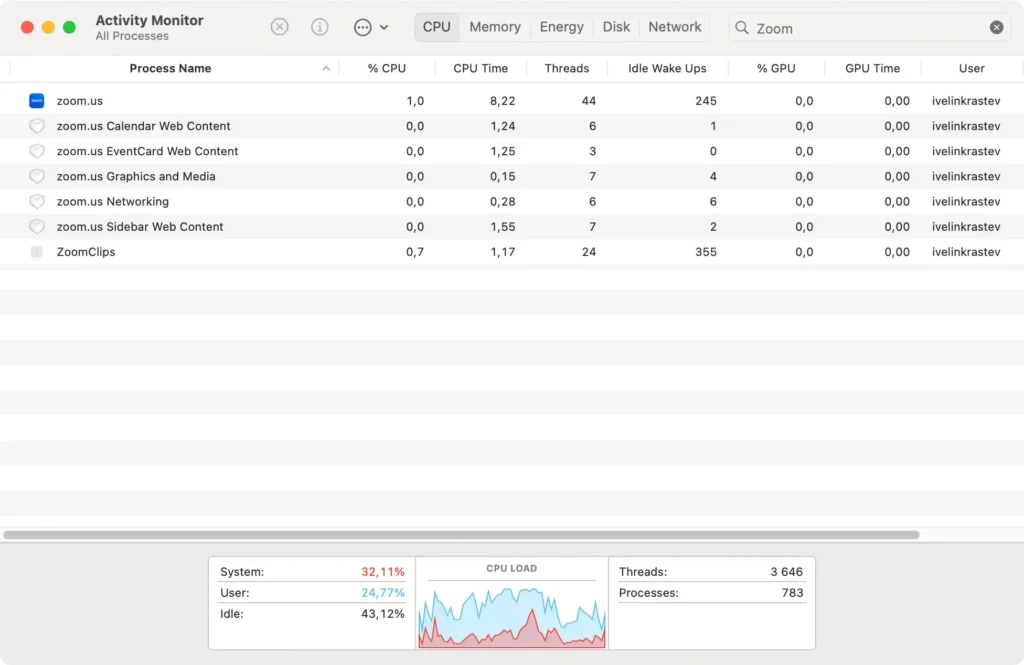
Select them and then click the [X] button at the top left of the window, followed by Force Quit to close them completely.
Step 2: Remove the Zoom app
Next, remove the application itself:
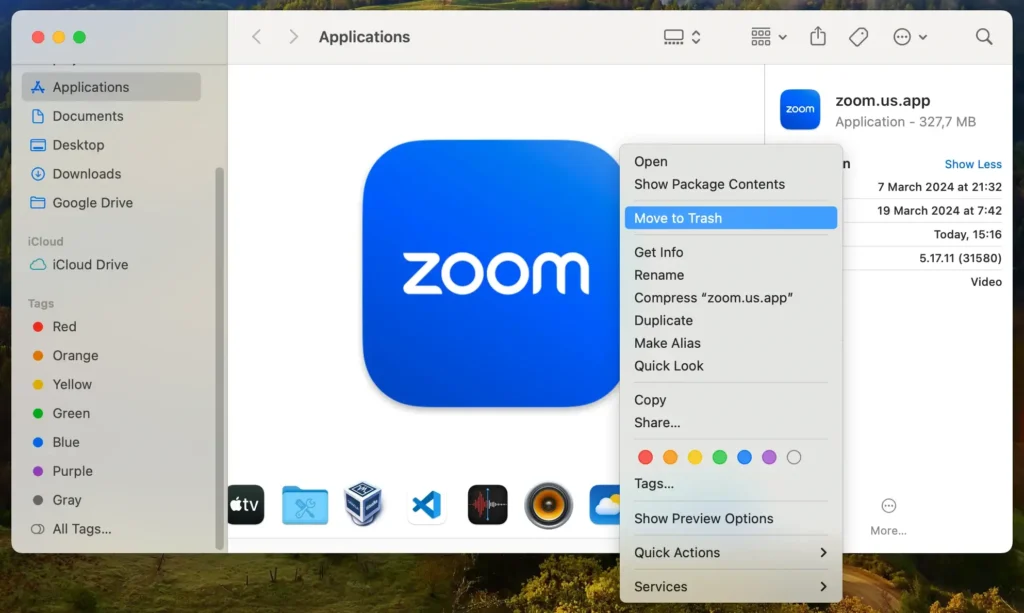
- Open
Finderand select theApplicationsfolder. - Scroll through the list of applications to find Zoom.
- Drag the Zoom icon to the Trash bin or right-click on the icon and select
Move to Trashfrom the dropdown menu. - Empty the Trash to remove the app from your Mac permanently.
Step 3: Delete Zoom-related files and folders
Zoom may leave behind configuration files and folders that don’t automatically get deleted when uninstalling the program:
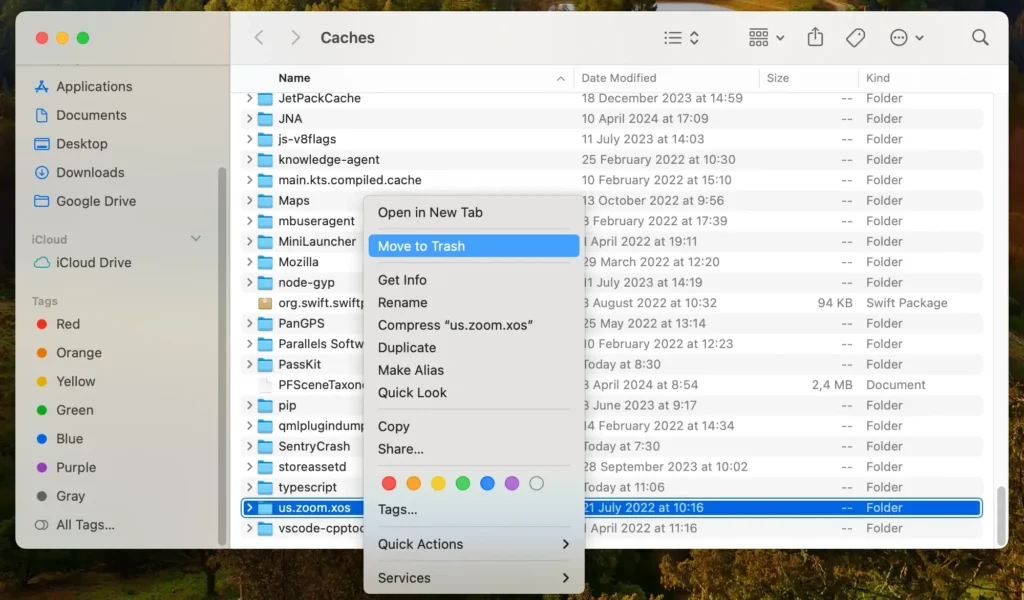
- Open
Finderand selectGo > Go to Folderfrom the menu bar. - Type in the following paths one by one in the search bar, pressing
Enterafter each to access them:~/Library/Application Support/zoom.us/~/Library/Preferences/us.zoom.xos.plist~/Library/Caches/us.zoom.xos/~/Library/Logs/zoom.us/
- Look for directories or files related to the program, deleting each pinpointed entity.
- Ensure that all files associated with Zoom are entirely removed by emptying the Trash again.
Following these steps, you ensure Zoom is entirely removed from your Mac, including all associated data.
This manual process helps keep your system clean and running efficiently without unnecessary load from unused software.
Completely uninstall Zoom from Mac with SpyHunter
To ensure the thorough removal of Zoom from your Mac, SpyHunter offers a robust solution that efficiently cleans out all traces of the application.
SpyHunter features an App Uninstaller that detects and eliminates remnants, ensuring a thorough cleanup.
Here’s how to use SpyHunter to remove Zoom:
- Download SpyHunter from here and follow the on-screen instructions to install SpyHunter.
- Open SpyHunter and click the App Uninstaller tab. This will initiate an automatic application scan.
- Allow the application scan to complete. SpyHunter will list all applications it has detected, including Zoom.
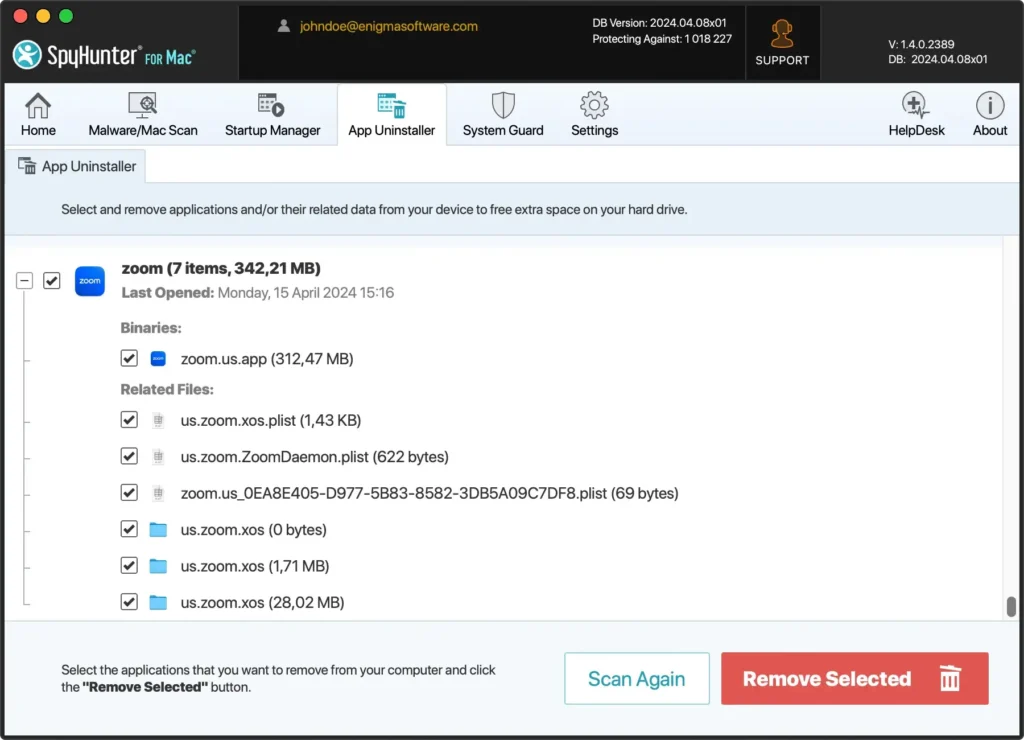
- Locate Zoom in the scan results. This list will also show any associated files linked to the app.
- Select Zoom and any related files, then click the ‘Remove’ button to delete them from your system.

Using SpyHunter simplifies the uninstallation process and ensures that your Mac is free from any residual files left behind by Zoom, maintaining optimal performance and security.
Remove Zoom using its built-in uninstaller
Zoom features a built-in uninstaller with its application on Mac, removing the software without leaving any residual files behind.
Here’s how to use Zoom’s uninstaller to remove the application from your Mac cleanly:
- Navigate to the
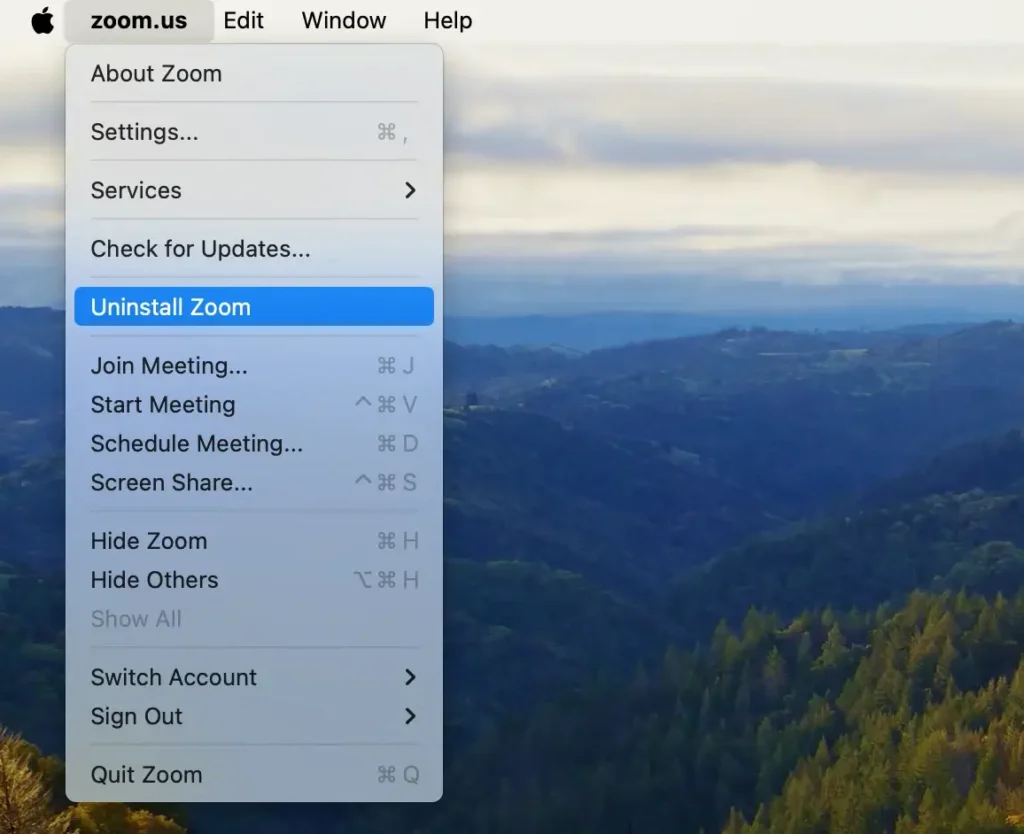
Applicationsfolder in Finder, and double-click Zoom to open it. - Click the
zoom.usmenu next to the Apple logo at the top left of your screen. - Select
Uninstall Zoomfrom the dropdown menu, which will initiate the uninstallation process. - A window will appear asking if you are sure you want to uninstall Zoom. Confirm by clicking
OKto proceed. - The uninstaller will remove the program and each service file or folder from your system. You will receive a confirmation once the process is complete.
Using Zoom’s built-in uninstaller ensures that the application is removed effectively, along with all its components, maintaining the cleanliness and efficiency of your Mac.
Conclusion
Congratulations, you have successfully uninstalled Zoom from your Mac!
Whether you opted for the manual removal method, utilized Zoom’s built-in uninstaller, or employed a comprehensive tool like SpyHunter, your Mac is now free of the Zoom software.
This frees up valuable disk space and ensures your system remains optimized and secure. Regular maintenance and careful installed application management are vital to running your Mac smoothly.
Stay vigilant about the software you install in the future to maintain a clean and efficient computing environment.