How To Screen Record On Mac [Full Guide]
Before we dive in
Before we dive in, let's make sure you stay safe online. We created SpyHunter because your security matters to us.
Protect your computer today — download SpyHunter right here! Check out our top tips below to keep your computer safe and secure.
Ever struggled with showing a process on your Mac without the hassle of long emails or endless screenshots?
Whether you’re guiding a team, creating a tutorial, or presenting a design, screen recording on a Mac simplifies communication, making it straightforward and visually engaging.
In this guide, you’ll dive into the essentials of how to screen record on Mac, explore built-in and advanced tools, and pick up pro tips to enhance your videos.
Using built-in options to screen record on your Mac
Apple provides Mac users with several integrated tools for screen recording, which cater to different versions of macOS.
Whether you are working with the latest system or something a bit older, these tools are designed to be straightforward and require no additional downloads.

Let’s delve into the options like the screenshot toolbar for modern macOS versions and QuickTime for older systems.
Using the versatile screenshot toolbar
Starting from macOS Mojave, Apple introduced the screenshot toolbar, enhancing the ease of screen recording. The toolbar integrates the functionality of both a screenshot app and a screen recorder.
Here’s a quick guide on how to use it:
- Press
Shift + Command + 5on your keyboard to open the screenshot toolbar.
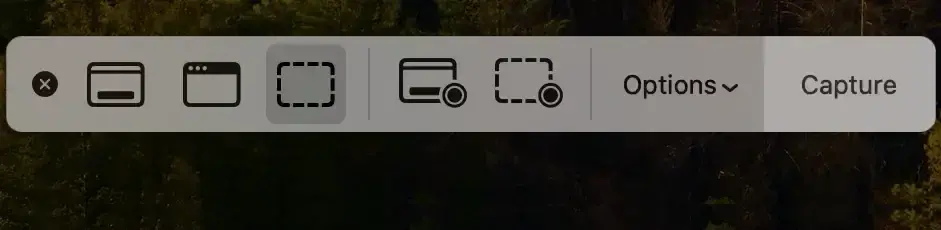
- Explore the toolbar icons: hover over each to see what type of recording or capture they facilitate. The first three icons are used for screenshot images, while the two icons after the vertical divider are used for video recording.
- Select the appropriate icon to record the whole screen or just a portion, using respectively the first or second icon after the vertical divider. For a partial recording, drag to select the area you wish to capture, then click
Record. - End your recording by clicking the
Stopicon in your menu bar or pressingCommand + Control + Escapesimultaneously.

This tool also supports basic editing features such as cutting and trimming the video. For advanced editing, users might prefer third-party software.
Using QuickTime for screen recording
For those using macOS versions older than Mojave, QuickTime Player offers a reliable alternative. It’s simple to use and already installed on your Mac. Here’s how to create a screen recording with QuickTime:
- Open QuickTime Player and select
New Screen Recordingfrom theFilemenu. - Choose your audio input by clicking the arrow next to the record button if needed.
- Click the
Recordbutton. Click anywhere to capture the entire screen, or select a specific area to record by dragging your cursor. - To stop recording, click the
Stopbutton in the menu bar or press theCommand + Control + Escapekeys.
QuickTime also allows you to preview and trim your recording immediately, making it a handy tool for quick edits.
Ensuring a stable recording environment with SpyHunter
Screen recording can put a certain amount of strain on your hardware. If your computer is infected with malware that is already quietly hogging system resources, you may run into issues.
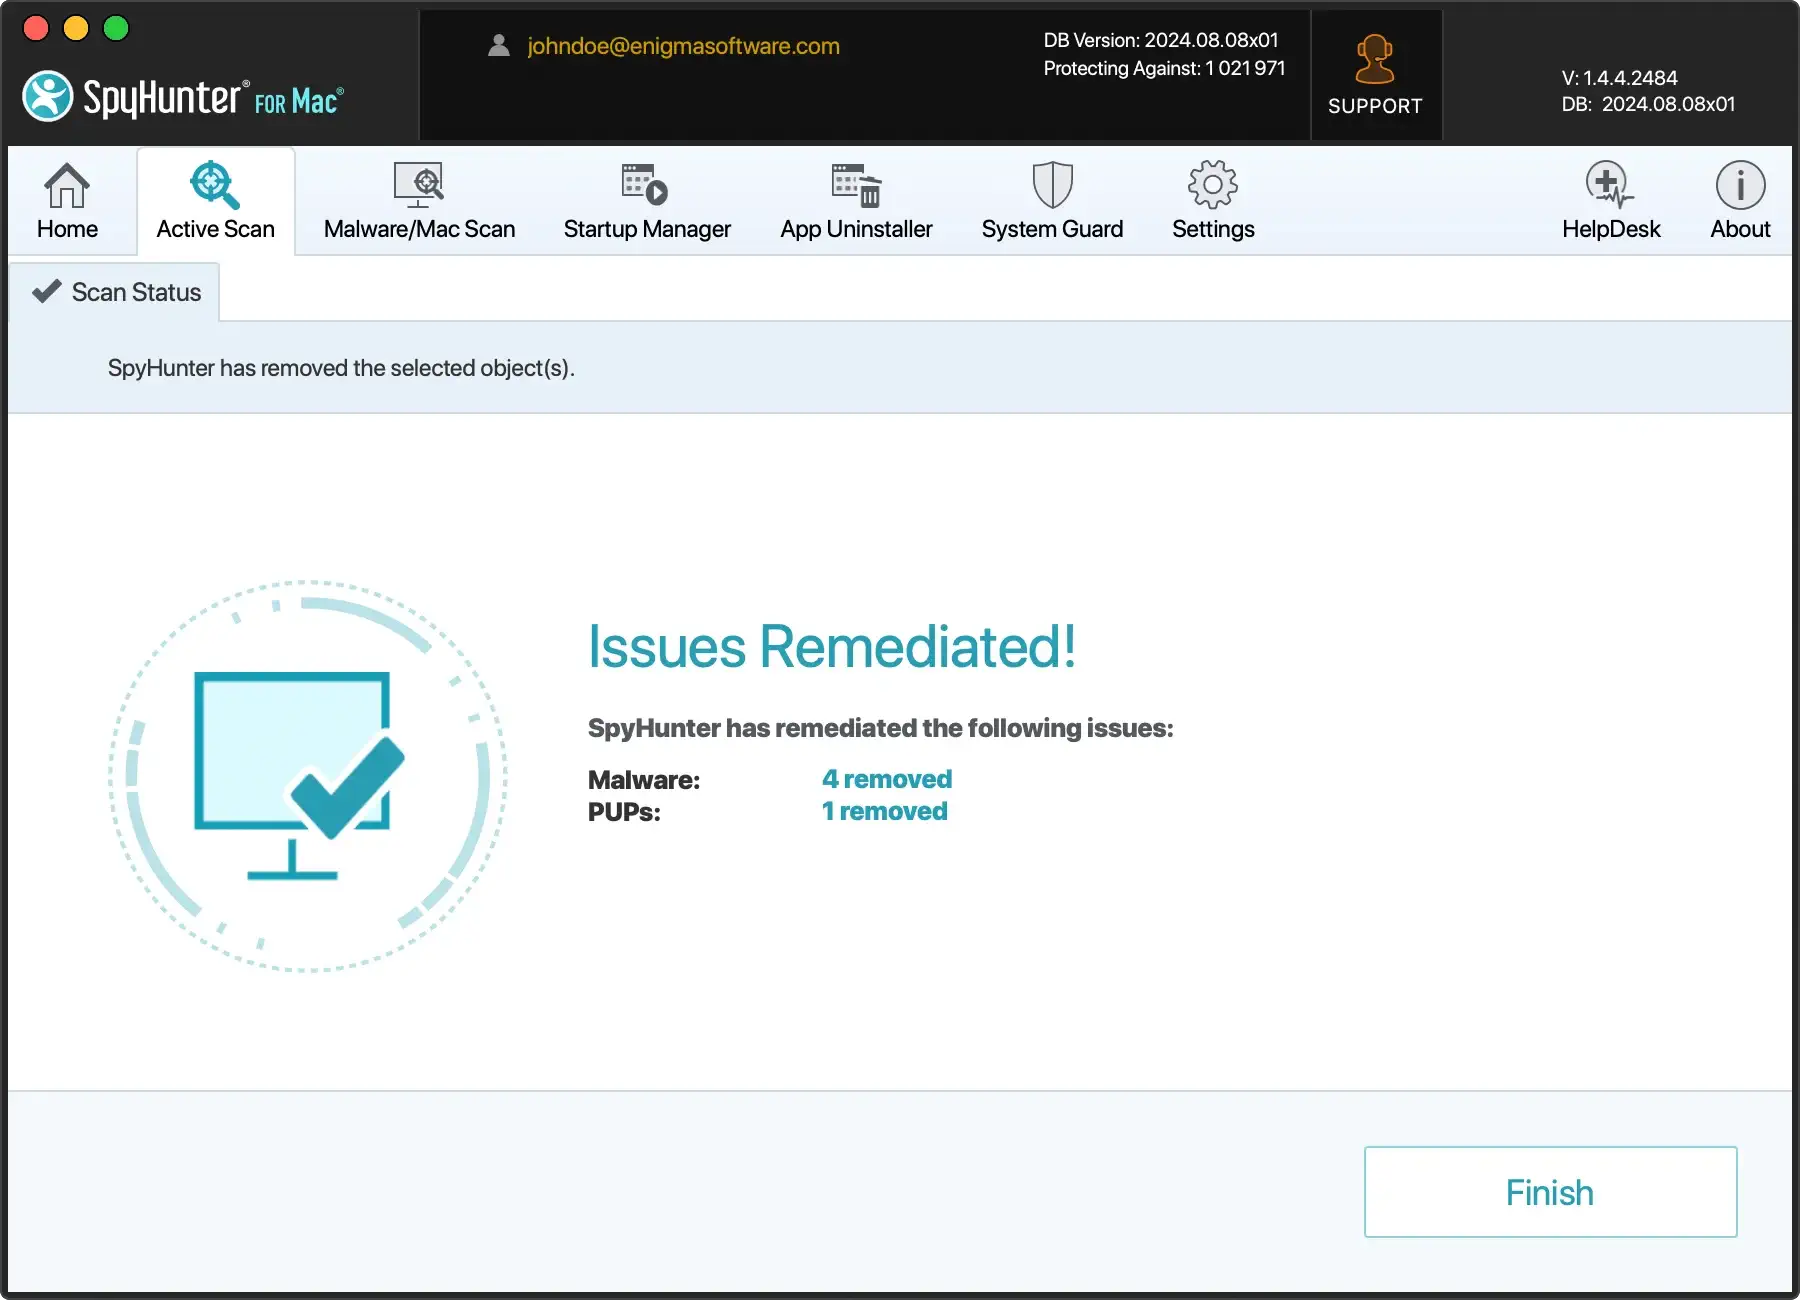
SpyHunter is an anti-malware tool for Mac that can scan your system, detect and remove malicious or potentially unwanted apps and files.
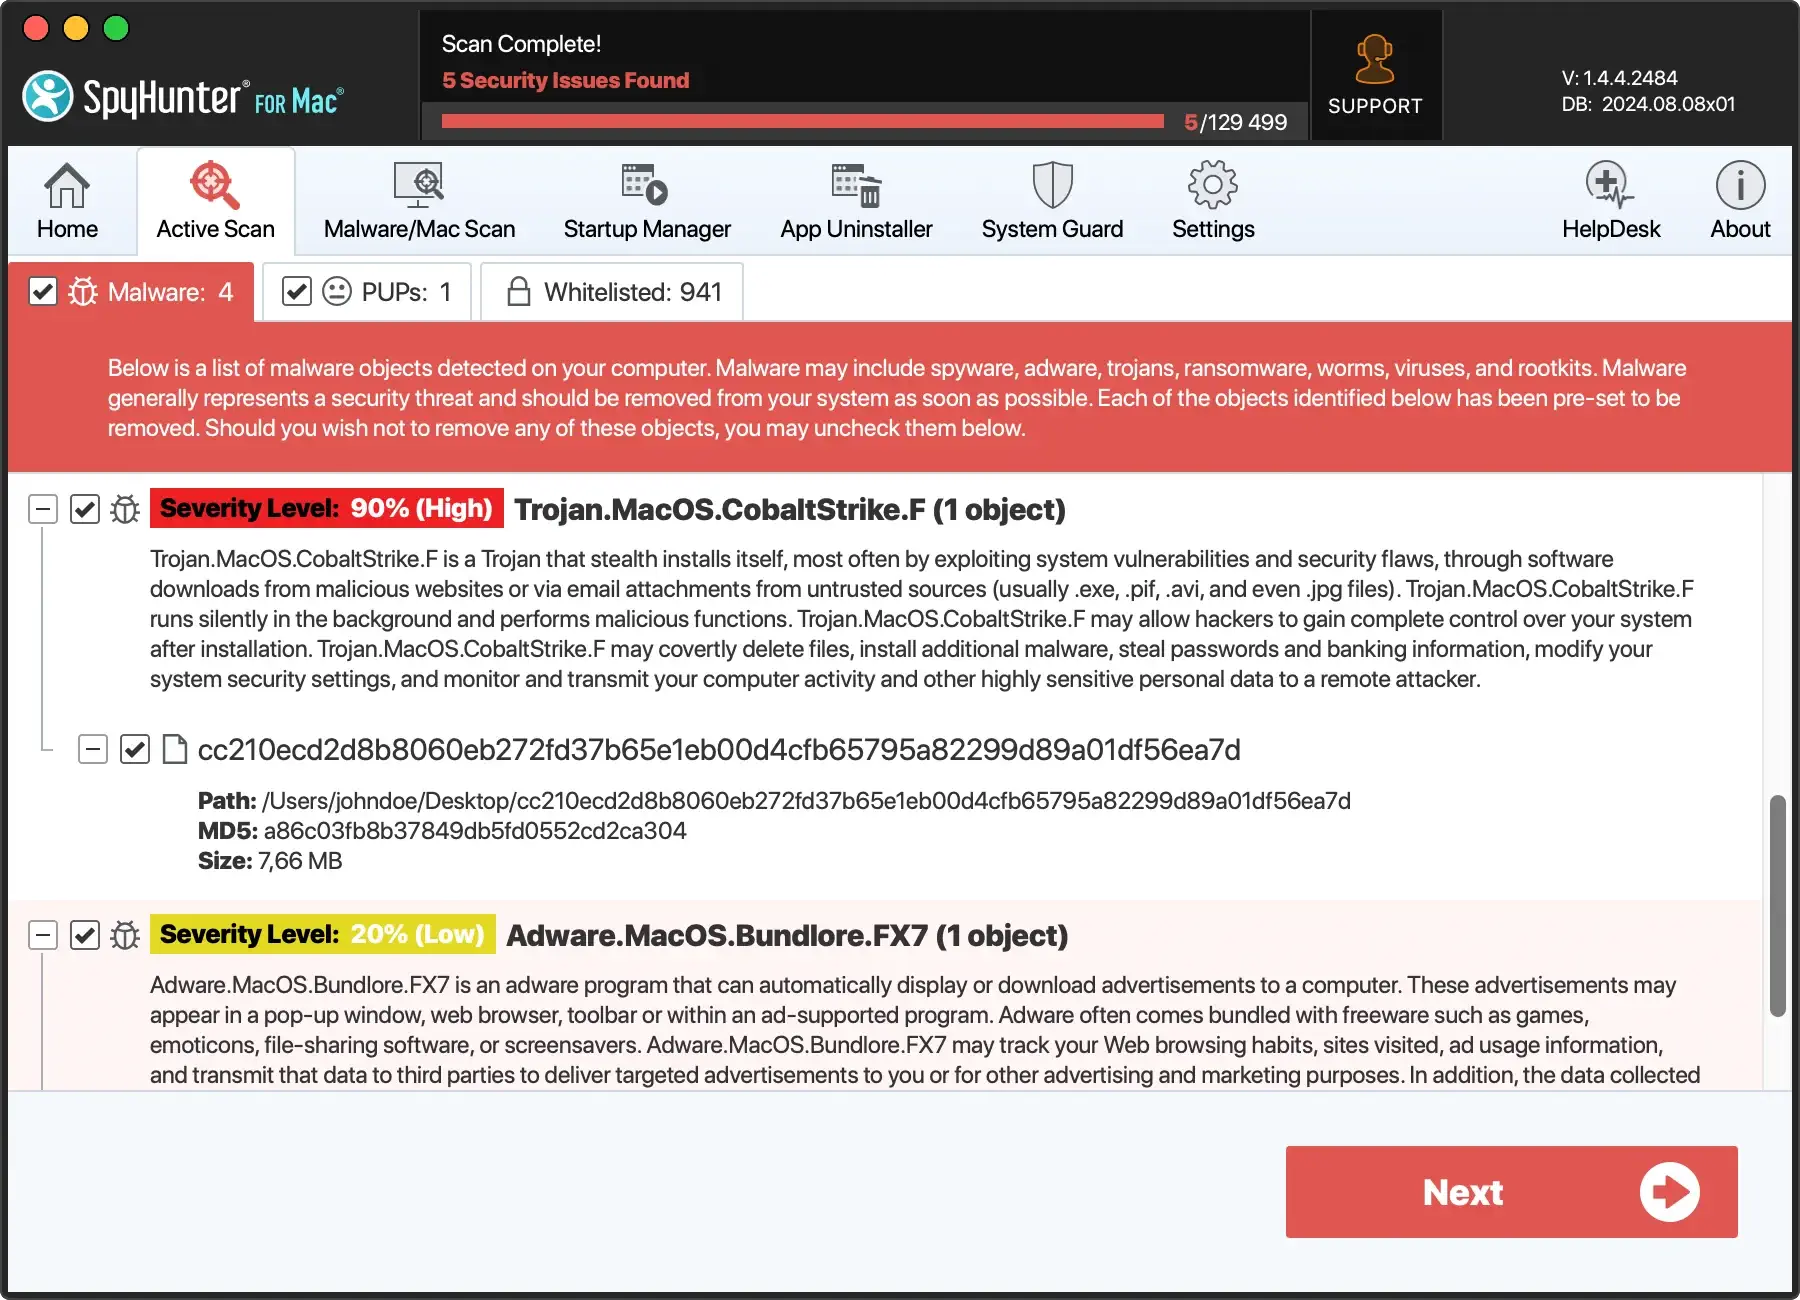
You can download SpyHunter for free here and install the app to perform a full system scan. SpyHunter will display a list of any potential malicious or unwanted software found and will automatically remove it for you.
Having a stable, secure Mac is a necessity both when it comes to everyday use and when it comes to recording your screen. SpyHunter has been built to give you that additional layer of security and protection.
Advanced techniques with dedicated software
Exploring advanced techniques with dedicated software can offer enhanced control and professional results for those seeking to elevate their screen recording quality.
These specialized programs allow for deeper customization and refinement of the recording process, catering to more sophisticated projects that demand higher-quality visuals and audio.
Optimal settings for recording high-quality videos
Configuring your recording software with optimal settings is crucial for achieving high-quality video outputs.
This involves adjusting video quality, frame rate, audio, and recording dimensions to suit the nature of the content being captured.
Step 1: Select your video quality and frame rate
Choosing the right video quality and frame rate is essential for ensuring smooth playback and professional-grade visuals.
Start by setting your video quality to the highest possible resolution, such as 1080p or 4K, depending on your storage capacity and processing power.
For frame rate, opting for 30 fps will suffice for most tasks, but 60 fps may be required for capturing high-motion activities like gaming or dynamic presentations.
Step 2: Configure audio recording settings
Audio clarity is critical in screen recordings, especially if the video includes dialogue, narration, or system sounds.
To record audio with optimal quality:
- Ensure your microphone is well-positioned to capture clear voice without ambient noises.
- Set your audio input levels to avoid peaking or distortion.
- Consider using noise cancellation software if recording in a noisy environment.
Step 3: Customize recording dimensions
Customizing the recording dimensions allows you to focus on the specific content you want to capture without unnecessary backgrounds.
You can usually choose to record your full screen, a particular window, or a custom-defined area.
This customization improves viewer focus and enhances the video’s overall aesthetics by eliminating irrelevant visual elements.
The pros and cons of using Mac’s built-in tools vs. dedicated software
Mac’s built-in tools, like QuickTime and the Screenshot toolbar, provide basic functionality that is convenient for casual users.
They are accessible right from the operating system without the need for additional downloads, making them ideal for quick tasks. These tools support simple screen recording and offer a user-friendly interface.
However, dedicated software provides a robust set of features that go beyond the basics. These programs offer enhanced editing capabilities, including advanced video effects and annotations.
They cater to users looking for professional-quality productions, and their ability to handle complex editing tasks easily surpasses the built-in options. The downside is that many of them come at a cost and require initial setup and learning.
Preparing your screen for recording
Before hitting the record button, spend a few minutes getting your screen ready. This preparation ensures your video appears clean and professional.
- Close any unrelated applications or browser tabs to avoid distractions and notifications.
- Clean up your desktop by removing icons or files that aren’t relevant to the recording.
- Adjust the resolution if necessary to make sure that text and graphics are clear.
- Prepare any scripts or notes you might need to refer to during the recording.
- Do a quick test recording to ensure everything looks and sounds the way you want.
Essential tips for first-time Mac screen recorders
If you’re new to screen recording on a Mac, setting it up properly can make a huge difference. Here are a few tips to ensure you get the most out of your recording sessions:
First, choose the right screen recording software. Look for applications that are easy to use and match your tech-savvy level.
Consider using macOS’s built-in tools, like QuickTime Player, for simple tasks or exploring specialized software for more complex requirements.
Next, configure your settings before you start. Decide on the screen area to capture, whether it’s the full screen, a single window, or a custom section.
Also, check your resolution settings to ensure your video quality meets your needs without unnecessarily large file sizes.
Lastly, organize your desktop. Close irrelevant applications and clear your workspace of any sensitive information visible on the screen.
This protects your privacy and creates a cleaner, more professional-looking video.
How to ensure audio clarity in recordings
Good audio is critical for effective screen recordings, especially if you’re creating tutorials or presenting information. To ensure your Mac captures clear audio:
Start by selecting a quiet environment. Background noise can be very distracting and can often degrade the quality of your recording.
Using a good-quality microphone instead of your Mac’s built-in microphone can also significantly improve audio clarity.
If you need to capture both internal and external audio, you may consider using additional software to route your system’s audio correctly.
The importance of trial runs before final recording
Before finalizing your screen recording, conducting trial runs is crucial to ensure everything works smoothly. Here’s why:
Trial runs help you locate any snafus in your video and audio settings and give you a chance to correct them. For example, you may find that your microphone levels are too low or that there’s lag in video capture.
Additionally, a trial allows you to practice your presentation. If you’re explaining something as you record, running through your script a few times can help make your delivery smoother and more confident.
It will also allow you to time your presentation, ensuring that you can cover everything you intend within a desired timeframe.
Remember, your final video is often as good as your preparation. Taking these steps seriously enhances the quality of your output, making it more useful and engaging for your audience.
Frequently asked questions about Mac screen recording
Can I record my screen on a Mac with external audio?
Yes, you can record your screen on a Mac, along with external audio. This is particularly useful for creating tutorials, webinars, or recording online meetings with clarity. To do this:
- Connect your external microphone or audio device to your Mac.
- Open your preferred screen recording software.
- In the recording settings, select the external microphone or audio device as your audio input source.
- Choose the area of your screen you wish to record and make sure the audio settings are correctly configured to capture the sound from the external source.
- Start recording your screen along with the external audio.
This setup is perfect for professionals looking to produce high-quality video content with clear audio narration.
What are the shortcut keys for screen recording on Mac?
MacOS offers built-in shortcuts for screen recording that make the process quick and easy:
- Press
Command + Shift + 5to open the screen capture interface. - Click the
Optionsbutton to choose whether you want to capture the entire screen, a selected window, or a selected portion of the screen. - Choose
Record Entire ScreenorRecord Selected Portionto begin recording. Those are two buttons with a small dot on their icon. - To stop recording, click the
Stopbutton in the menu bar or pressCommand + Control + Esc.
This functionality is great for quick captures, but if you need more advanced features, such as scheduling recordings or editing tools, third-party software might be required.
How do I save and share my Mac screen recordings effectively?
Once you have finished recording your Mac screen, it’s important to save and share your files efficiently:
- Immediately after recording, save your video file to a secure location on your Mac. Choose a format that suits your needs; MP4 is widely used for its balance of quality and file size.
- Edit the video, if necessary, to enhance the quality or trim parts that are not needed.
- For sharing, consider the platform where the video will be viewed. Upload to video hosting sites like YouTube or Vimeo for easy access, or use cloud storage services like Google Drive or Dropbox for direct sharing.
- If the video is for professional use, ensure privacy settings are configured to control who can view your screen recording.
Managing your file size and format effectively will ensure your screen recordings are easily accessible and viewable by your intended audience.